Help centre

Place user guide

Using and setting up Umovi

Web panel · Umovi Calendar · troubleshooting
Version
2026.09
Updated
7 September 2026
Language
English (UK)

How to use this guide

Web panel chapters cover setup and full place management. Umovi Calendar chapters cover daily work on iPhone or iPad. The interfaces are described separately, with links to equivalent tasks on the other platform.

Web panel

Place, team, services, billing, data and integration setup.

Umovi Calendar

Calendars, bookings, clients and availability during daily work.

Before you start

Contents

1. Getting started
  1. 1.1 Create and set up your place
  2. 1.2 Web panel or mobile app?
  3. 1.3 Signing in
  4. 1.4 Places, roles and permissions
2. Web panel — daily work
  1. 2.1 Web panel overview
  2. 2.2 Statistics and results
  3. 2.3 Booking centre
  4. 2.4 Create a booking
  5. 2.5 Booking statuses
  6. 2.6 Edits, messages and history
  7. 2.7 Clients and communication
3. Web panel — setup
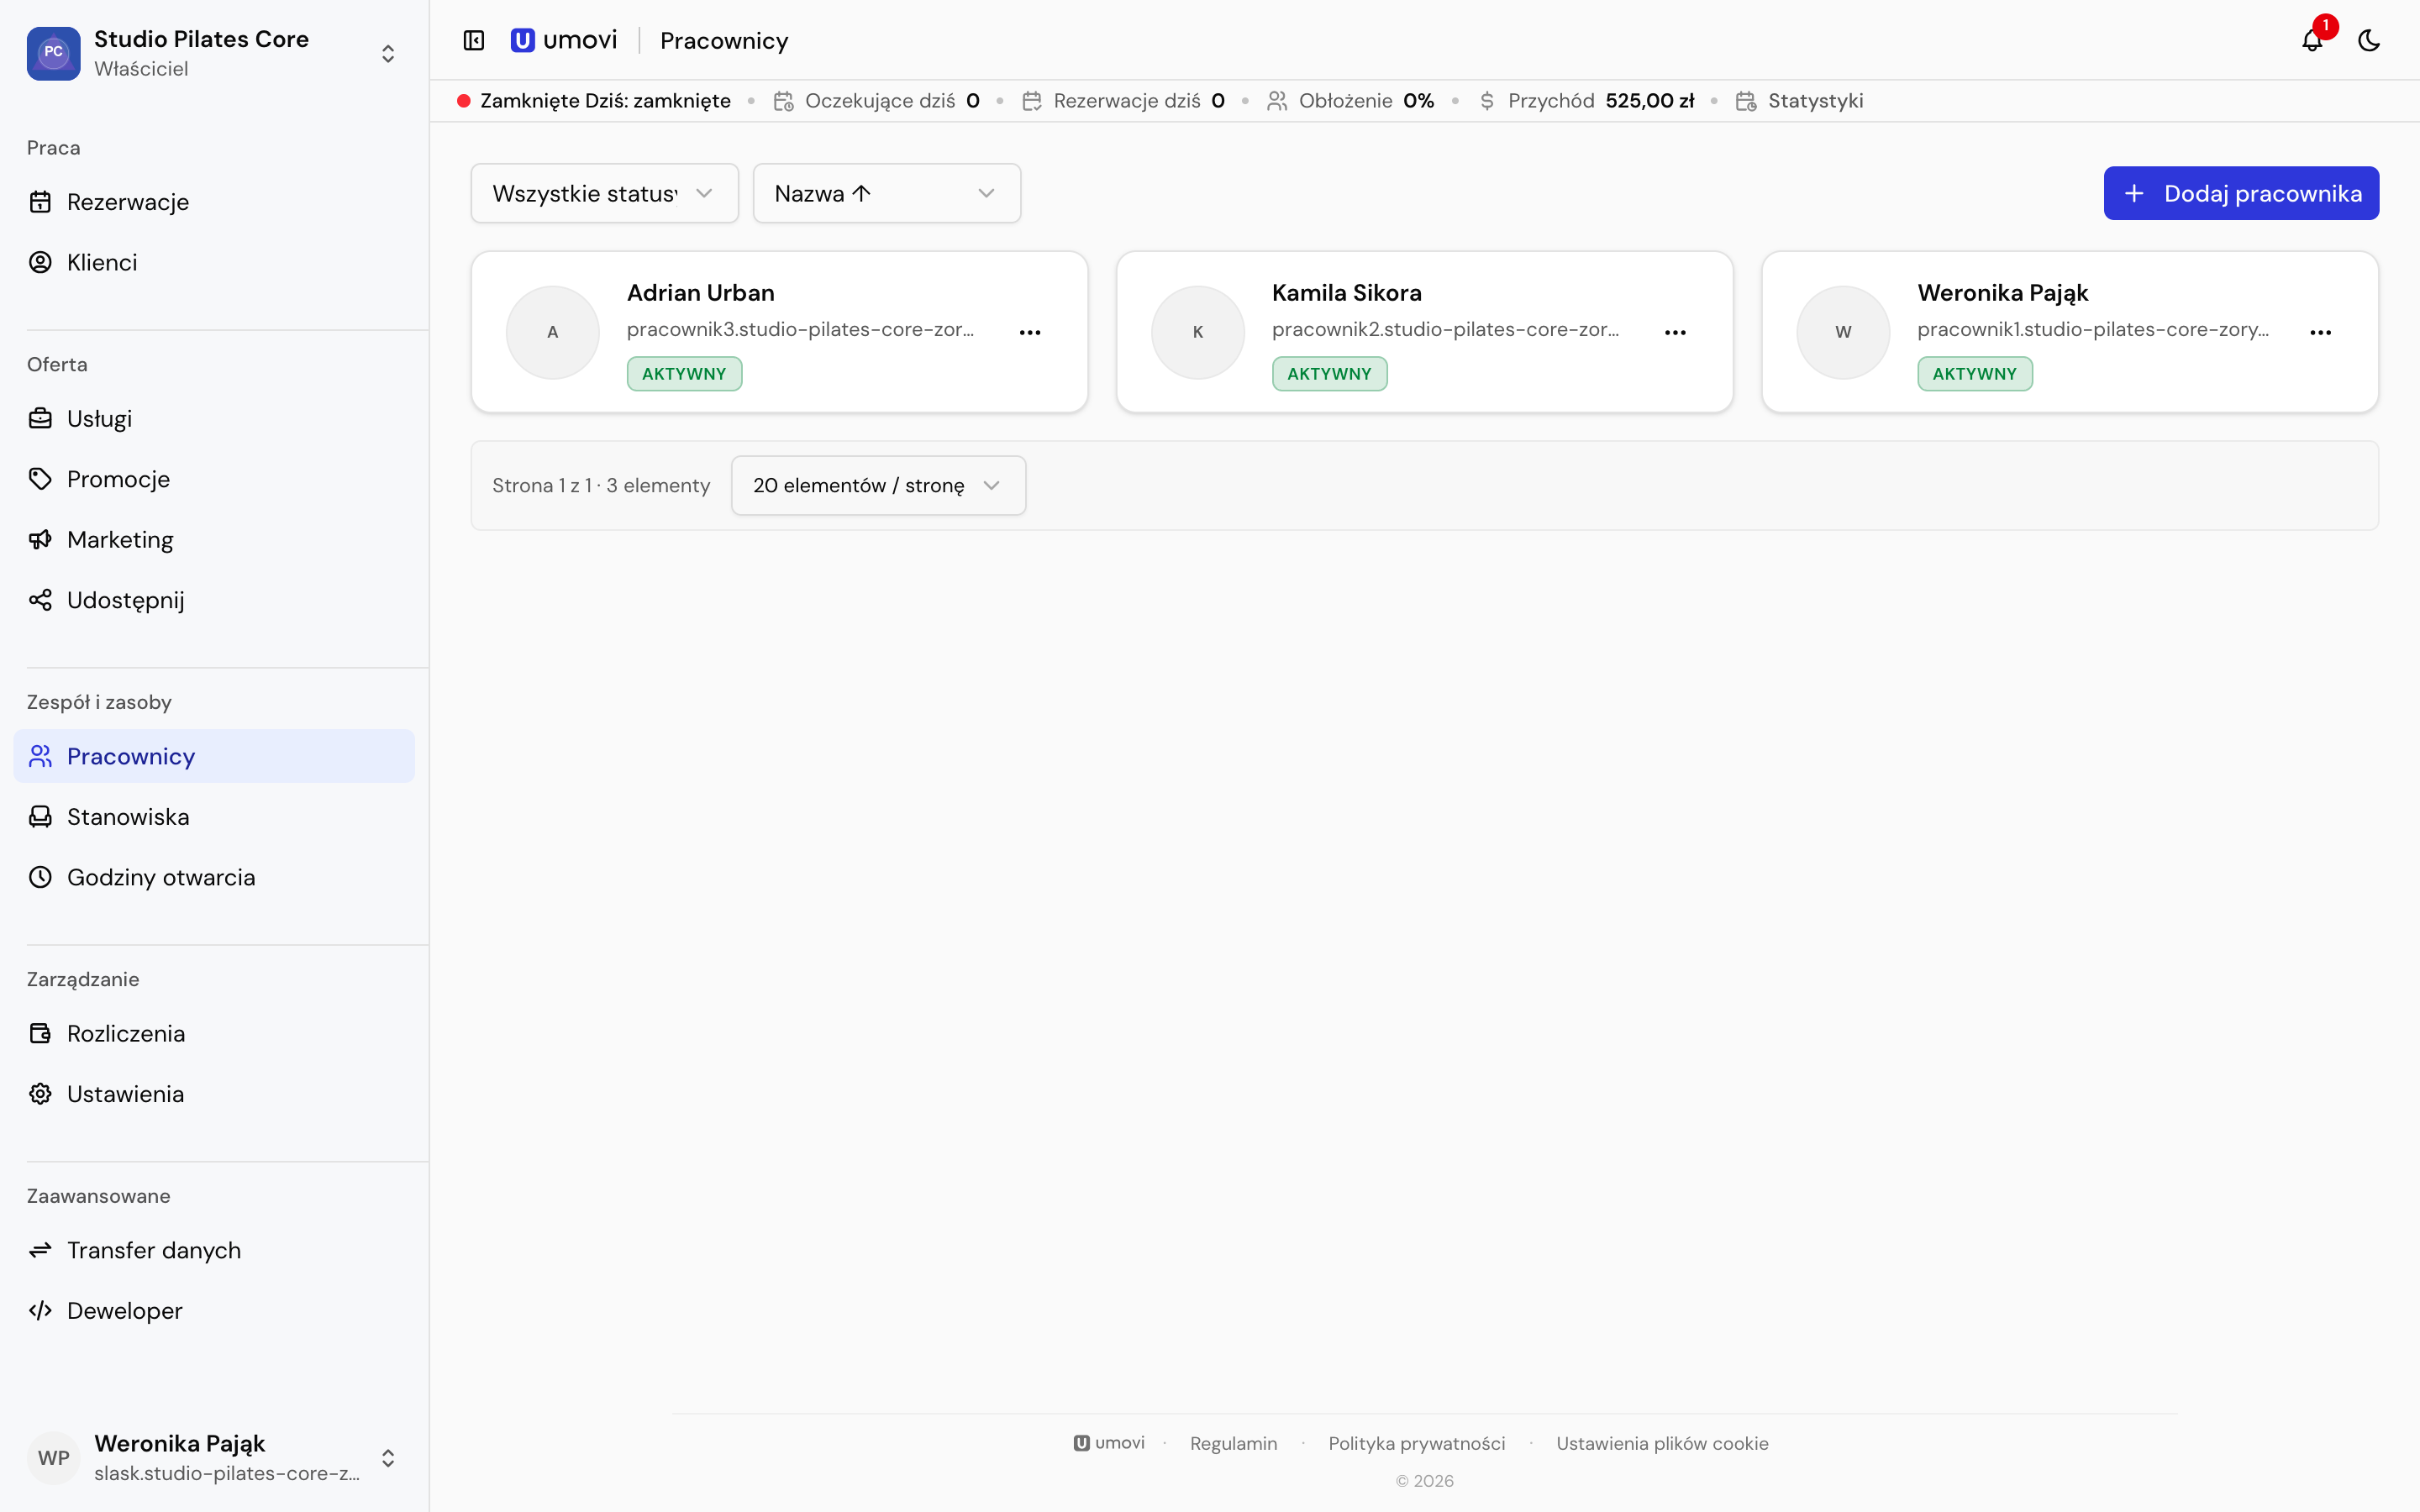
  1. 3.1 Employees and assignments
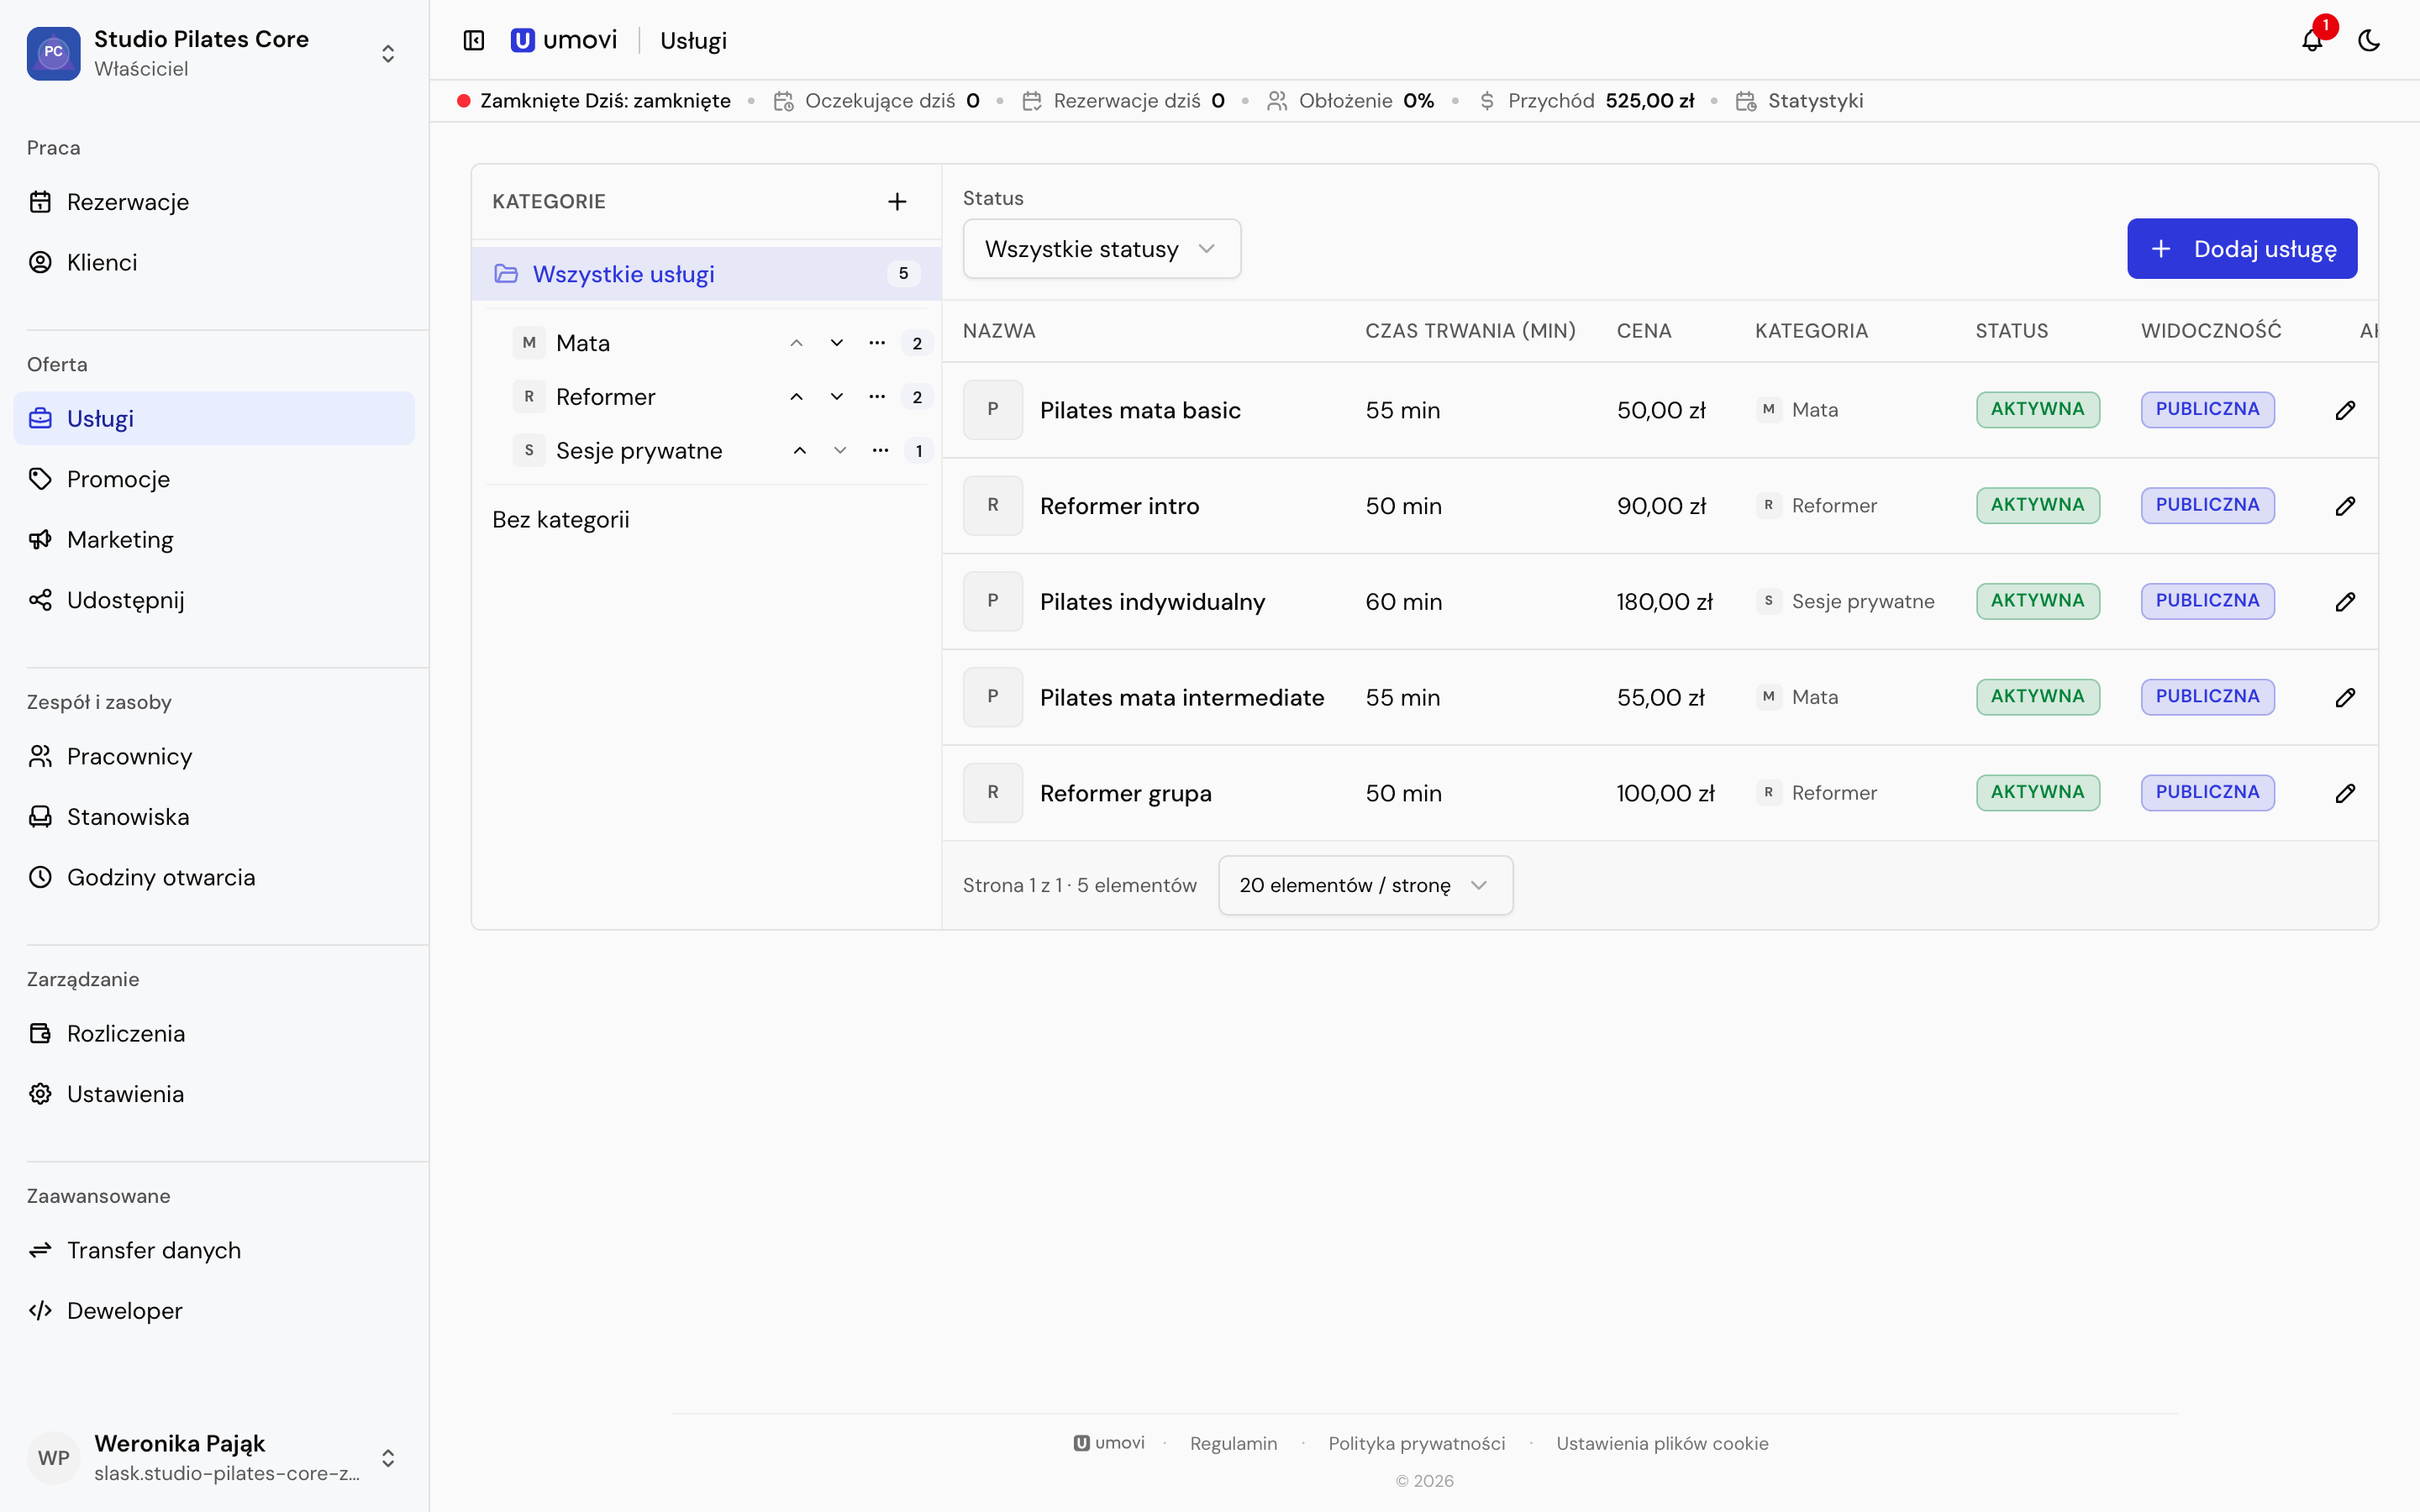
  2. 3.2 Services and categories
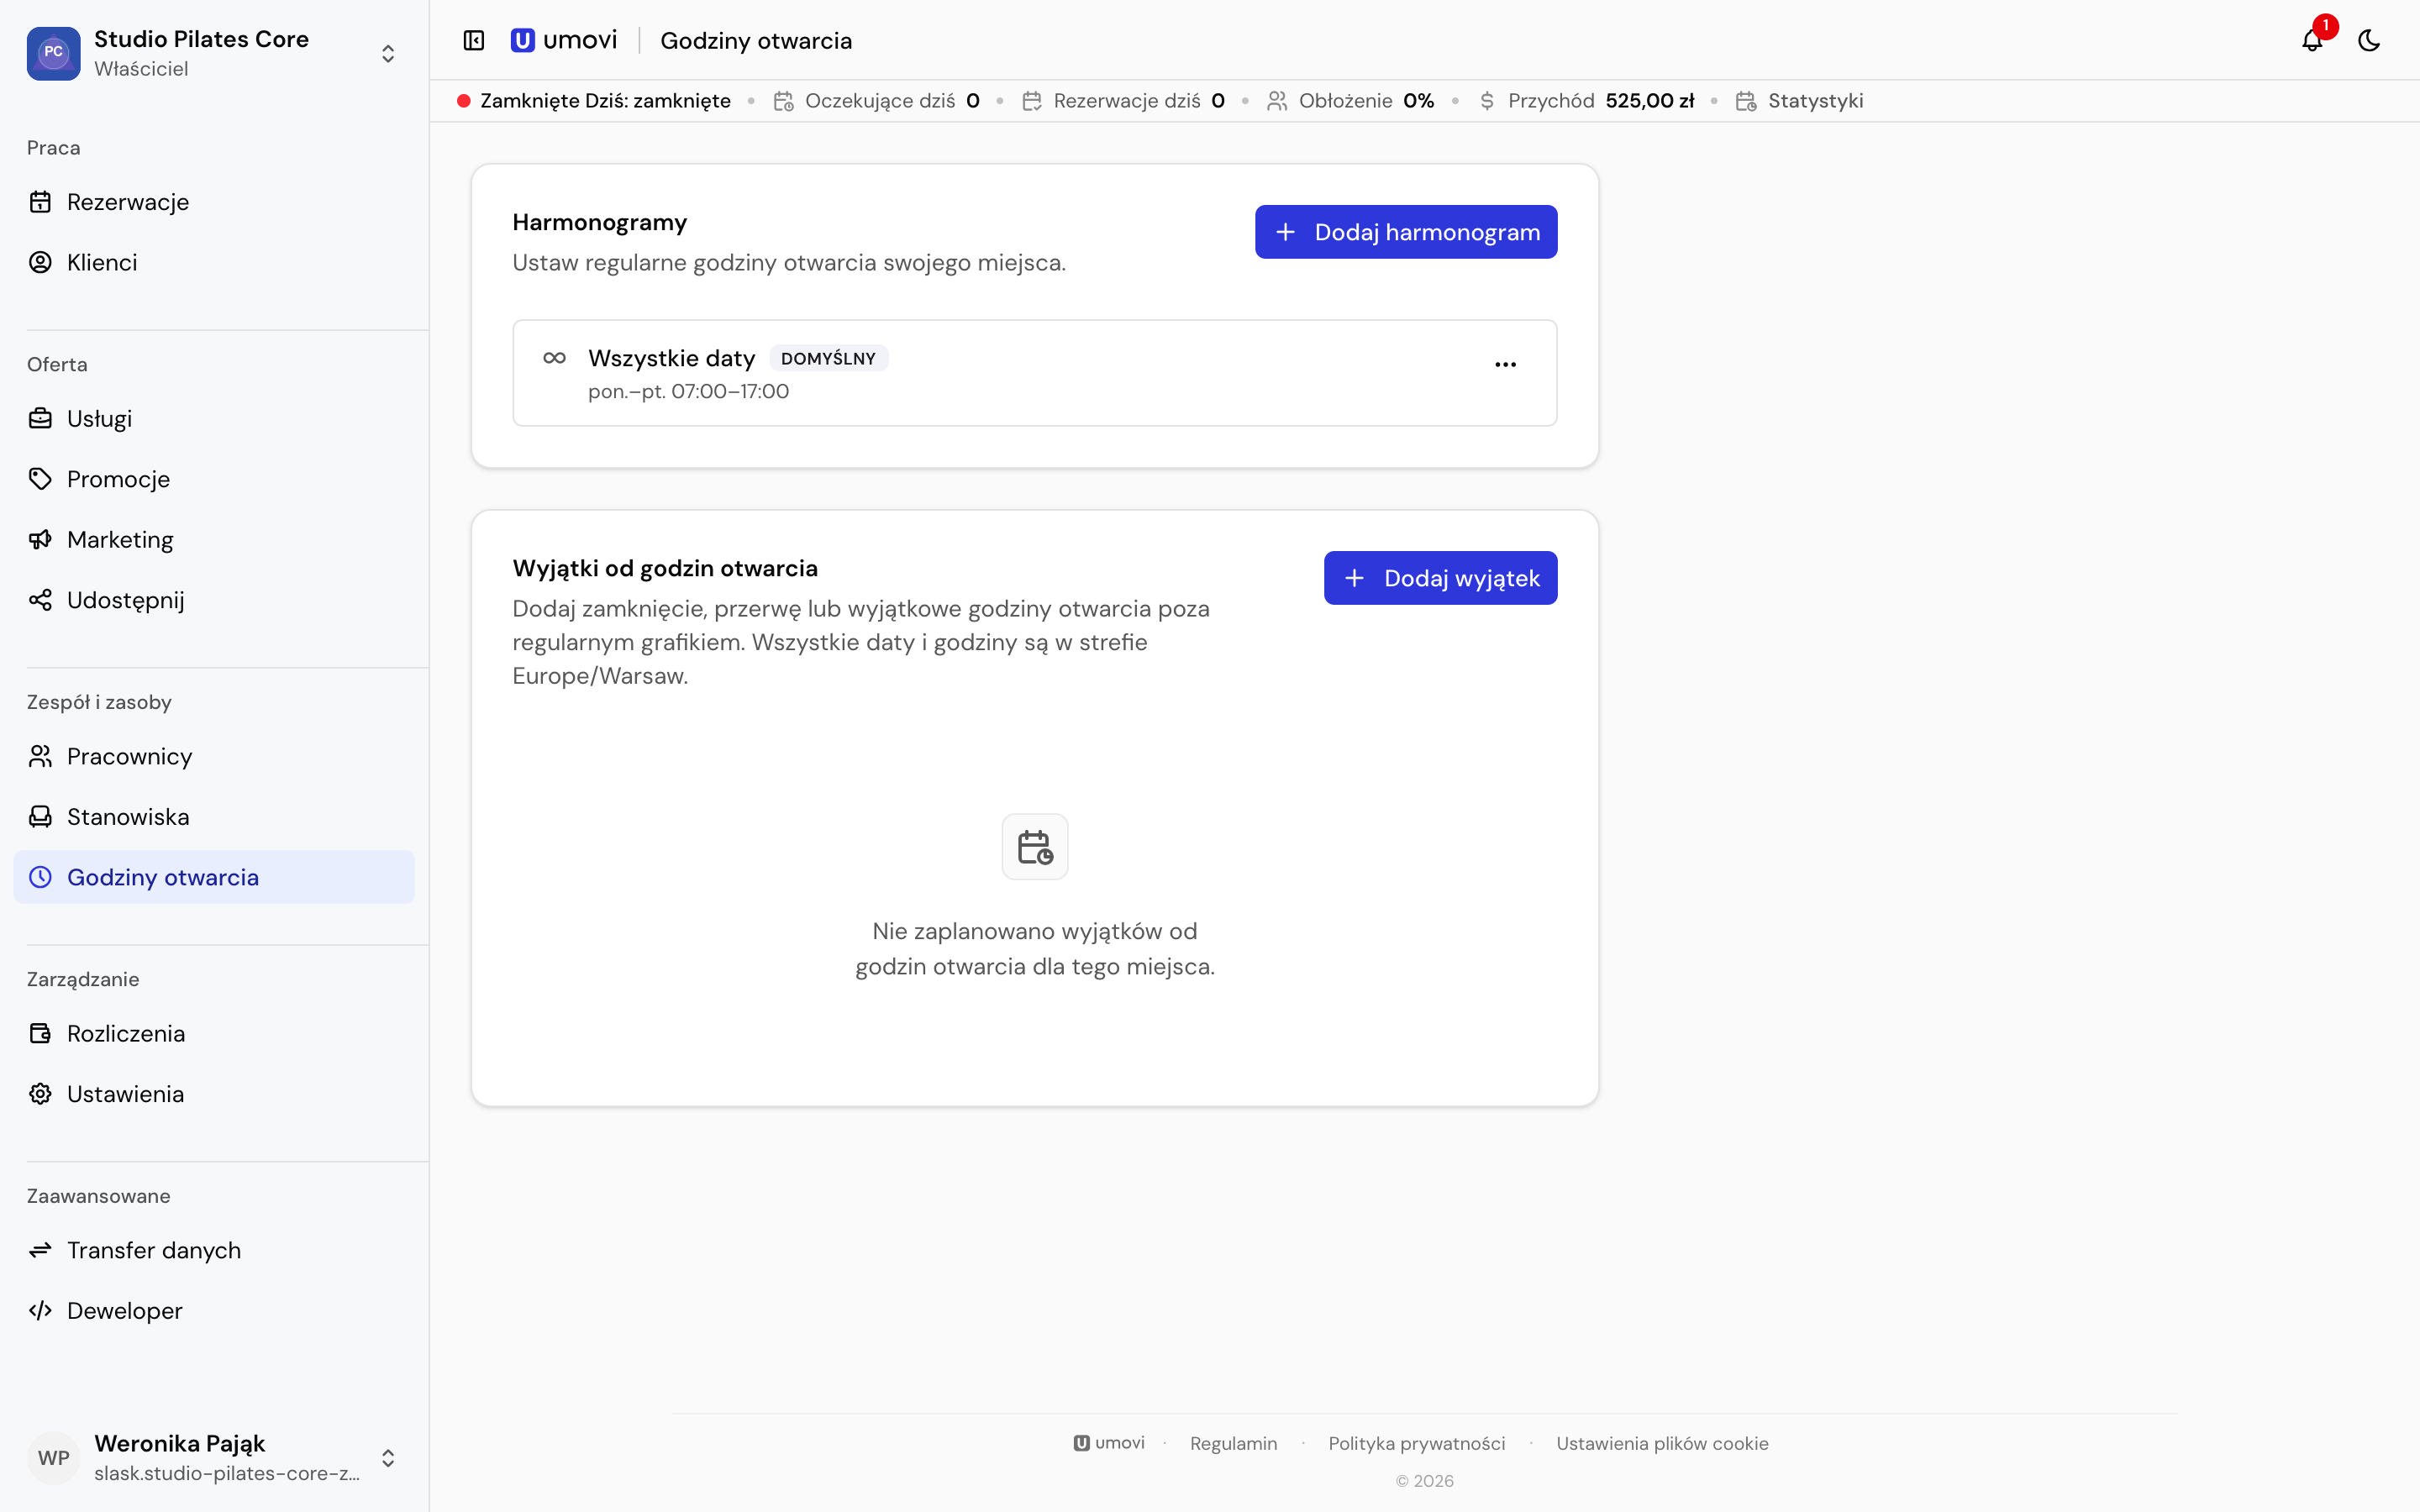
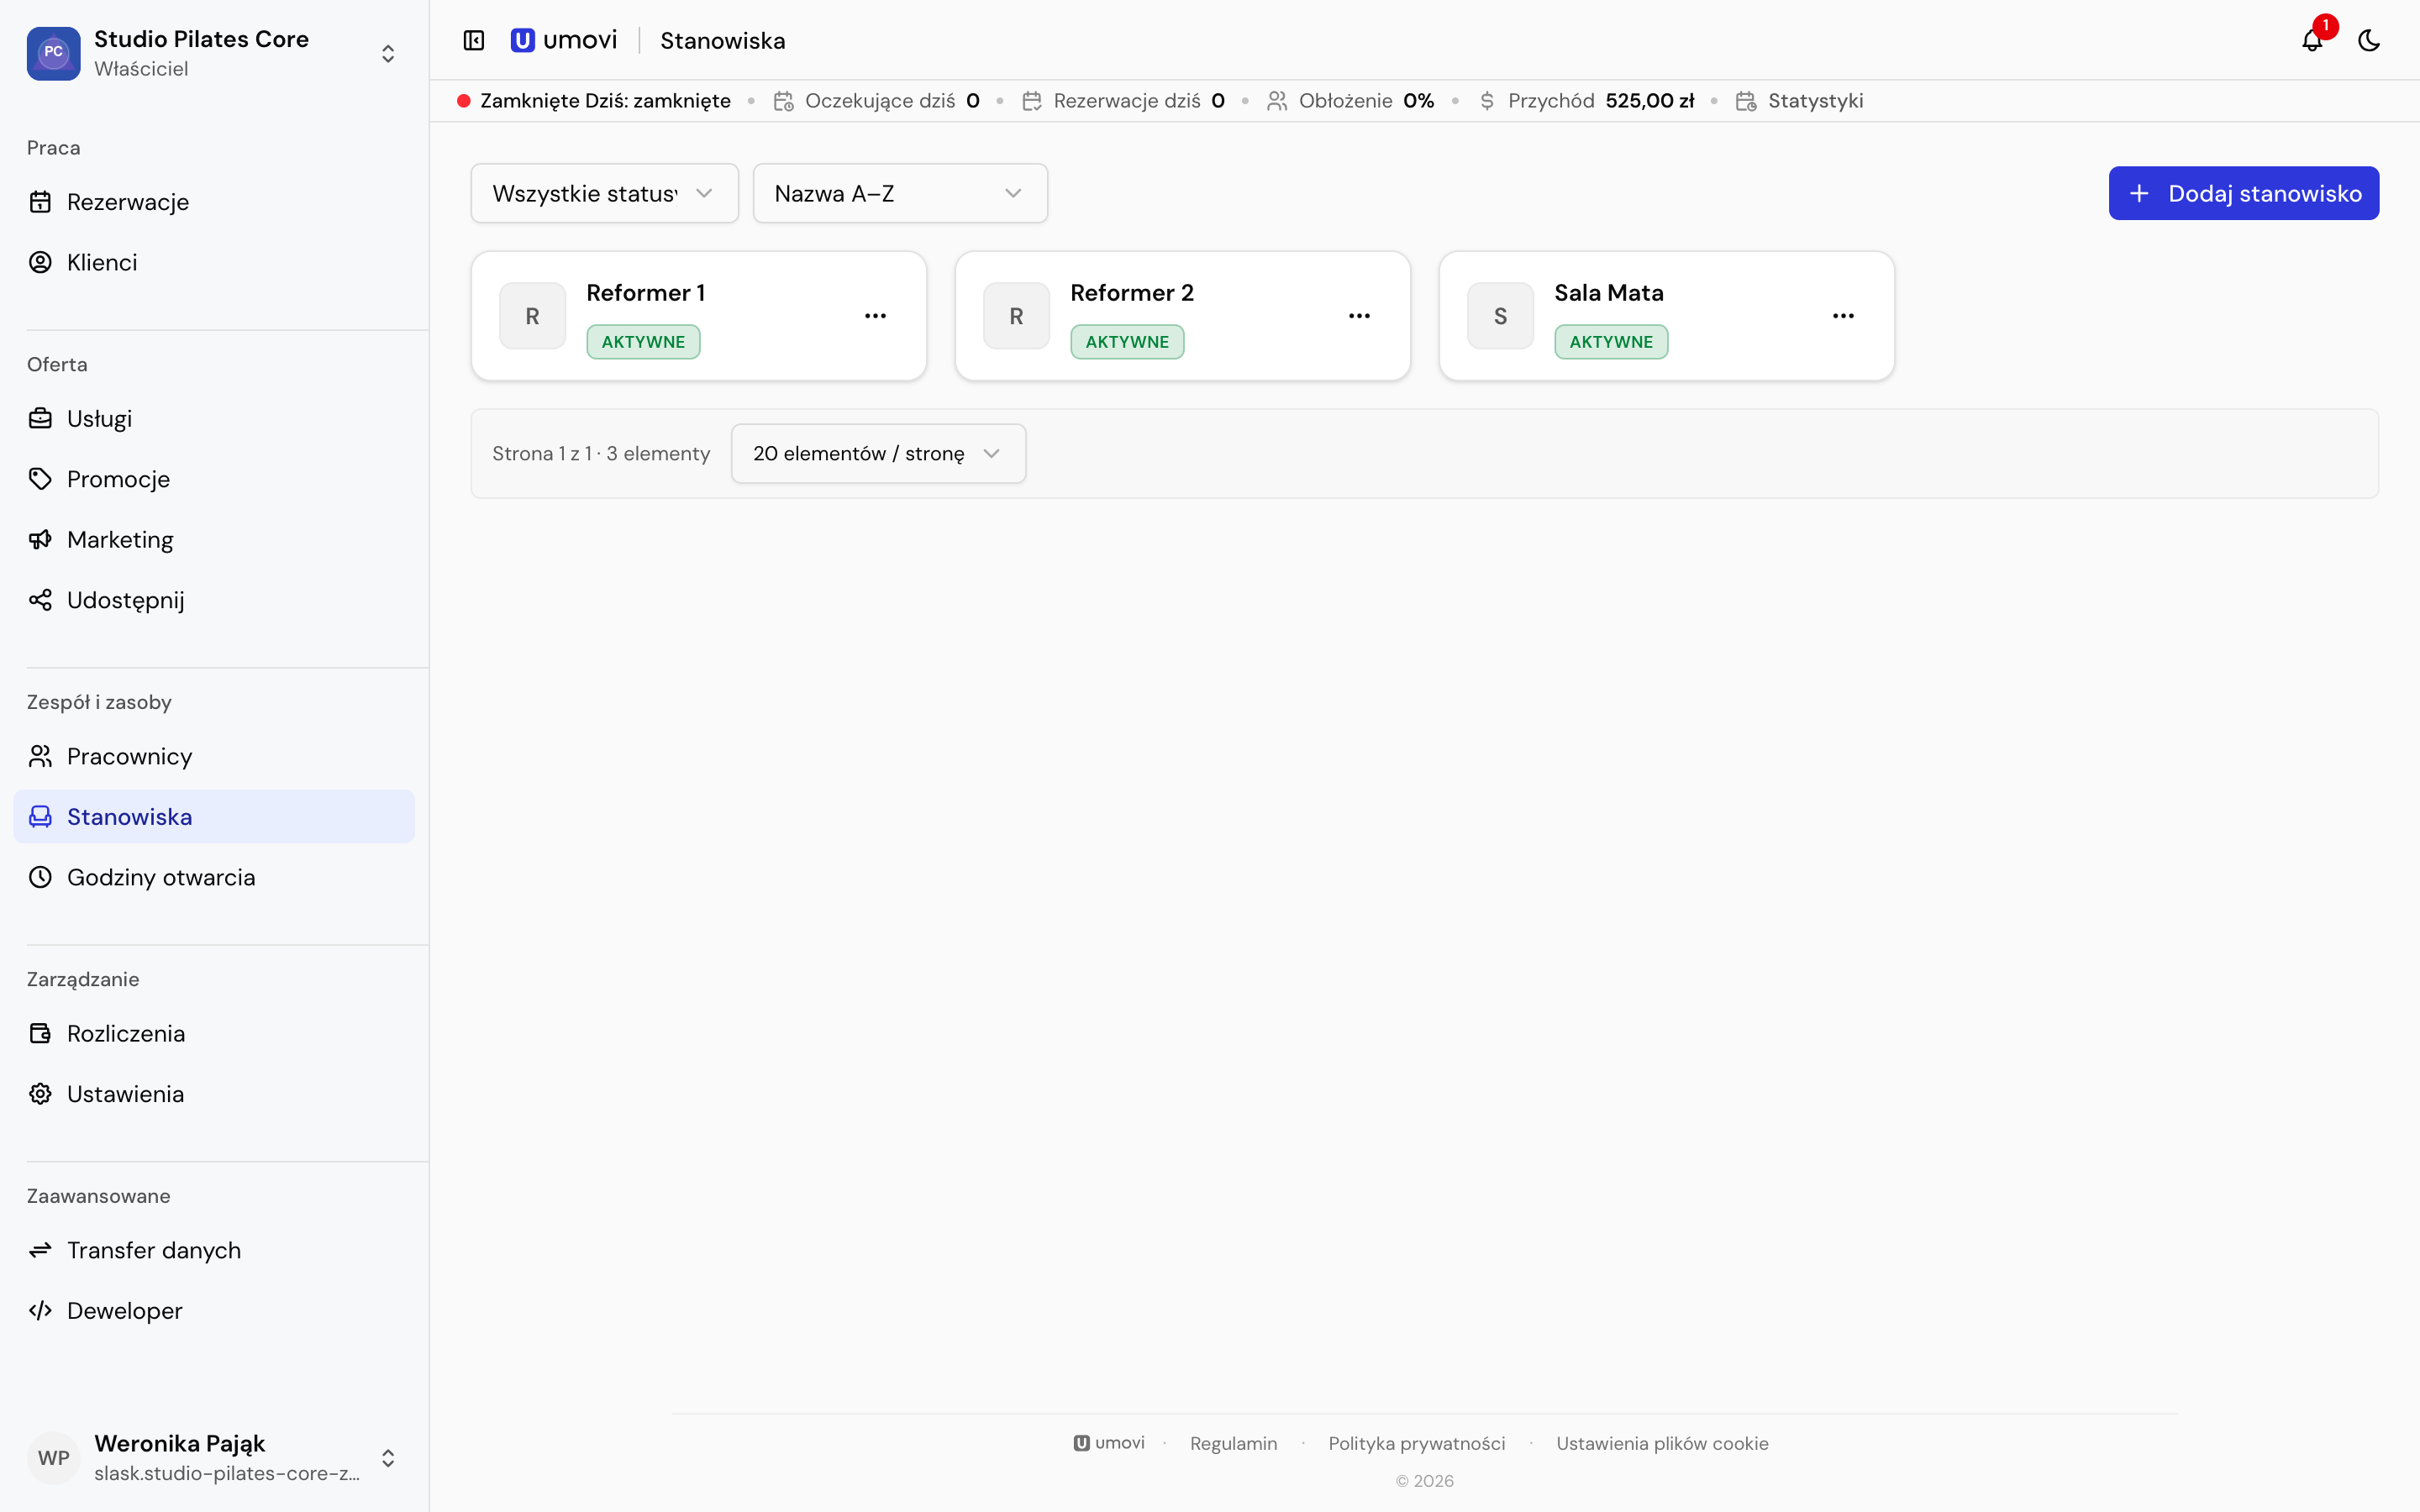
  3. 3.3 Opening hours and workstations
  4. 3.4 Place settings
4. Web panel — growth and billing
  1. 4.1 Promotions and marketing
  2. 4.2 Share your place
  3. 4.3 Plans, payments and invoices
  4. 4.4 Data transfer
  5. 4.5 Developer tools and integrations
5. Mobile app — calendar
  1. 5.1 App overview
  2. 5.2 Daily and team calendars
  3. 5.3 Availability exceptions
  4. 5.4 Booking list and search
  5. 5.5 Create a booking
  6. 5.6 Edit bookings and statuses
  7. 5.7 Messages and history
6. Mobile app — clients and account
  1. 6.1 Client list and profiles
  2. 6.2 Client records and attachments
  3. 6.3 Links and QR codes
  4. 6.4 Notifications
  5. 6.5 Account, language and 2FA
7. Troubleshooting
  1. 7.1 Contact and support
  2. 7.2 Sign-in and sessions
  3. 7.3 Missing features or data
  4. 7.4 Booking time conflicts
  5. 7.5 Connection and notifications

Chapter 1

Getting started

1.1

Create and set up your place

Prepare your place, activate bookings and check the complete client journey.

Web panel

Complete the initial setup in the web panel. Use Umovi Calendar afterwards for day-to-day bookings, calendars and clients.

1. Create a place

PathPlaces → Add new place

Verify your account email first. Enter the public name, unique page address (slug), time zone, currency and default communication language. Add contact details, a description and the map location. You can edit these later in settings.

Activate your subscription

The panel shows setup guidance after you create a place. Select Activate place, complete the company details and choose a plan and payment method. A subscription is required to activate client bookings. You can prepare services, opening hours and the team beforehand using Continue to panel.

See Billing for charges, limits and renewal.

2. Complete the place profile

PathSettings → Place details

Check the name, contacts, address, map location and default language. Set booking rules and notification channels. Clients should be able to recognise the business and the correct location.

See Place settings.

3. Set hours and resources

PathOpening hours → Add schedule

Add weekly opening hours. Use a date range for seasonal changes. Create workstations required by services, such as a room, chair or device. Add a resource only when its exclusive availability matters.

See Opening hours and workstations.

4. Add services

PathServices → Add service

Prepare categories, then services. Check each service's name, duration, buffer, price, currency, visibility and status. Keep internal services hidden from clients; the team can still use them for manual bookings. Assign a workstation if required.

See Services and categories.

5. Add your team and assignments

PathEmployees → Add employee

Create each person's profile, set their role and active status, then assign the services they perform. An employee profile defines their work at the place; a linked user account lets them sign in. Grant only the access their role needs.

See Employees and assignments and Roles and permissions.

6. Check availability

Check place hours, employee schedules, availability exceptions and required workstations, in that order. Use an exception for leave, training or an extra shift instead of changing the regular schedule.

7. Share bookings with clients

PathShare → choose a destination → Copy link or Download QR code

Create a link to the place, a service or a service with an employee. Open it in a private browser window and continue to time selection. Check the name, location, services, employees and free times.

8. Check you are ready

Make one test booking and confirm that:

  • the client sees the correct service, price, duration and place;
  • the time respects the employee schedule and workstation;
  • the booking appears in the booking centre and Umovi Calendar;
  • the right people receive notifications;
  • you can update the status after completion or a no-show;
  • the public link and QR code open the intended destination.
1.2

Web panel or mobile app?

Find the right platform for your task and open its guide.

The web panel and Umovi Calendar use the same places, clients and bookings. Each is designed for a different type of work, with its own instructions.

Web panel

Use the web panel for:

  • the booking centre and team calendar;
  • clients, employees, services and categories;
  • opening hours, workstations and booking rules;
  • promotions and marketing campaigns;
  • plans, payments, invoices, data transfers and integrations.

Open the web panel guide.

Umovi Calendar

Use the iPhone and iPad app for:

  • daily schedules and employee calendars;
  • creating, editing and completing bookings;
  • availability exceptions;
  • clients, client records and attachments;
  • messages, notifications, sharing links and QR codes.

Open the mobile app guide.

Features available on both platforms

Each guide uses the buttons and steps for its own interface. Where a matching feature exists, the article links to the other platform's instructions.

1.3

Signing in

Sign in with email and password, Apple or Google, and complete two-factor authentication.

Web panel

PathWeb panel → Sign in
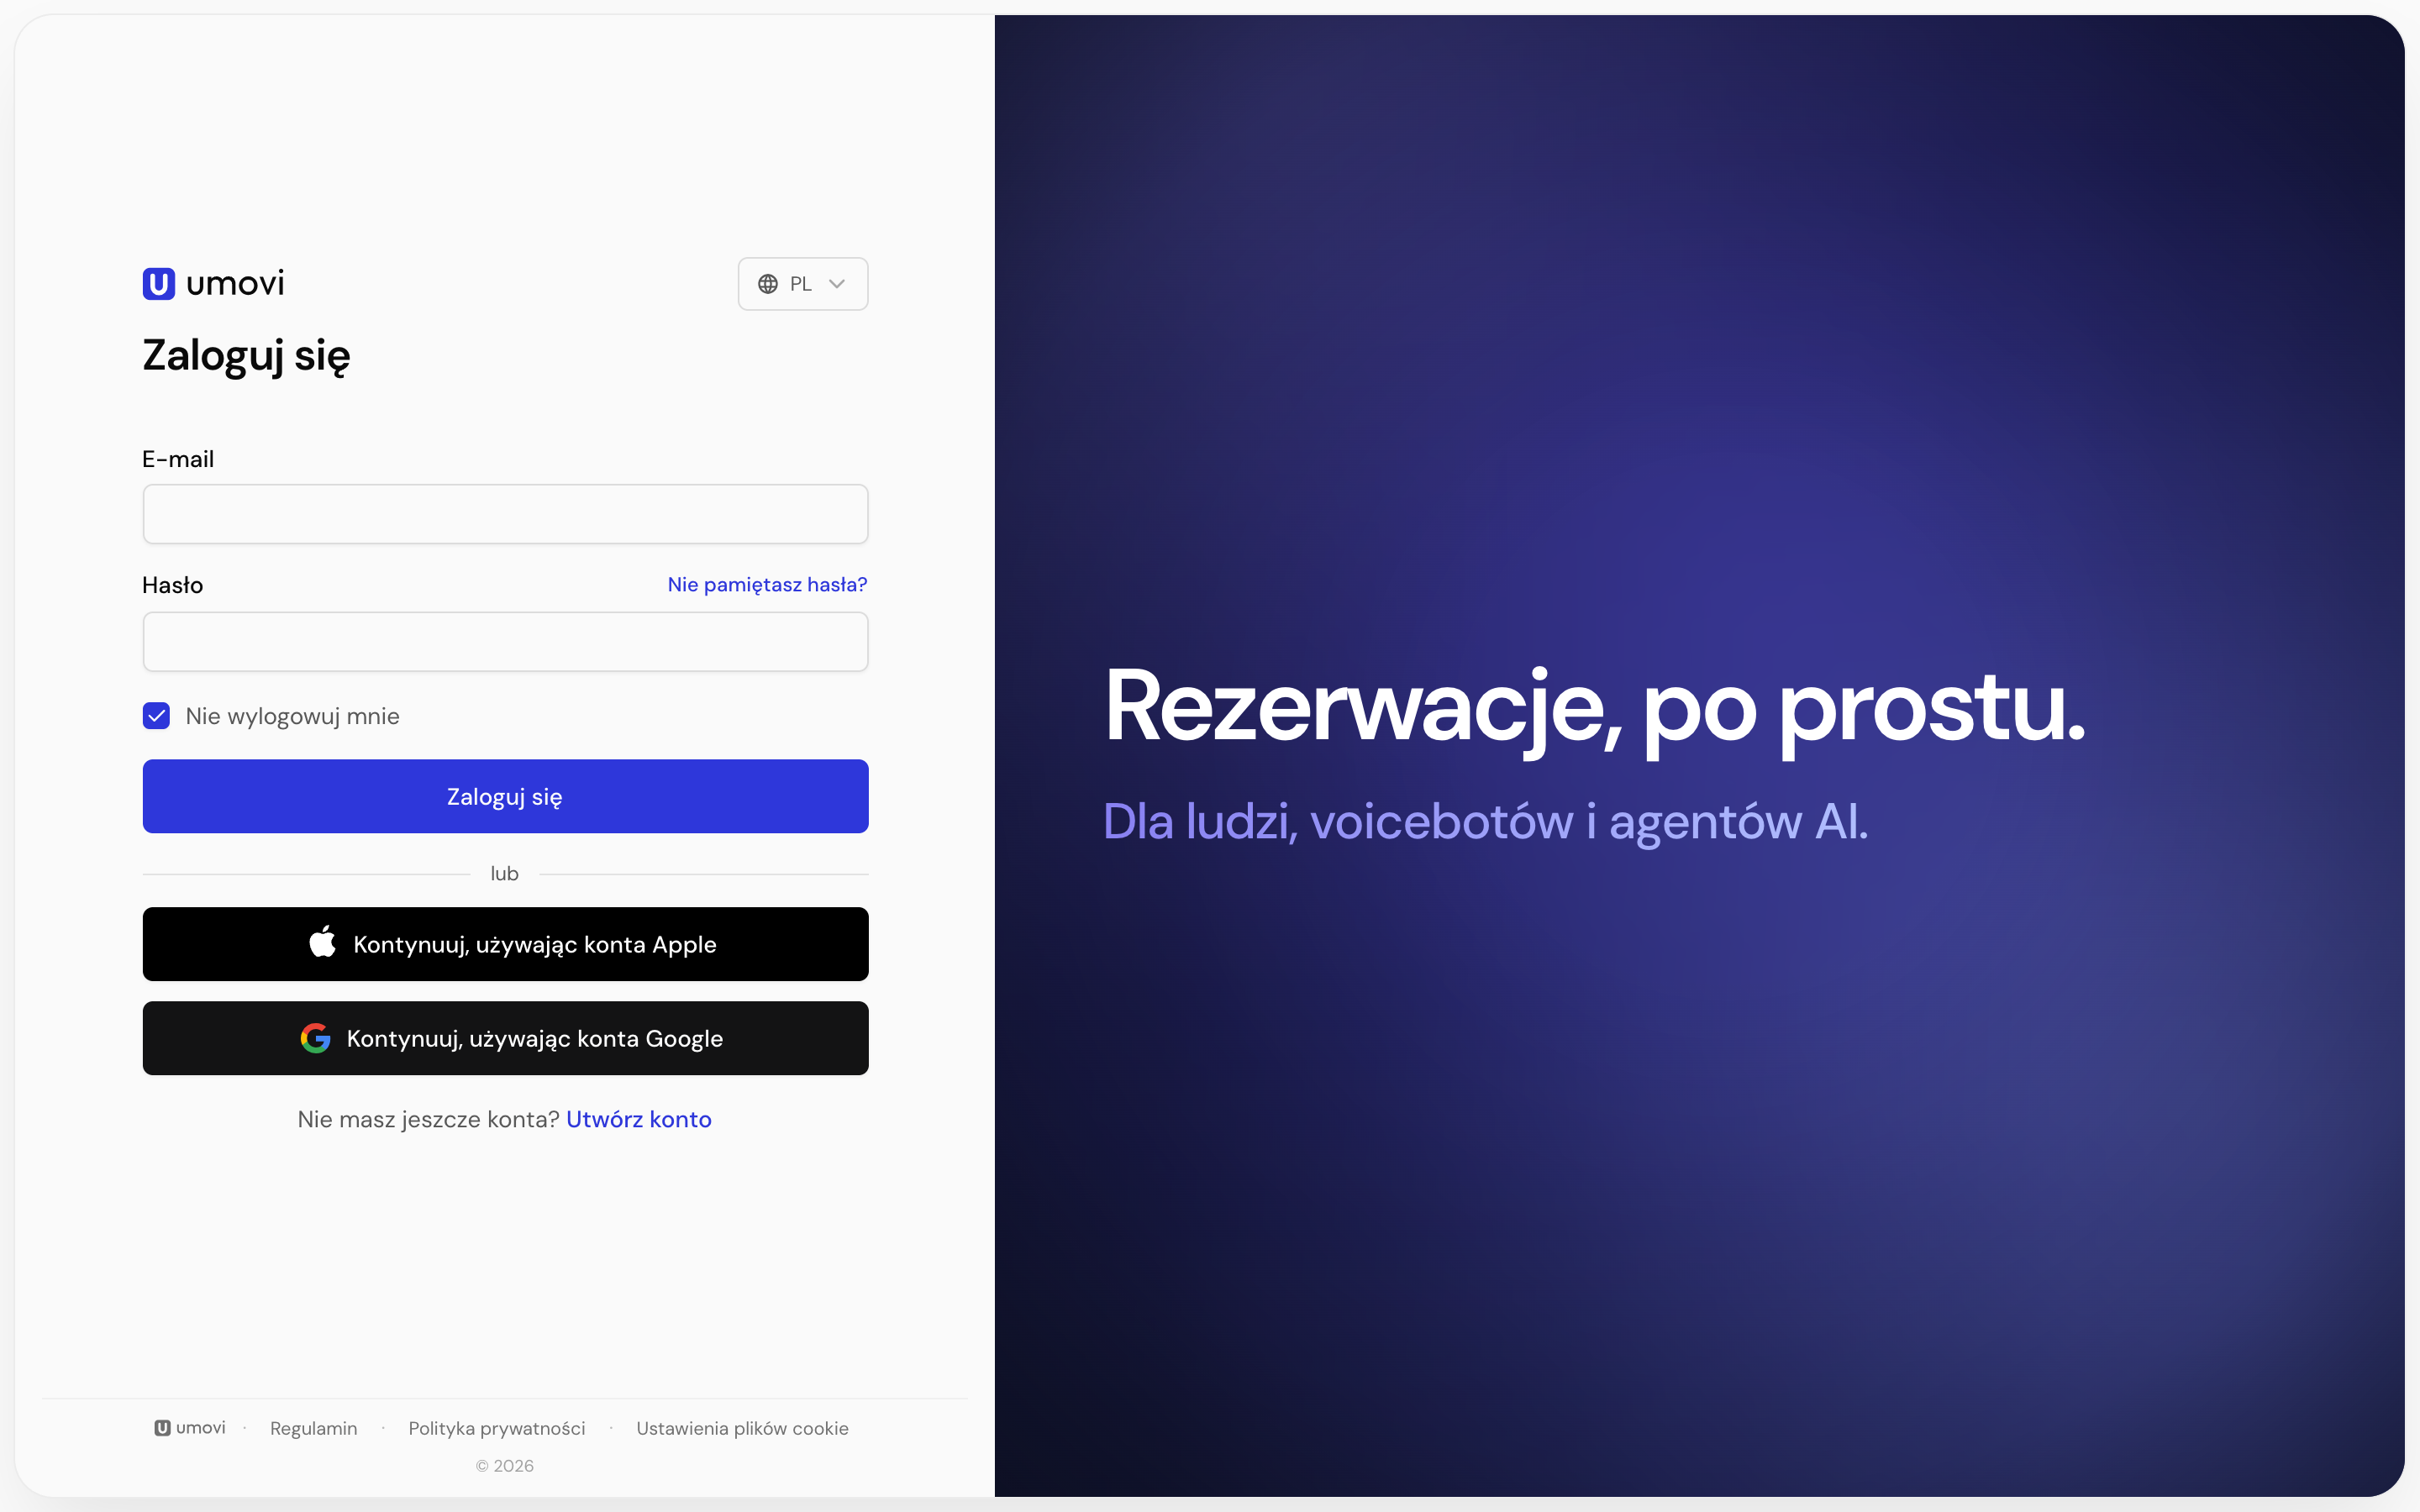
  1. Enter your Umovi account email address.
  2. Enter your password.
  3. Optionally leave Keep me signed in enabled.
  4. Select Sign in.

You can also choose Continue with Apple or Continue with Google if that method is linked to your account.

Web panel sign-in screen
Web panel — sign in with email, Apple or Google. Screenshots show the Polish interface. Button labels may vary with the app language and version.

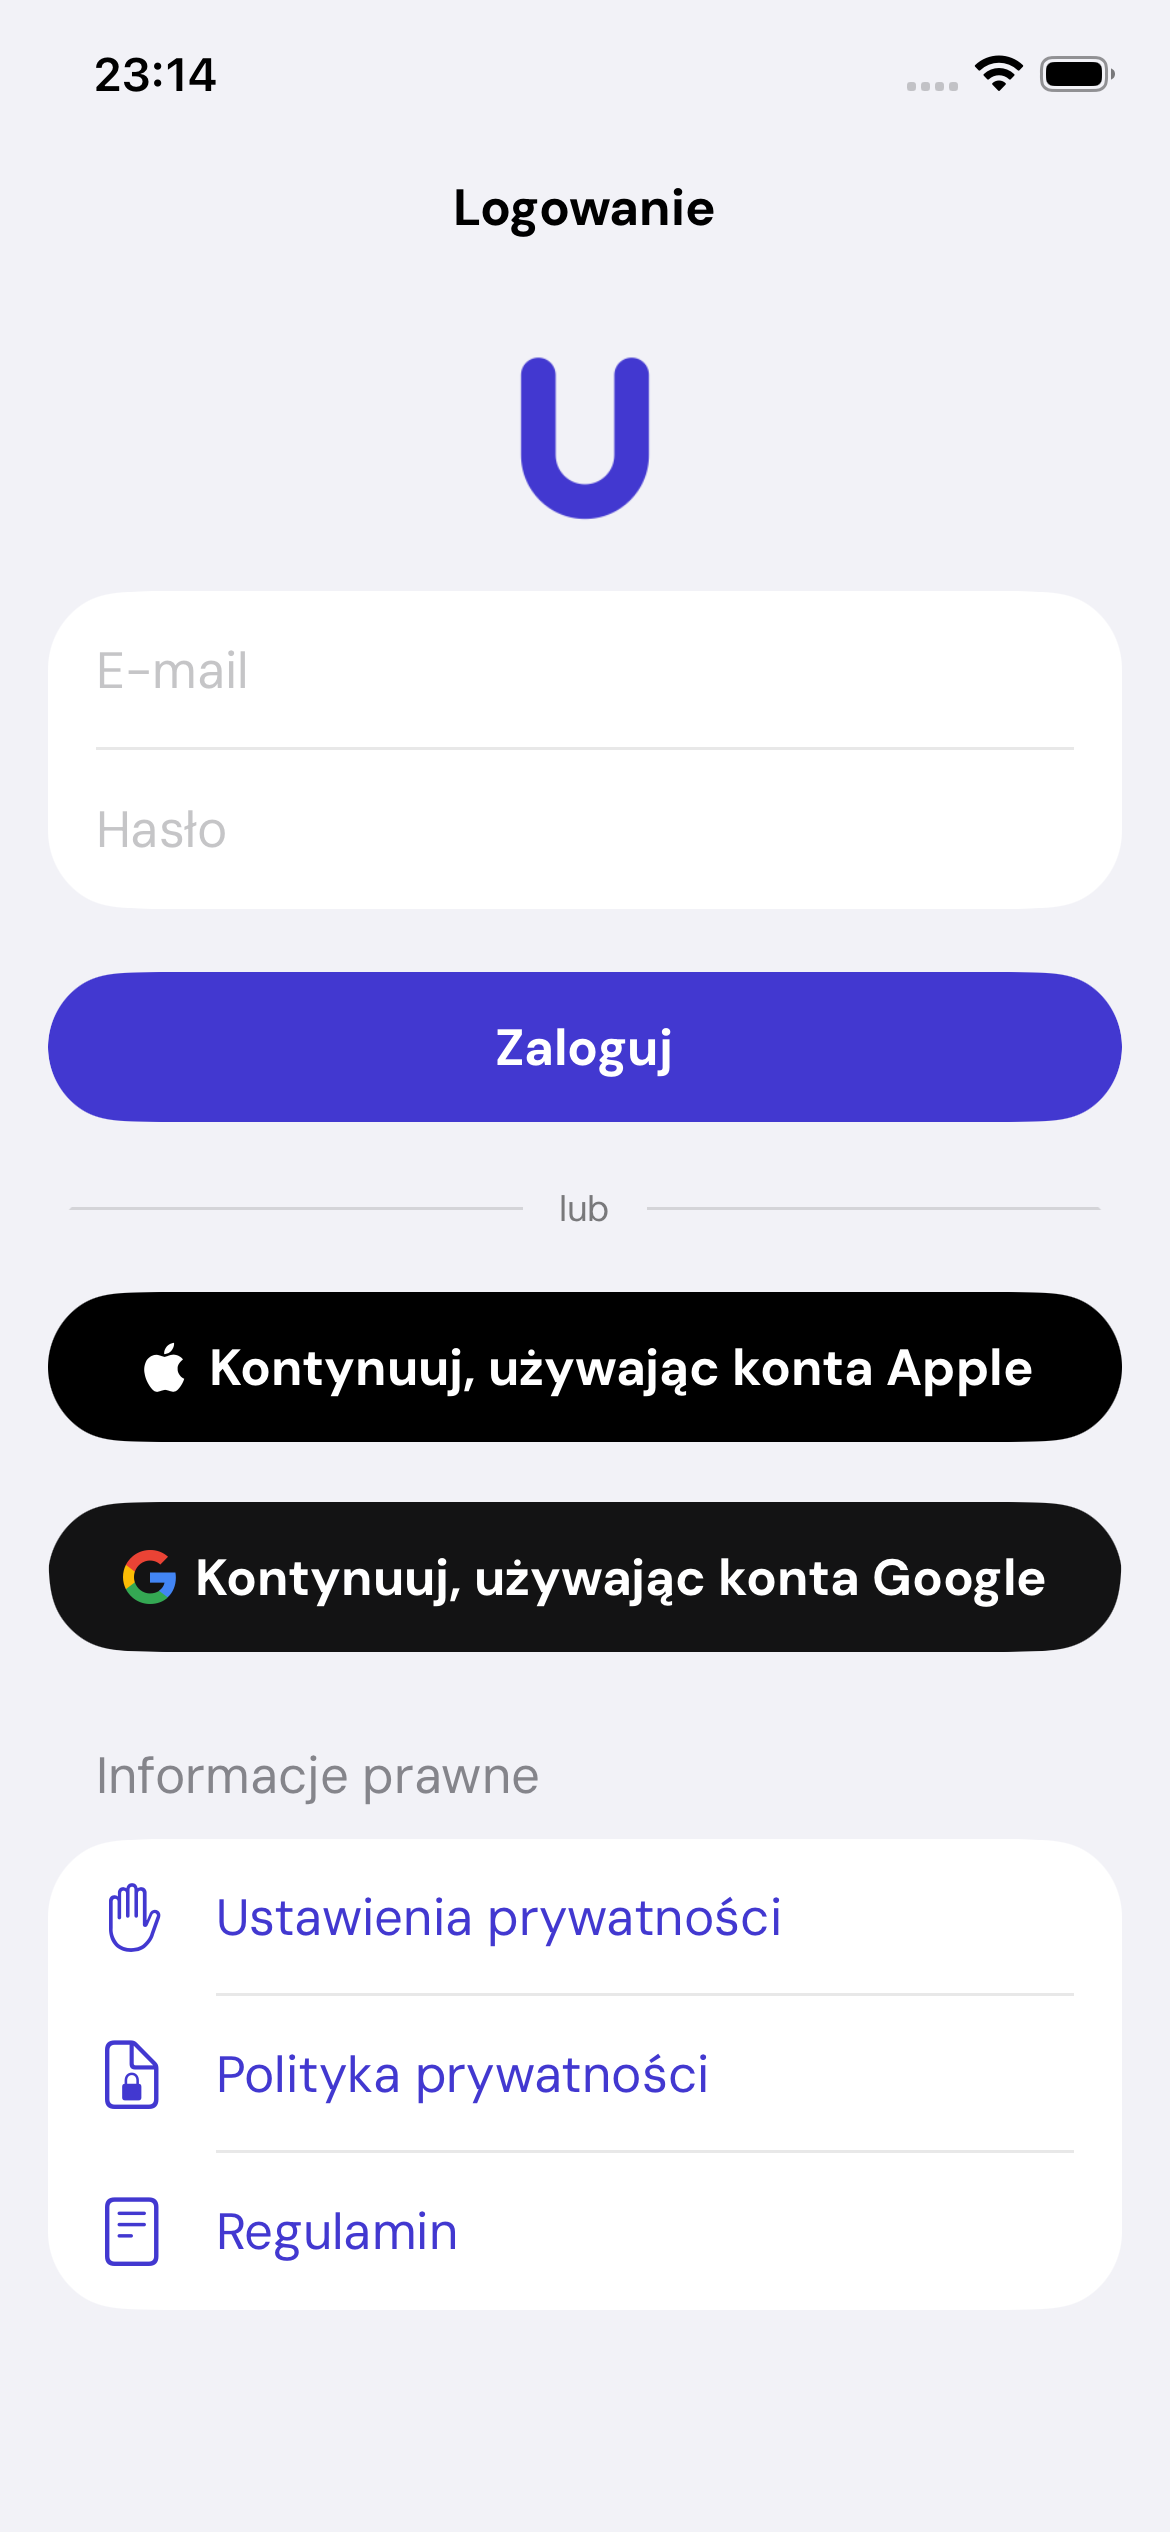
Mobile app

  1. Open Umovi Calendar.
  2. Enter your email and password, or choose Apple or Google.
  3. Select Sign in.
Umovi Calendar sign-in screen
Mobile app — sign-in options and privacy settings. Screenshots show the Polish interface. Button labels may vary with the app language and version.

Two-factor authentication

If 2FA is enabled, enter the code from your authenticator app after your password. You can switch to Recovery code. Each recovery code works only once.

1.4

Places, roles and permissions

Choose a place, understand your role and find out why some features may be hidden.

One account can access several places. After sign-in, Umovi selects the last used place or shows your available places.

Switching places

  • In the web panel, use the place selector at the top of the left sidebar.
  • In the app, tap the place logo, then Switch place.
  • Save open forms first. The app warns you about unsaved booking changes.

Roles

RoleTypical access
OwnerPlace settings, billing, integrations, data and team management.
ManagerDaily operations, clients, services and the team; some capabilities depend on assigned access and the plan.
EmployeeTheir own or assigned calendar, bookings, clients and personal availability.

Why a feature is hidden

Access can depend on your role, plan, place status and the link between your account and employee profile. See Missing features or data.

Chapter 2

Web panel — daily work

2.1

Web panel overview

Find your way around the place workspace in your browser.

PathWeb panel → choose a place

The left sidebar organises the panel into five areas.

Work

  • Bookings — list, confirmation queue, week and team day calendars.
  • Statistics — date filters, booking results, team and service comparisons.
  • Clients — profiles, bookings, communication and consent.

Services and promotion

  • Services — categories, prices, durations, visibility, employees, workstations and media.
  • Promotions — discount rules and active periods.
  • Marketing — campaigns and messaging when available in your plan.
  • Share — links and QR codes for a place, service or service with an employee.

Team and resources

  • Employees — profiles, accounts, statuses, photos, calendars and service assignments.
  • Workstations — resources needed to perform services.
  • Opening hours — weekly schedules and date ranges.

Management and advanced tools

  • Billing — plan, usage, invoice details, documents and payment methods.
  • Settings — place details, booking rules and notification channels.
  • Data transfer — imports, exports and transfer history.
  • Developer — integration clients and webhooks.
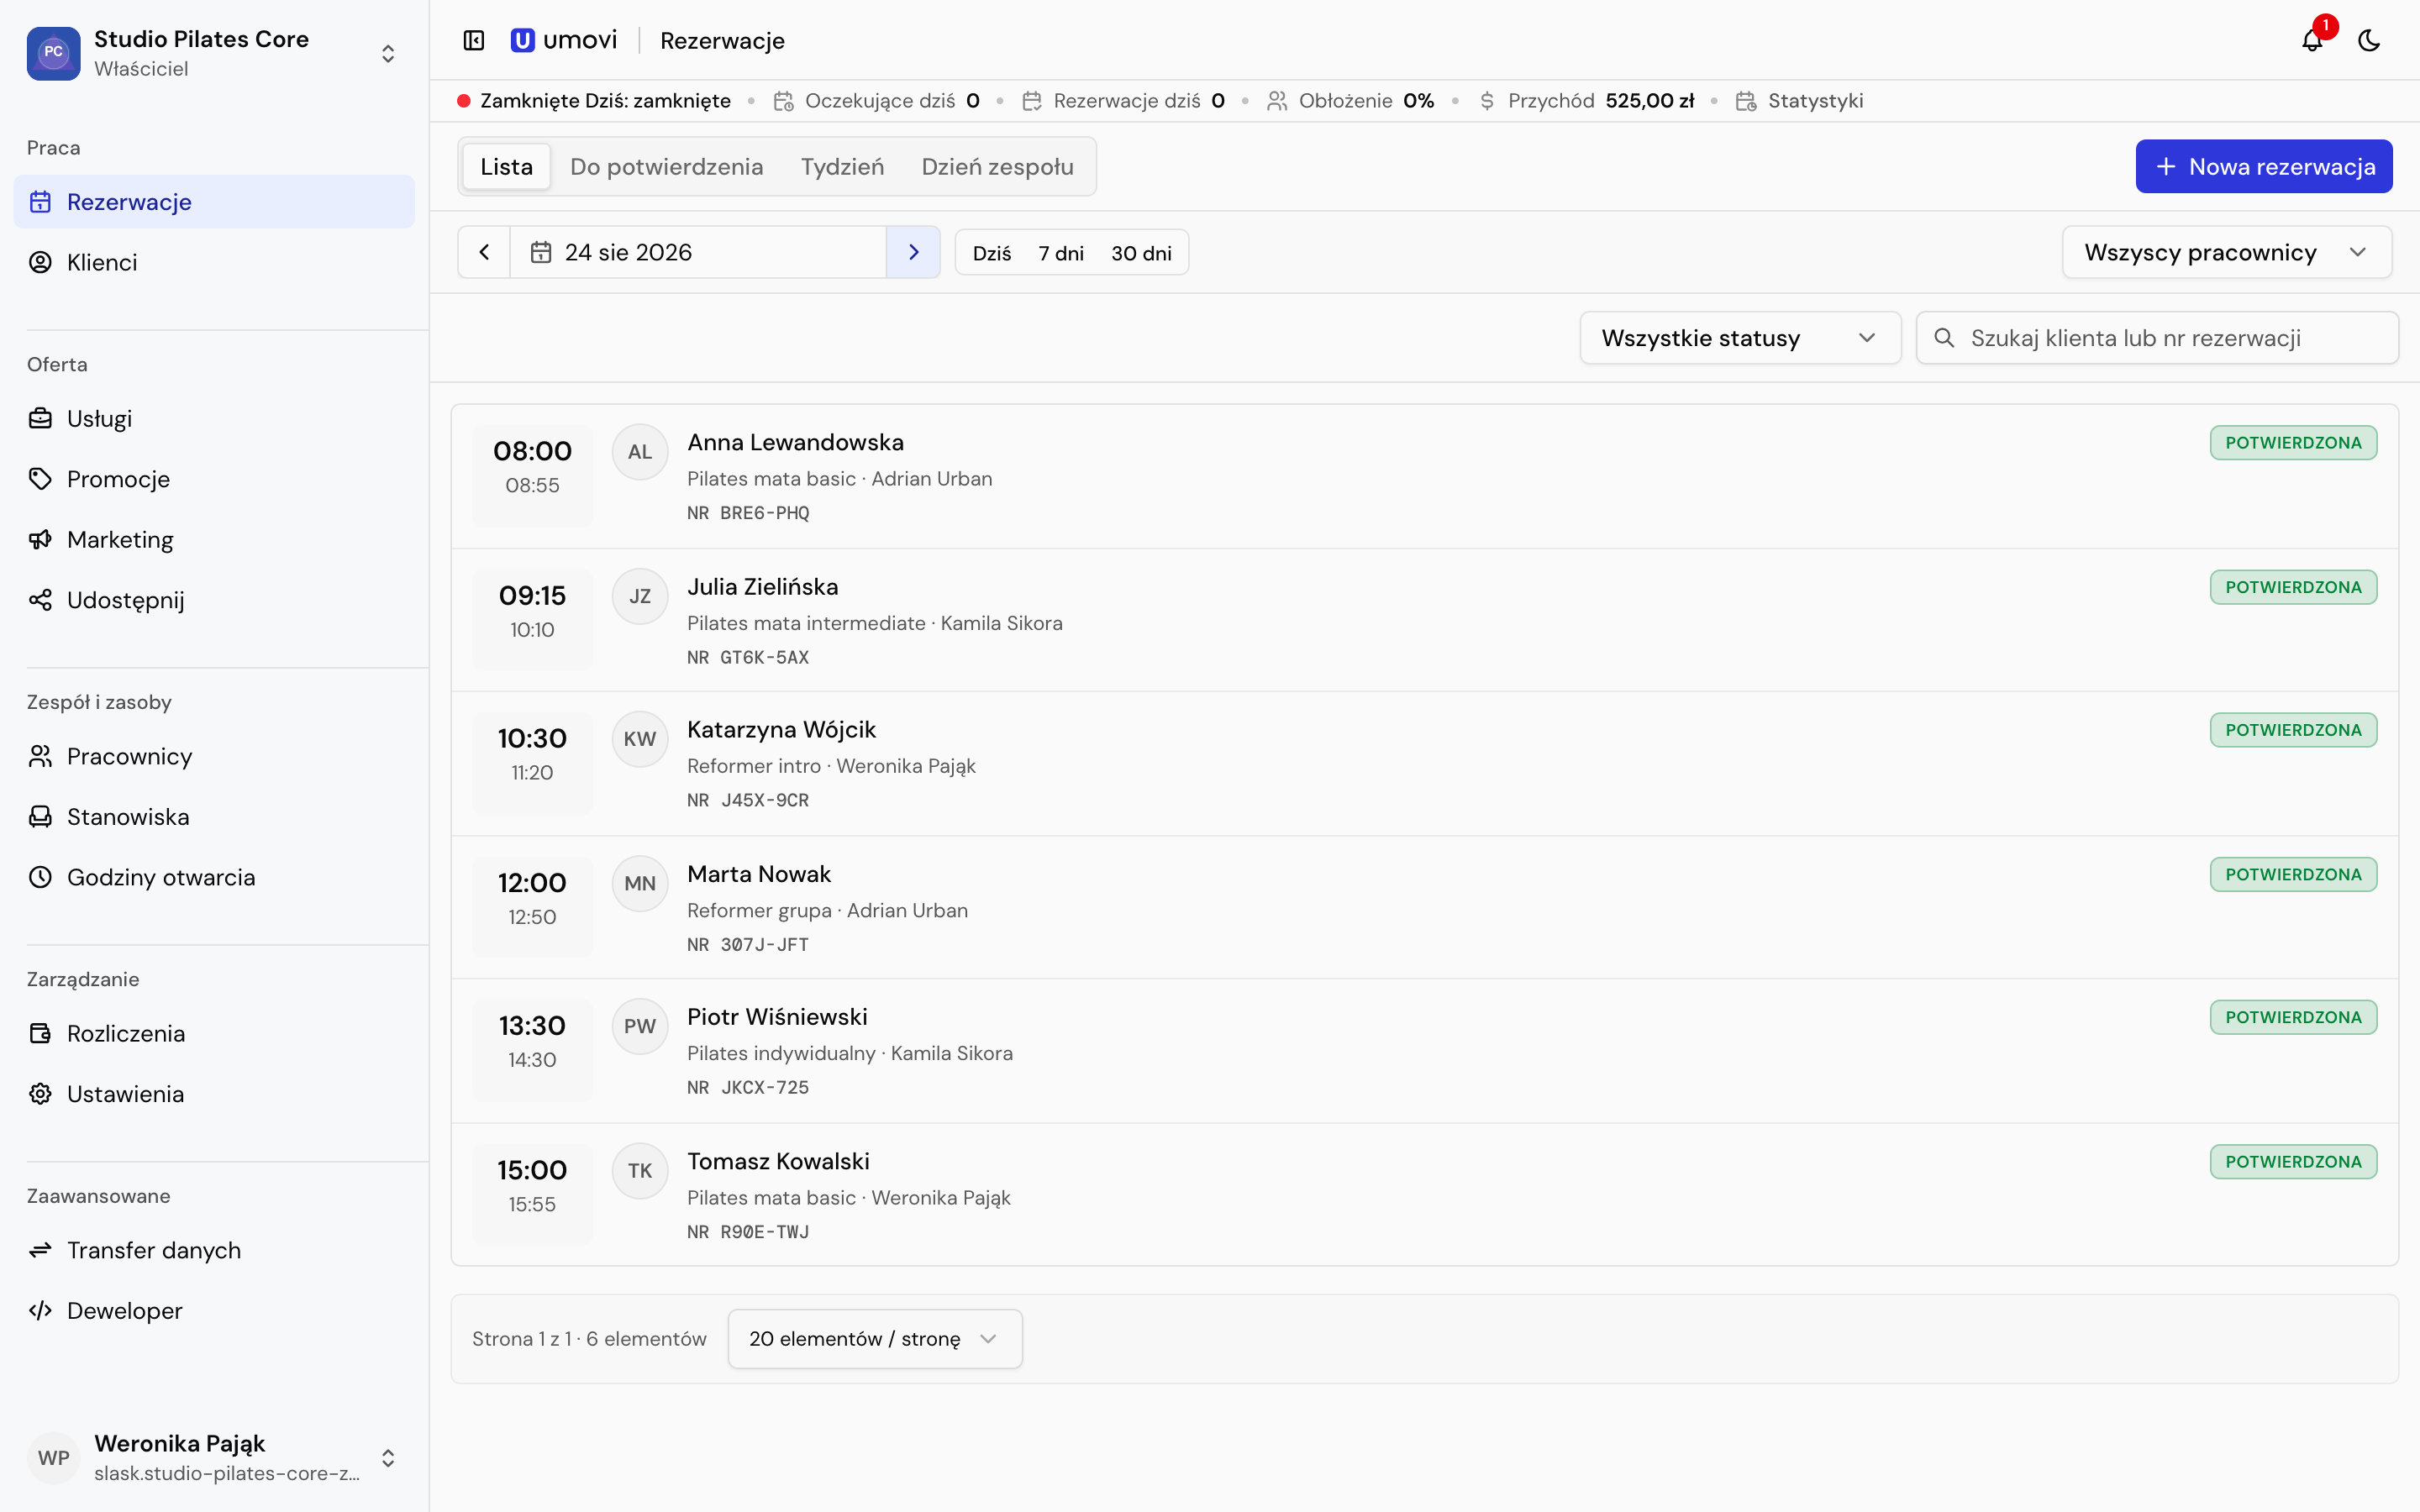
Booking centre in the web panel
The web workspace with place navigation and the booking centre. Screenshots show the Polish interface. Button labels may vary with the app language and version.

Header and operational summary

The header contains the current section, notifications and theme controls. The operational summary shows today's opening hours, pending bookings, booking count, utilisation and revenue. Select an indicator to open its related view. See Statistics for longer periods.

For work on your phone, use the separate Umovi Calendar guide.

2.2

Statistics in the web panel

Analyse bookings, revenue, clients and team results over a selected period.

PathWeb panel → Statistics

Statistics show results for the selected place. Owners and managers can compare the team; employees see their own results. An employee account must be linked to an employee profile for their data to be available.

1. Set the data range

Choose 7 days, 30 days, 90 days, This month or This year, or enter start and end dates. Narrow the results by employees, services, categories and statuses. The same filters apply to every section. Use Clear to remove additional filters.

2. Read the summary

  • Booking revenue is the sum of recorded prices for confirmed and completed bookings in the period. It does not confirm that payment was received.
  • Bookings counts the bookings in the selected range.
  • Clients counts clients in the analysed bookings.
  • Service time shows the amount of scheduled work.
  • Completed shows the proportion of completed bookings.

Changes beside indicators compare with the previous period. Check dates and filters first: one employee's results cover a different scope from the whole team's.

3. Choose a chart measure

In the period chart, select revenue, bookings, hours or flow. Flow distinguishes when clients created bookings, when services were scheduled and when bookings were completed. These dates can differ; do not add them together as three separate bookings.

4. Compare the team and services

Team comparison shows each person's results, share and change from the previous period. Selecting one person shows that employee's performance. Status breakdown helps you review cancellations and no-shows. Service performance ranks services and categories by revenue.

Empty or unexpected results

Check the place, dates, statuses and selected employees. An empty filtered result does not mean bookings were deleted. Return to the booking centre to work with individual bookings.

2.3

Booking centre in the web panel

Use the list, confirmation queue, week and team day views.

PathWeb panel → Bookings

Four views

  • List — bookings for a day or date range.
  • To confirm — pending requests and times changed by clients.
  • Week — one employee's weekly calendar.
  • Team day — employee calendars side by side for one day.
Booking centre list
Date range, employee and status filters, and booking search. Screenshots show the Polish interface. Button labels may vary with the app language and version.

Dates and filters

  1. Select the date button above the list.
  2. Use Today, 7 days or 30 days.
  3. Choose an employee or the whole team.
  4. Select a status or enter a client name or booking code.

Confirm several bookings

In To confirm, select rows and choose Confirm selected. When cancelling several bookings, provide a shared reason. The result shows successful and failed changes.

Open details

Select a row to open the booking in the workspace. You can keep several tabs open. Closing a tab with unsaved changes requires confirmation.

Mobile equivalent: Booking list and search.

2.4

Create a booking in the web panel

Add a booking for an existing client, a new client or a walk-in.

PathWeb panel → Bookings → New booking

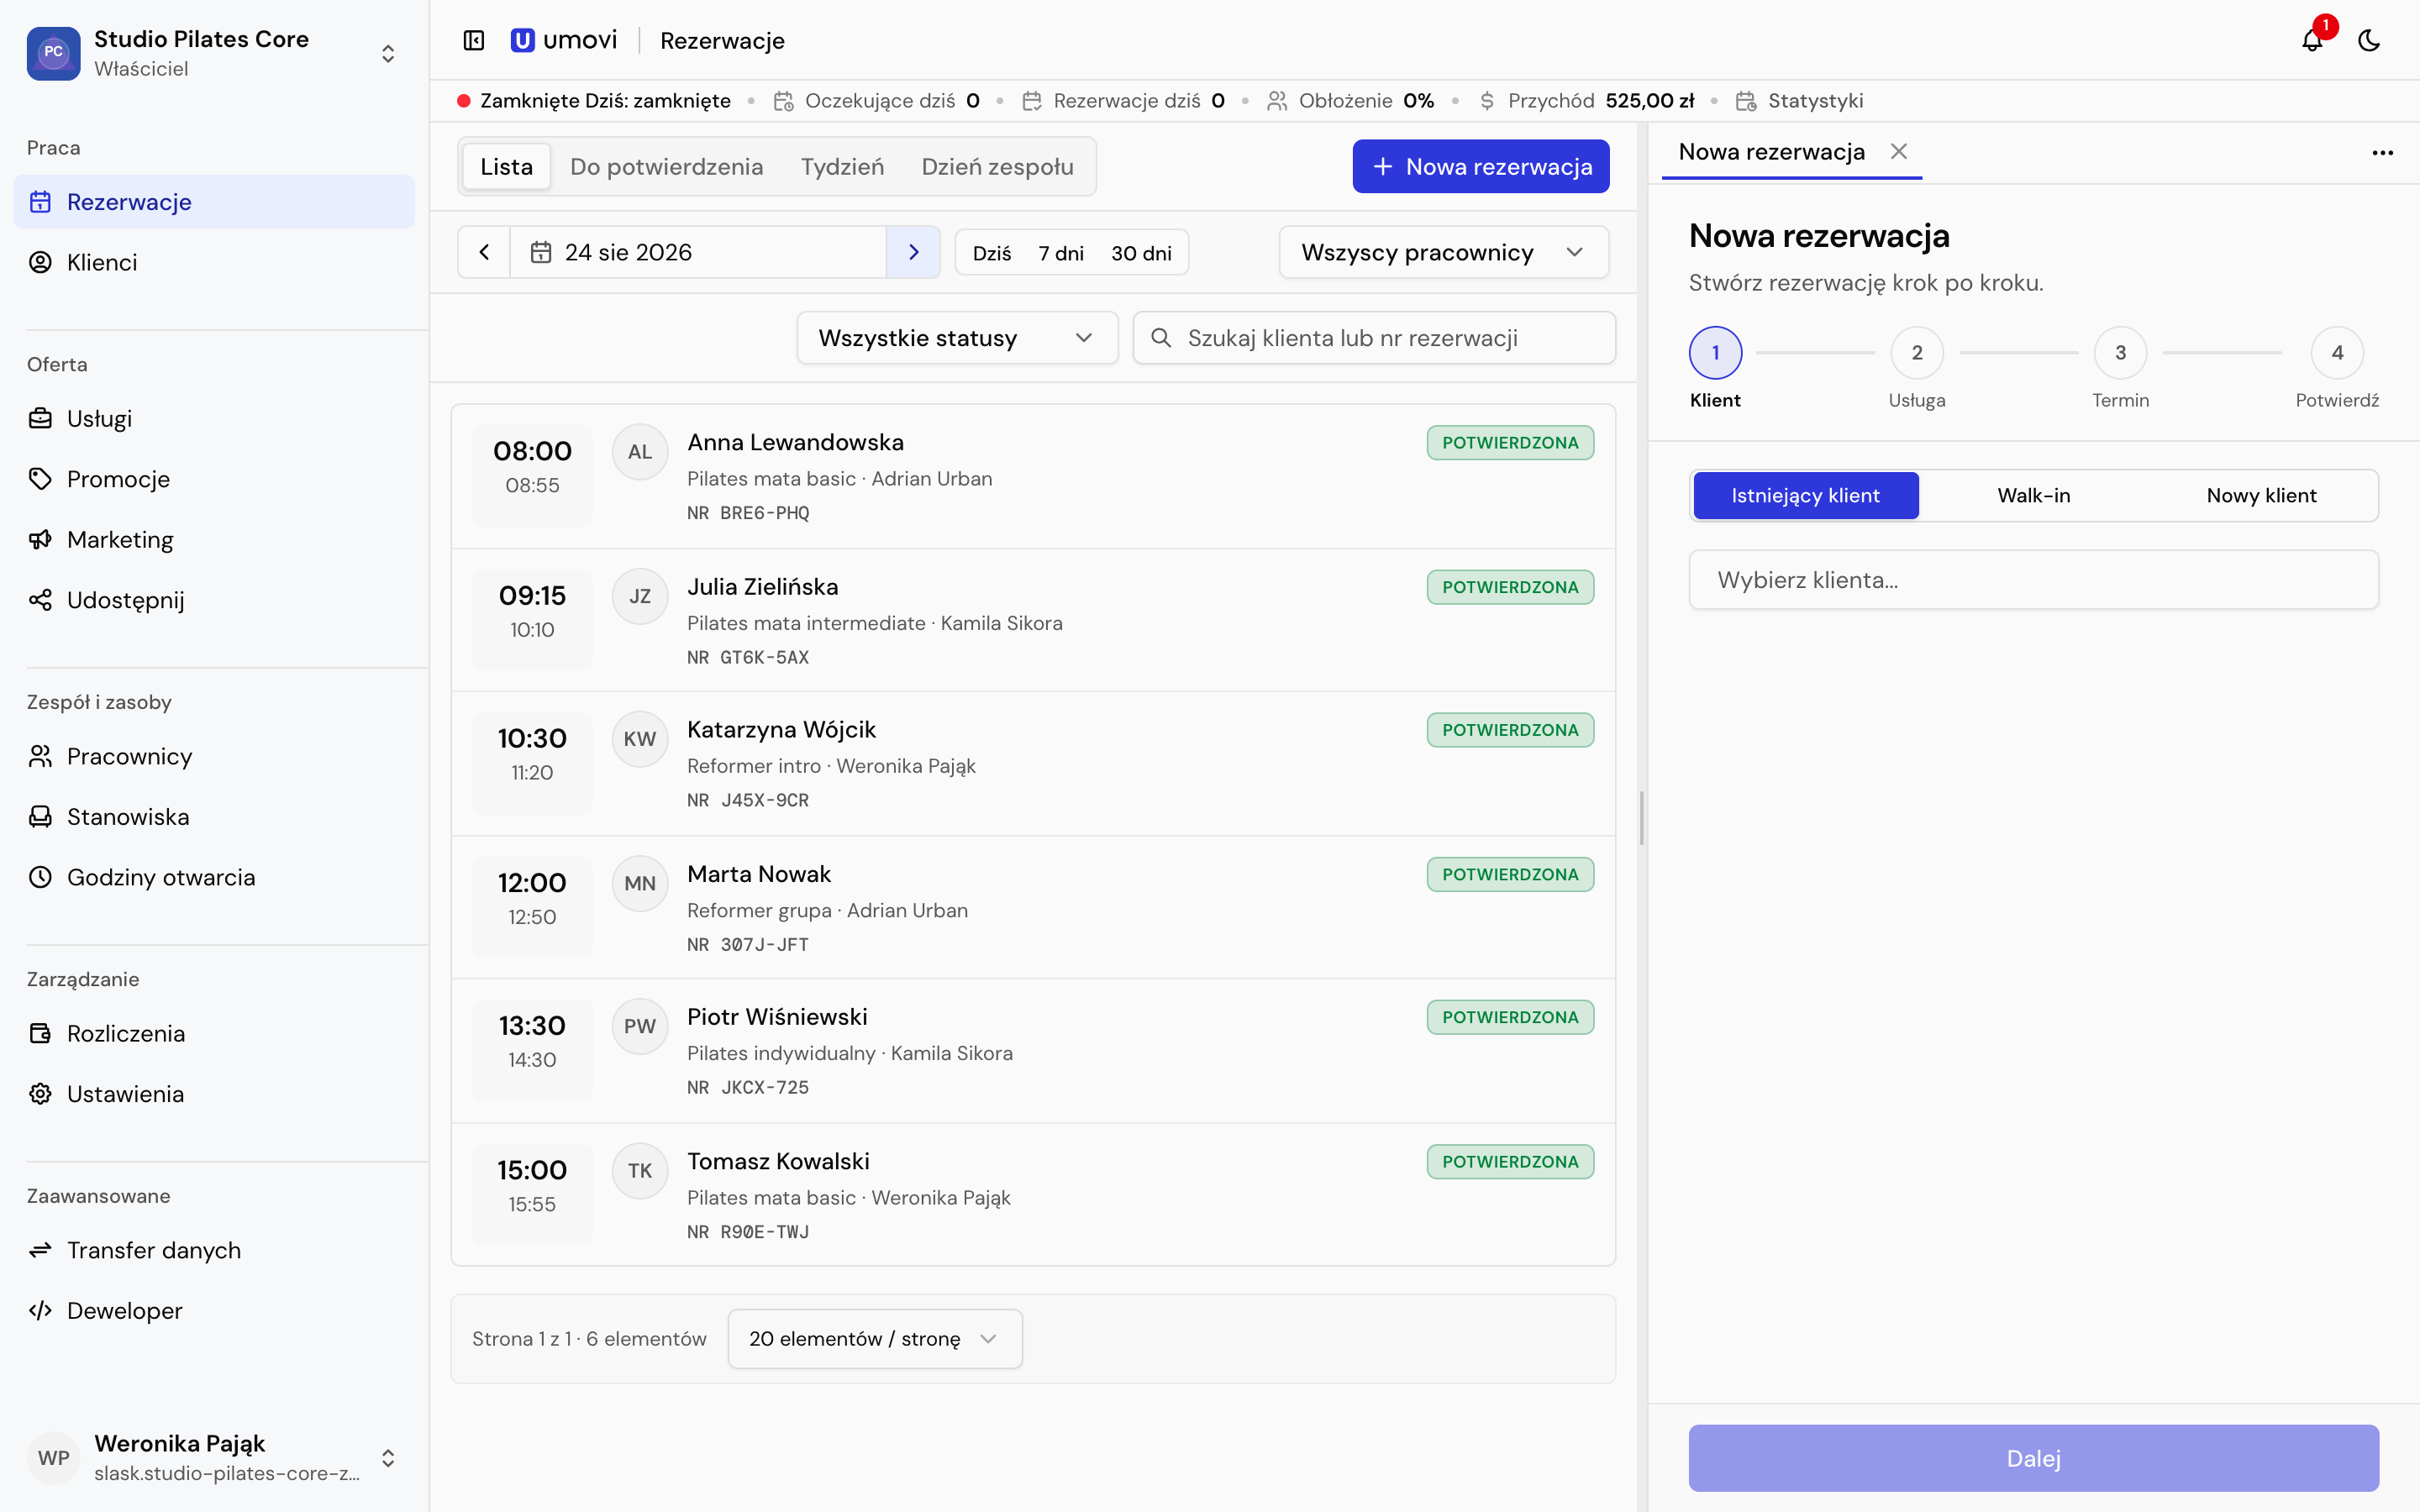
The form has four steps: client, service, time and confirmation.

New booking form in the web panel
New bookings open in the side workspace. Screenshots show the Polish interface. Button labels may vary with the app language and version.

1. Client

Choose:

  • Existing client — search for a client profile.
  • Walk-in — a booking without an assigned person; you can assign a client later.
  • New client — enter their details and confirm that they may be used to manage the booking.

2. Service

Choose an active service. The panel shows its duration, price and category. Check employee assignments through categories or individual services. You cannot continue without an employee who performs the service. The team can use active internal services for manual bookings.

3. Employee and time

  1. Choose an employee or Any available employee.
  2. Select a day with available times.
  3. Choose a time.

Automatic assignment selects someone who performs the service and is free. Availability takes place hours, employee schedules, exceptions and required workstations into account.

4. Confirmation

Check the client, service, employee, time and price. Put team-only information in the Internal note; the client will not see it. Select Book. Umovi checks availability again before saving.

Mobile equivalent: Create a booking in the app.

2.5

Booking statuses in the web panel

Confirm, cancel and complete bookings, or record a no-show.

PathWeb panel → Bookings → open a booking

Statuses

StatusMeaning and next action
Pending confirmationThe team should confirm or cancel the booking.
New time awaiting confirmationThe client changed the time; review it and decide.
ConfirmedThe time is accepted and normally blocks availability.
CompletedThe service has been performed.
No-showThe client did not attend at the booked time.
Cancelled by the teamThe place cancelled and provided a reason.
Cancelled by the clientThe client cancelled the booking.

Confirm

Open the booking and choose the confirmation action. You can also confirm several bookings from To confirm.

Cancel

Select Cancel and a reason, such as employee unavailability, place closure, unavailable service or a booking error. The reason may be visible to the client.

Complete or record a no-show

After the booked time, select Completed if the service was performed, or No-show if the client did not attend. The change appears in booking history and statistics.

Mobile equivalent: Edit bookings and statuses.

2.6

Edit bookings, messages and history

Update booking details, contact the client and review changes.

PathWeb panel → Bookings → open a booking

Edit details

Depending on the status, you can change the service, employee, start, duration, price, note and pinned client-record entry. You can assign a saved client to a walk-in booking once.

When you change the time, Umovi checks schedules, exceptions, other bookings and workstations again. Some conflicts can be overridden; others prevent saving.

Internal note and the client's initial message

The Internal note is for the team and is not visible to the client. It is separate from messages sent to the client and from a pinned client-record entry.

A client can add one optional message when making a booking. Read it before confirming the time. Disabling further conversation in place settings does not disable this initial message.

Messages

Use Messages for arrangements about this booking. You can send a message, check read status, edit your own message, unsend it and view revision history.

Messaging is unavailable for walk-ins, clients without a linked account, bookings outside the messaging window or places that have disabled further messages.

Change history

History shows creation, edits, time changes, status changes and deletion. Entries include the time and person or source, such as the web panel, Umovi Calendar, client app, integration or agent.

Mobile equivalent: Messages and history.

2.7

Clients and communication in the web panel

Find, add and edit clients, bookings, consent and communication channels.

PathWeb panel → Clients

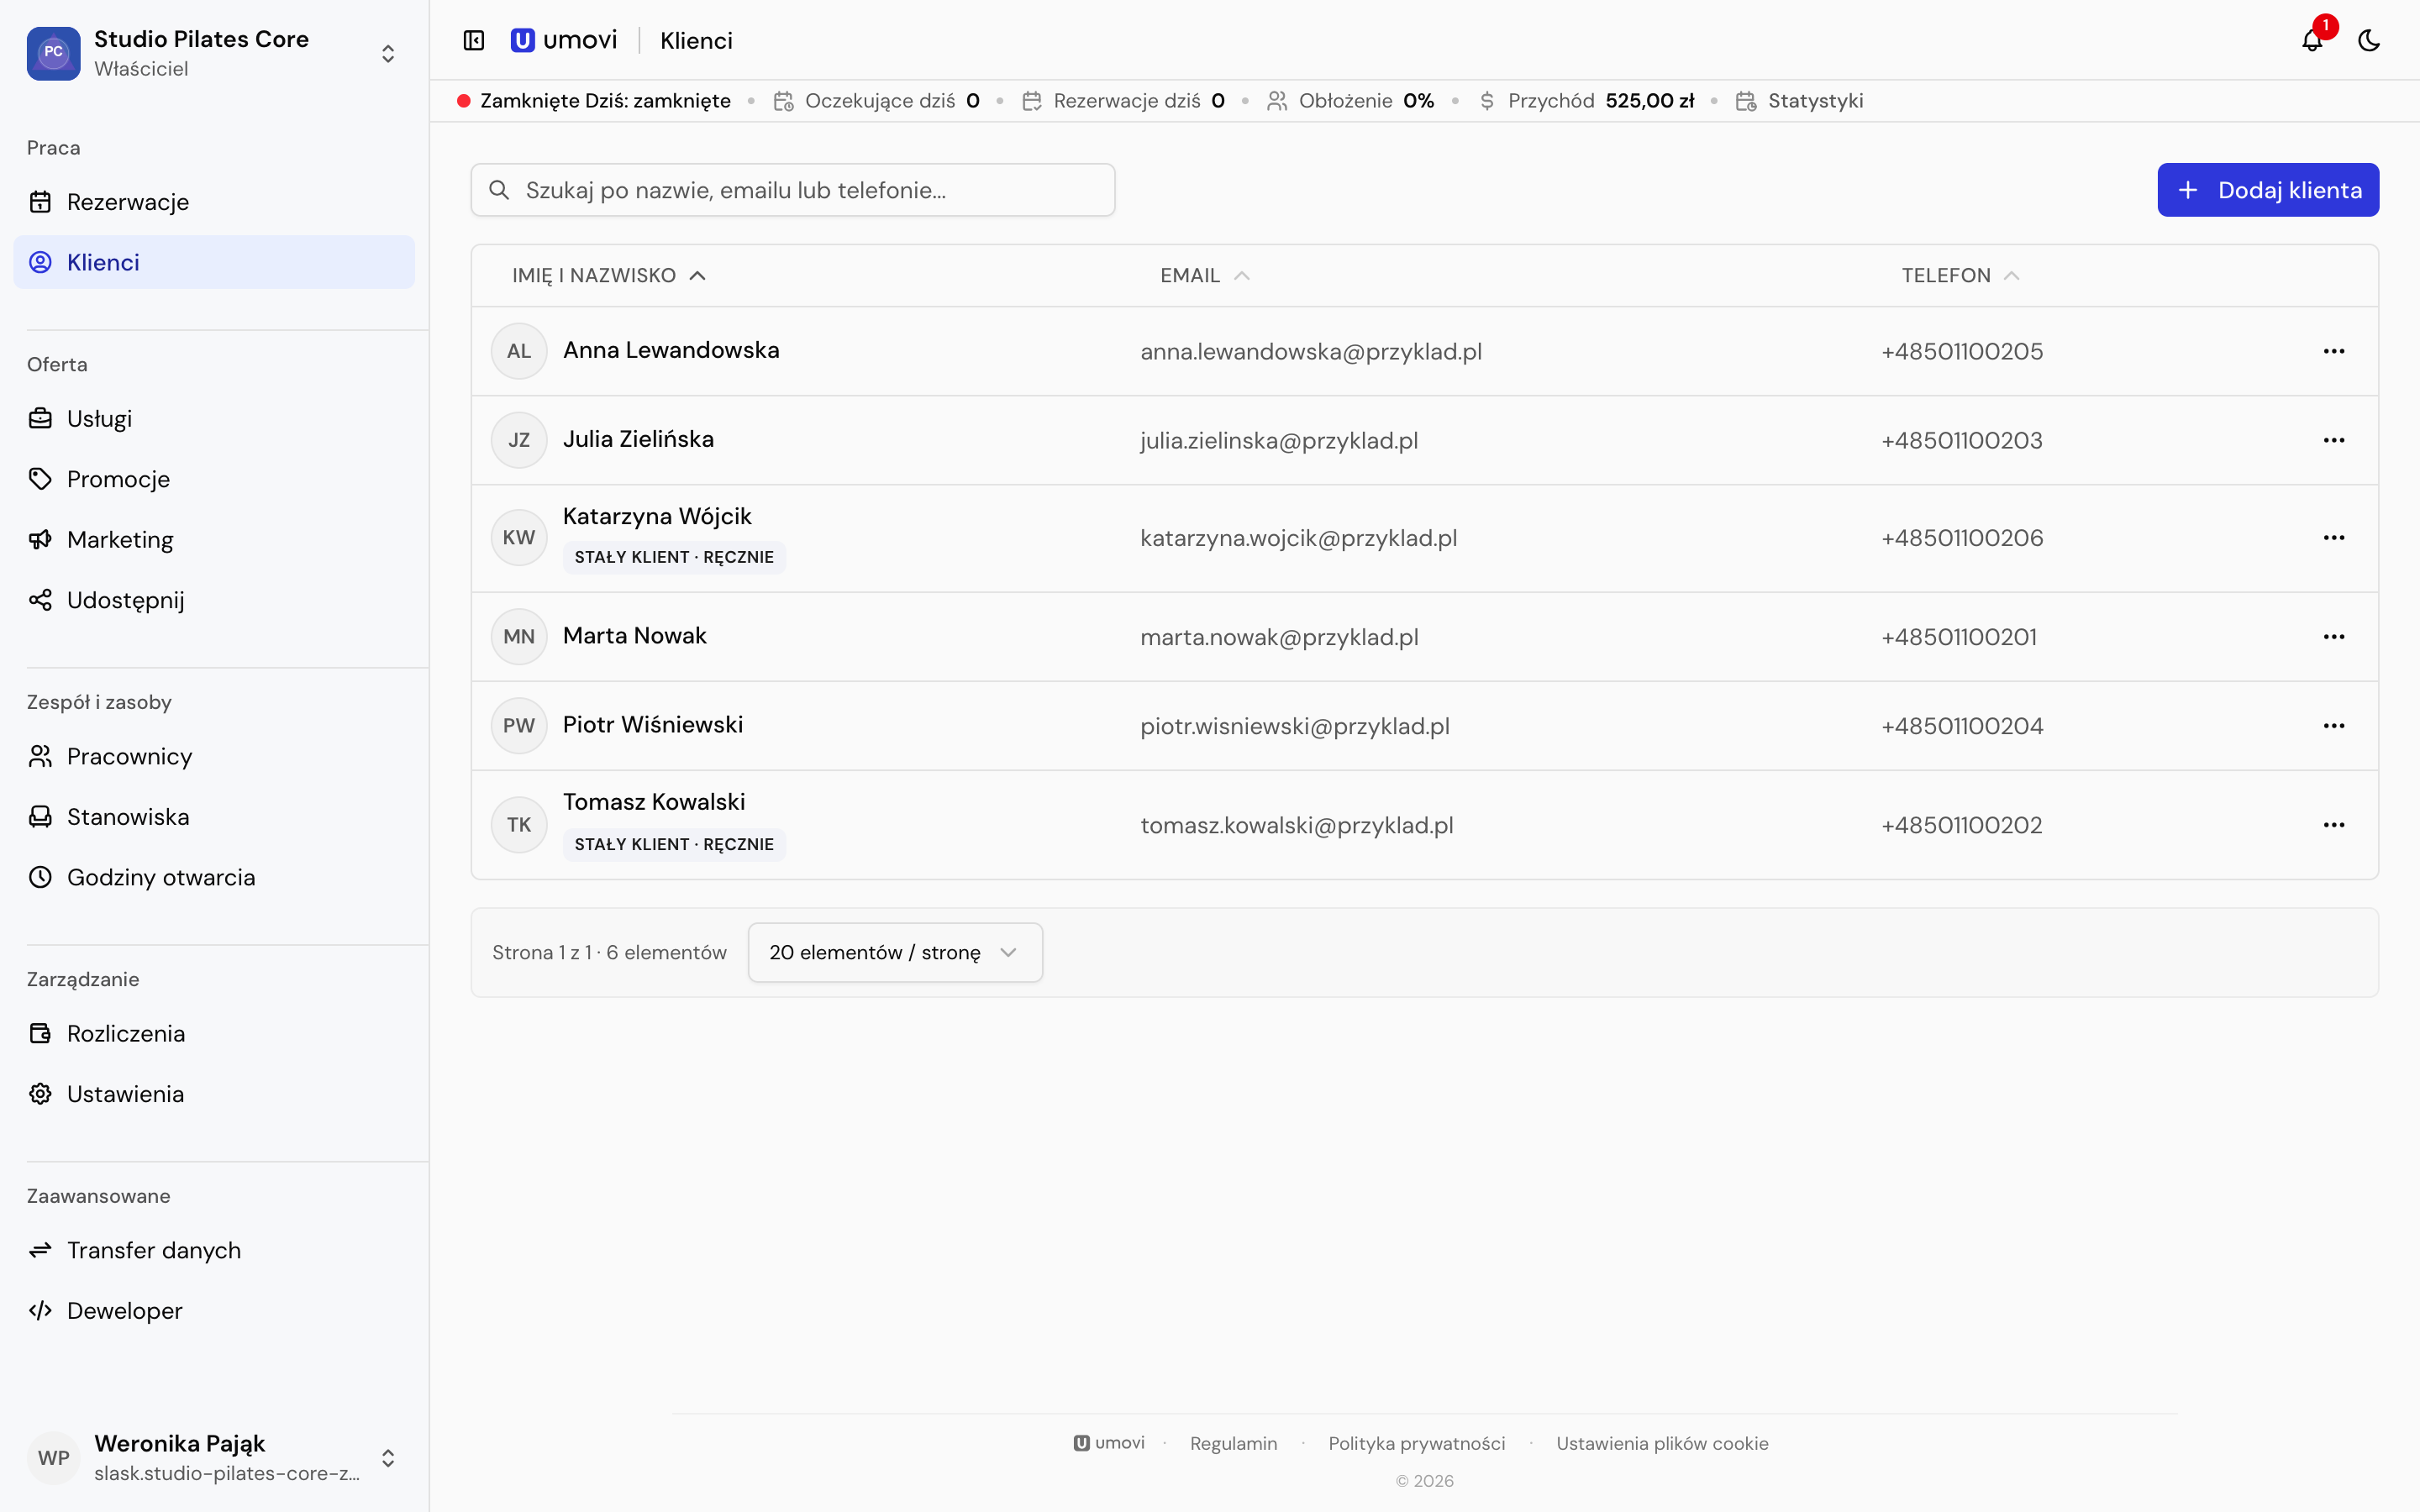
Client list

Search by name, email or phone. The table shows contact details, confirmation that the data may be used, and available actions.

Client list in the web panel
Search, add a client or open their profile. Screenshots show the Polish interface. Button labels may vary with the app language and version.

Add a client

  1. Select Add client.
  2. Enter their first and last name and at least an email address or phone number.
  3. Confirm that their details may be used to manage bookings.
  4. Set booking communication channels.
  5. Optionally record voluntary marketing consent and send an Umovi invitation.

Use international phone numbers, for example +48123456789.

Client profile

Profile contains details, a note, the linked account and communication settings. Bookings lets you search by code, filter dates and change the order.

Clients with a linked Umovi account manage some communication settings themselves. Sync from linked account refreshes their profile details.

Regular clients and deletion

Regular-client status can be set manually or automatically based on completed bookings. Withdrawing permission to use the data may delete the client record, so the panel asks for confirmation.

Mobile equivalent: Client list and profile.

Chapter 3

Web panel — setup

3.1

Employees and assignments

Manage employee profiles, accounts, photos, services and availability.

PathWeb panel → Employees
Employee list in the web panel
Open team profiles and calendars from the employee list. Screenshots show the Polish interface. Button labels may vary with the app language and version.

Add employees and change status

Select Add employee, enter a display name and optional contact details. Leave email or phone blank if unknown. You can activate, deactivate or delete an employee where the place's rules allow it.

Profile and account

Set the name, photo and linked user account in the profile. A linked account lets the employee sign in with their own credentials. An employee without manager access can edit only their own profile and availability.

Categories and services

Assignments work at two levels:

  1. Categories define the employee's basic service range.
  2. Direct service assignments extend or refine it.

In Categories and services, select a category and its subcategories, add individual services or remove direct assignments.

Calendar and availability

Open the employee's calendar and schedules from their profile. Regular hours and exceptions affect client availability and conflict checks for manual bookings.

3.2

Services and categories

Build your service catalogue, set prices and visibility, and assign employees and resources.

PathWeb panel → Services
Service catalogue in the web panel
Categories on the left and service prices, statuses and visibility in the table. Screenshots show the Polish interface. Button labels may vary with the app language and version.

Categories

Categories can have parent and child categories. Prepare the structure, then assign services. You cannot delete a category while it contains subcategories or assigned services.

You can assign an icon and employees who normally perform the category's services.

Create a service

Set the name, description, search terms, duration, optional buffer, price, three-letter currency, category, active status and public or internal visibility.

Public services can be available to clients, integrations and AI booking tools. Internal services are for manual bookings made by the team.

Employees and workstations

Employees may be inherited from categories or assigned directly. Workstations limit concurrent resource use. If every assigned workstation is occupied, a time may be blocked.

Status and deletion

Deactivation keeps the history but excludes the service from new bookings. Delete a service only when it should no longer remain in the catalogue.

3.3

Opening hours and workstations

Set regular place schedules and resources required by services.

Opening hours

PathWeb panel → Opening hours
Opening hours in the web panel
Schedules can run indefinitely or for a date range. Screenshots show the Polish interface. Button labels may vary with the app language and version.
  1. Select Add schedule.
  2. Choose a weekly schedule or a specific date.
  3. Optionally set start and end dates.
  4. Mark each day open or closed and enter its hours.
  5. Save. If the schedule overlaps another one, decide whether to replace it.

Employees may have view-only access; owners and managers can edit.

Workstations

PathWeb panel → Workstations
Workstations in the web panel
Filter the resource list by active or inactive status. Screenshots show the Polish interface. Button labels may vary with the app language and version.

A workstation is a resource such as a room, chair or device. Give it a name and active status, then assign active workstations to services. Umovi checks their occupancy when checking a time.

Deactivate a workstation to exclude it from new bookings while retaining history. Deletion removes it from the place's resource pool.

3.4

Place settings

Manage place details, branding, booking rules and client notifications.

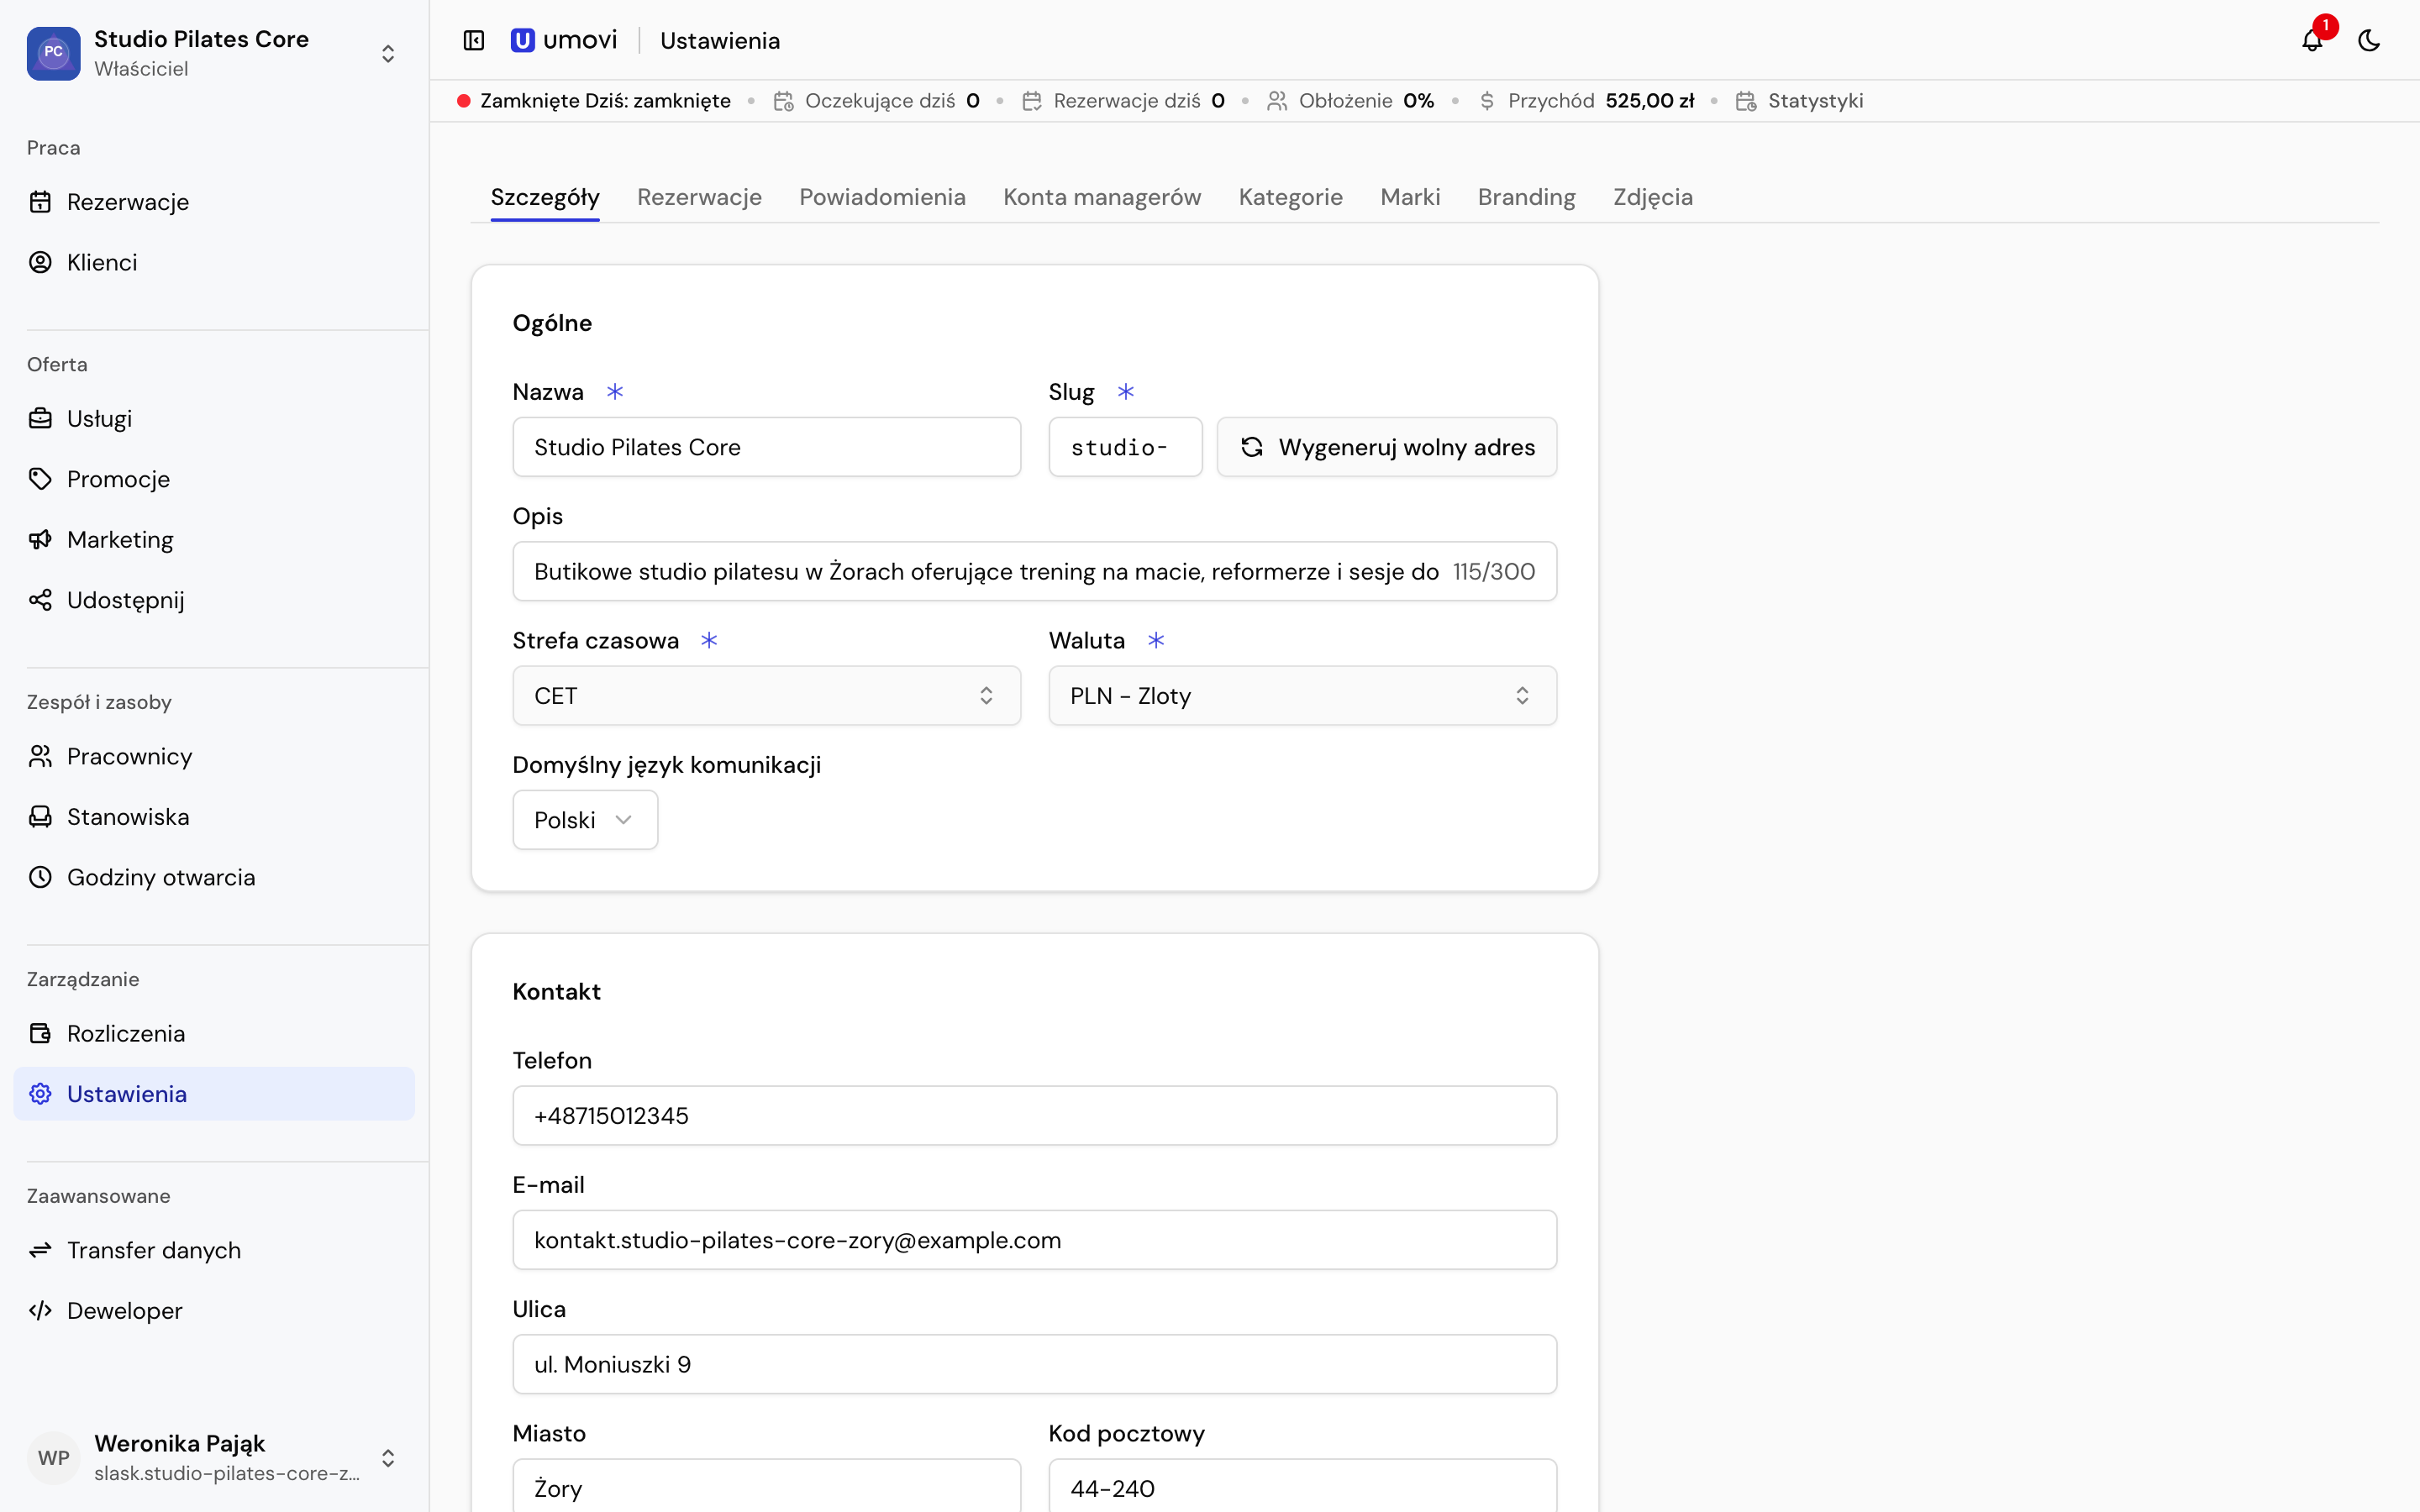
PathWeb panel → Settings
Place settings in the web panel
Settings include place details, bookings and notifications. Screenshots show the Polish interface. Button labels may vary with the app language and version.

Place details

Edit the name, description, contacts, address, time zone, location and branding. The place time zone determines calendar, schedule and notification times.

Logo and colours

Upload the place logo and choose Generate from logo to prepare a palette. Review the logo and contrast on the proposed backgrounds before saving. Changing colours does not update photos or place details.

Booking settings

Set the minimum booking lead time, booking horizon, confirmation rules and client rescheduling policy. An empty horizon has no future-day limit; 0 allows today only. The minimum lead time cannot exceed the horizon.

Separately choose which conflicts the team may override for manual bookings: employee or workstation occupancy, working hours and availability blocks. These settings also apply automatically when importing bookings.

Enable messages after booking controls further conversation. If disabled, clients can still add one optional message while making a booking.

Client notifications

Choose available push, email and SMS channels. SMS options are:

  • when push is inactive, without waiting for a push delivery confirmation;
  • always, including when push is active;
  • disabled.

For each event, choose whether to create a notification and which channels may deliver it. Client preferences and available contact details take precedence.

Chapter 4

Web panel — growth and billing

4.1

Promotions and marketing

Set discounts and prepare campaigns with audience, content and cost controls.

Promotions

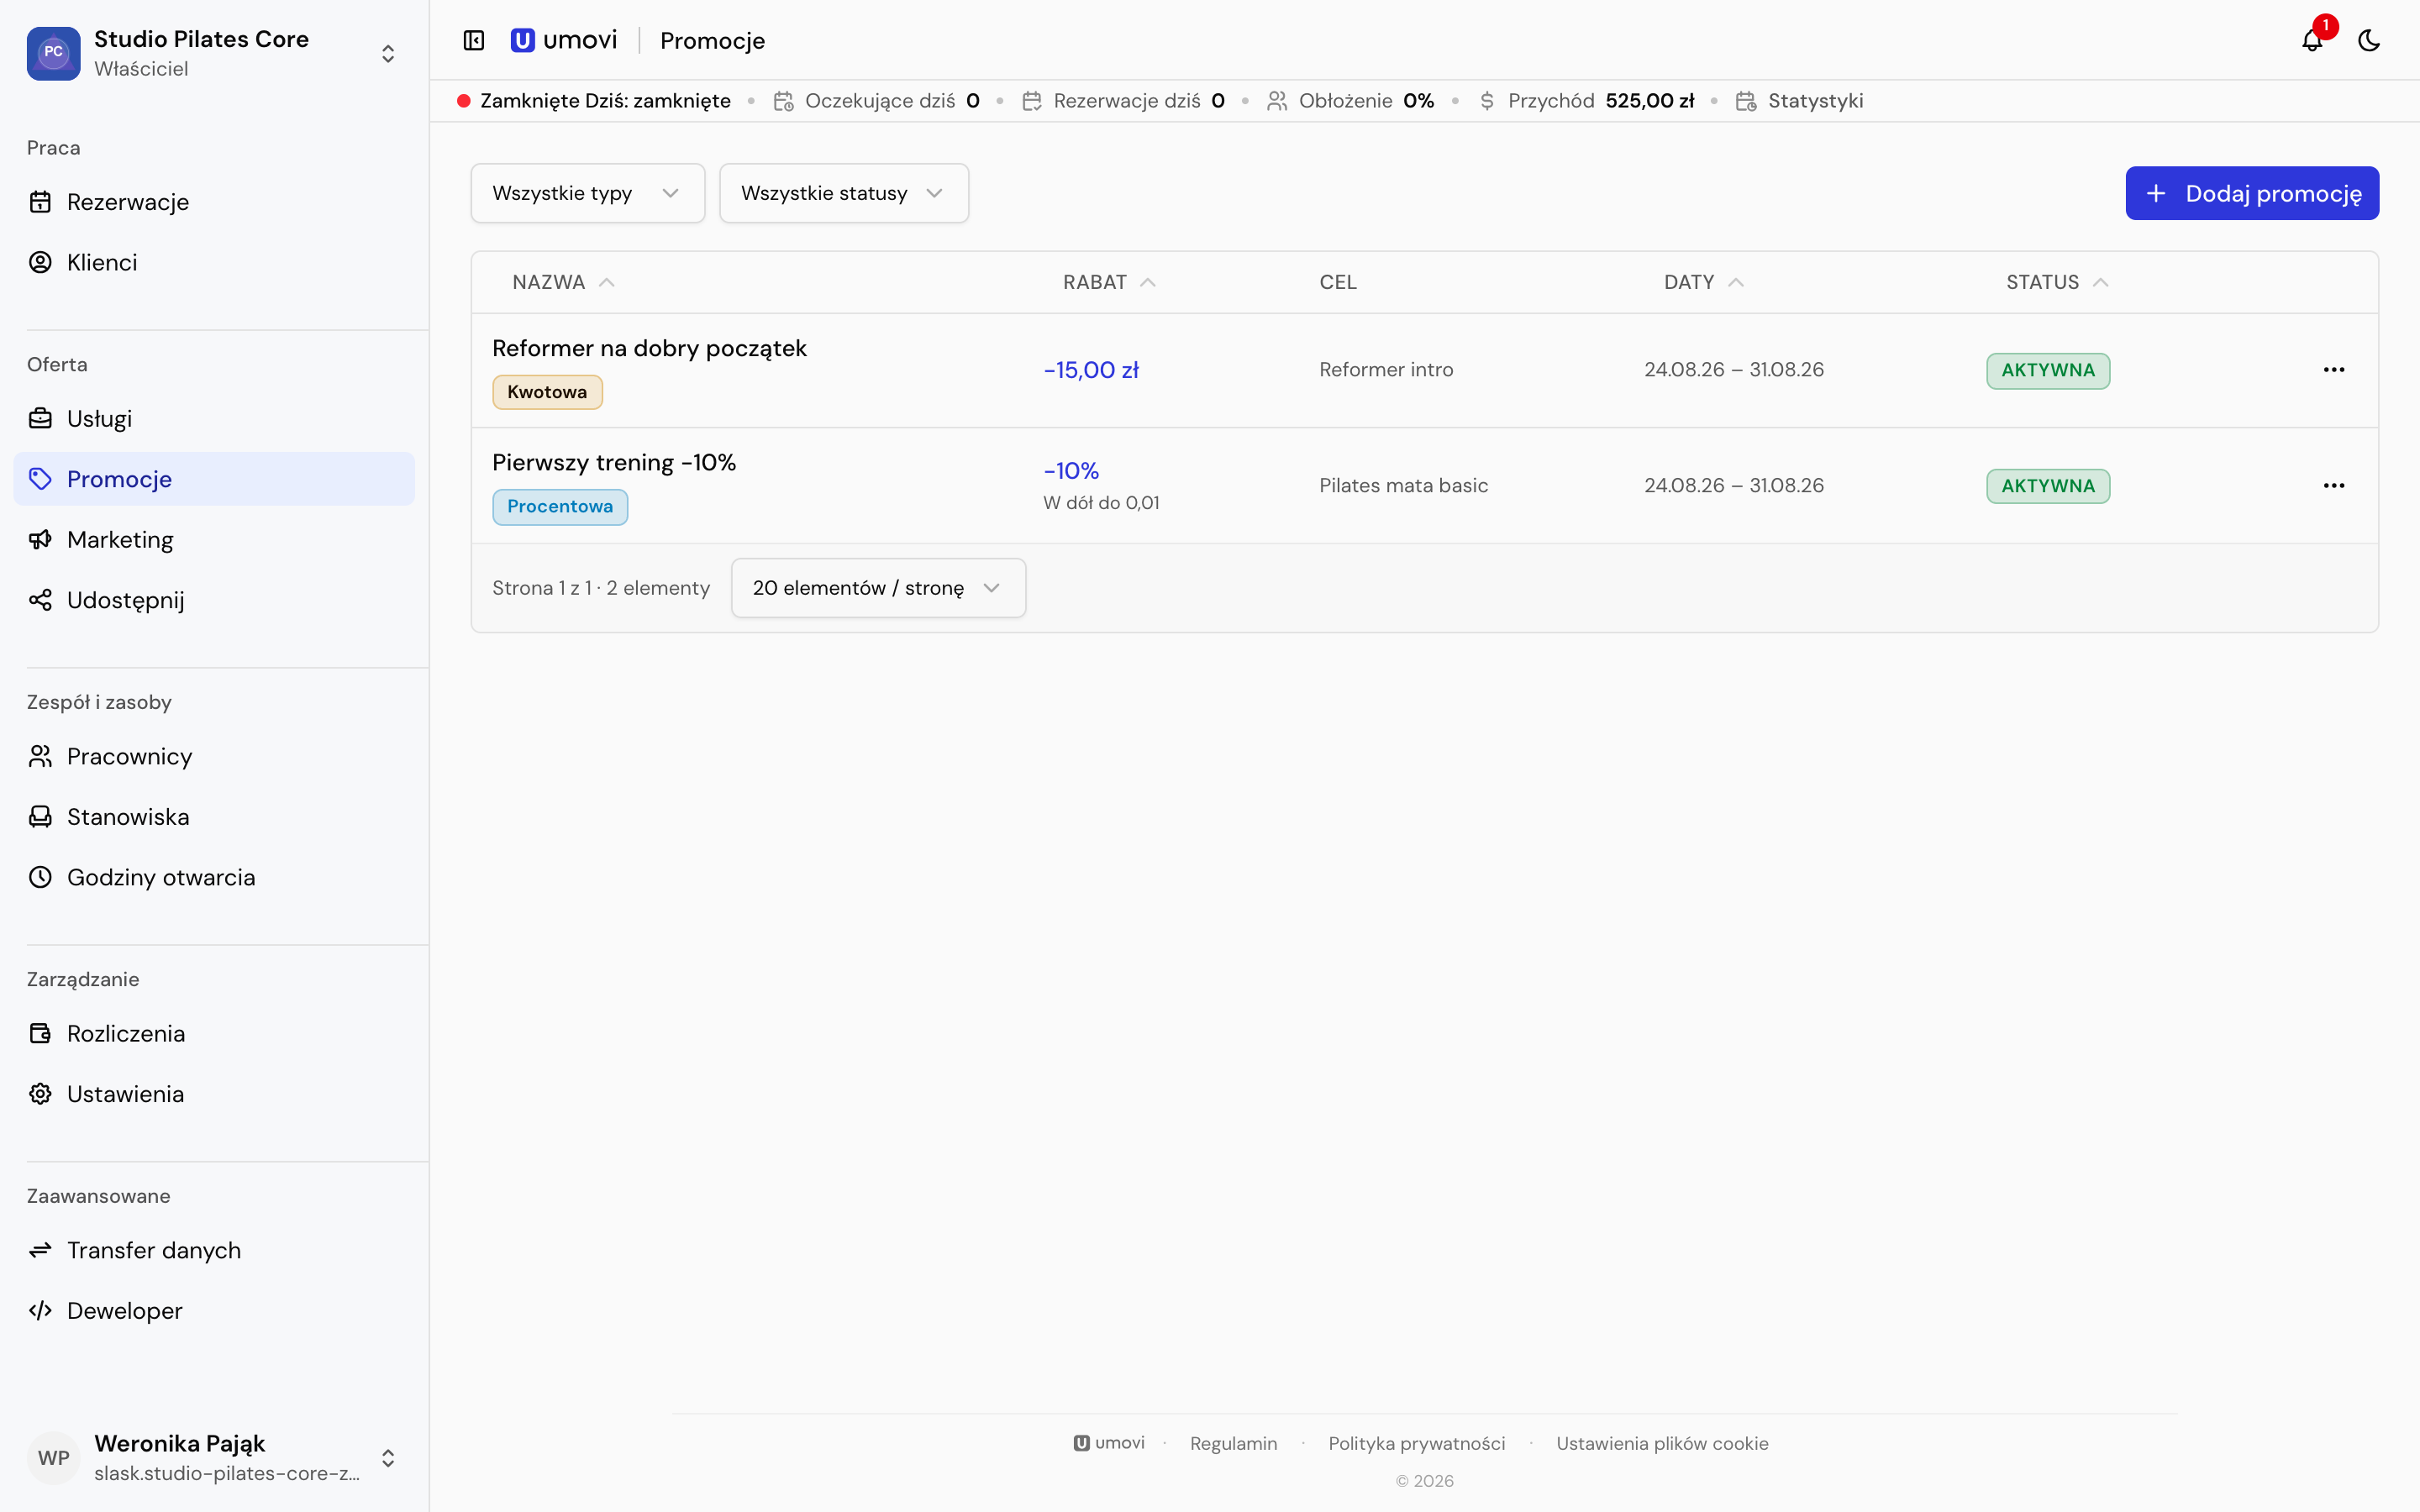
PathWeb panel → Promotions → Add promotion
Promotions in the web panel
Create a promotion or open an existing rule from the list. Screenshots show the Polish interface. Button labels may vary with the app language and version.
  1. Choose a Percentage or Fixed amount discount and enter the value.
  2. Select targets: percentage discounts can cover categories and services; fixed discounts cover services.
  3. Check price rounding for percentage discounts.
  4. Set optional start and end dates and active status.
  5. Review and confirm. High discounts require additional confirmation.

A fixed discount on a service takes precedence over percentage discounts. If several rules of the same type apply, the largest discount is used; discounts are not added together. The panel highlights overlapping promotions.

Discount parameters and targets cannot be changed after creation. Use Create copy to change them. Check prices before activation: an active promotion can affect the price history shown to clients. Excluding an incorrectly published price from history requires a reason and confirmations.

Marketing campaigns

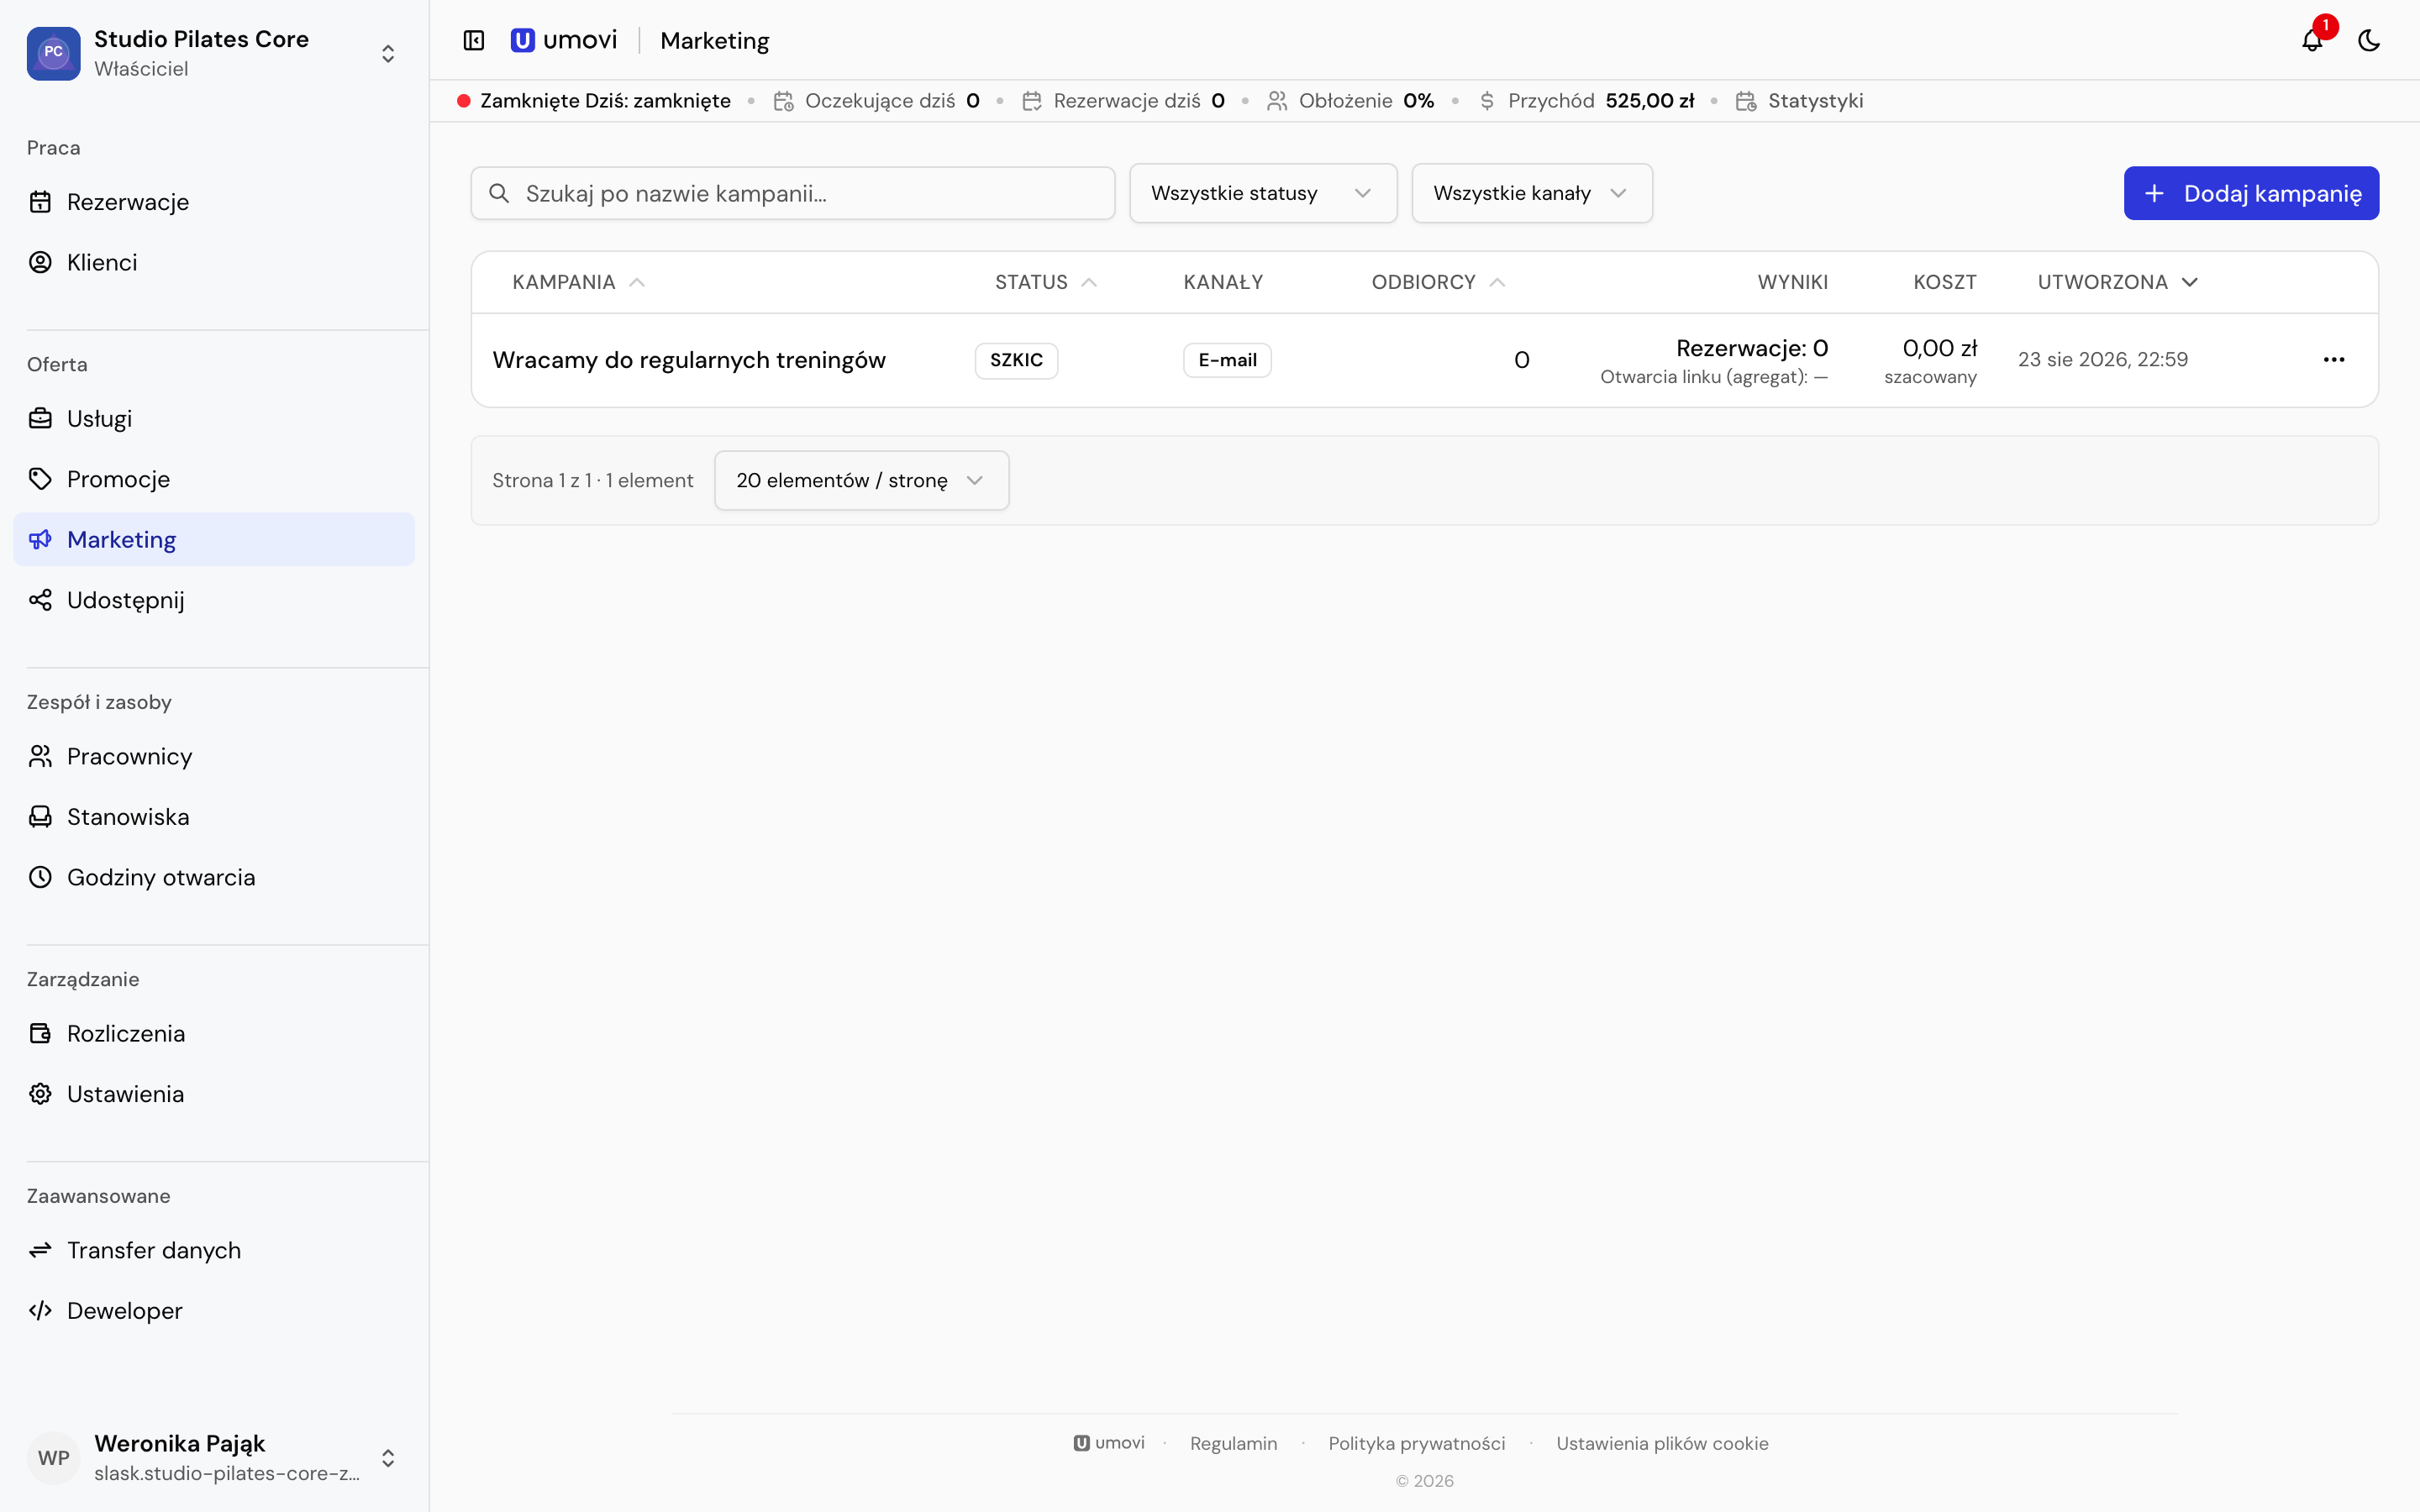
PathWeb panel → Marketing → New campaign
Marketing campaign list
Campaign history and access to the message builder. Screenshots show the Polish interface. Button labels may vary with the app language and version.
  1. Audience — build a segment using conditions, choosing whether all or any must match.
  2. Message — name the campaign, choose channels and prepare separate email, SMS or push content. Select the place or service that the link opens.
  3. Review content, recipient count and estimated cost. A longer SMS can use several billable segments.
  4. Set the sending time and available cost cap. Check recipients and every channel before final confirmation.

Access and results

Owners can access marketing; managers need assigned access. Sending new campaigns requires a plan with marketing enabled. Read-only mode retains history and lets you cancel a scheduled campaign.

Campaign details show sent, delivered, failed and cap-skipped messages, new bookings and final cost. Link opens (aggregate) counts opens, not unique people.

4.2

Share your place from the web panel

Create links and QR codes for a place, service or service with an employee.

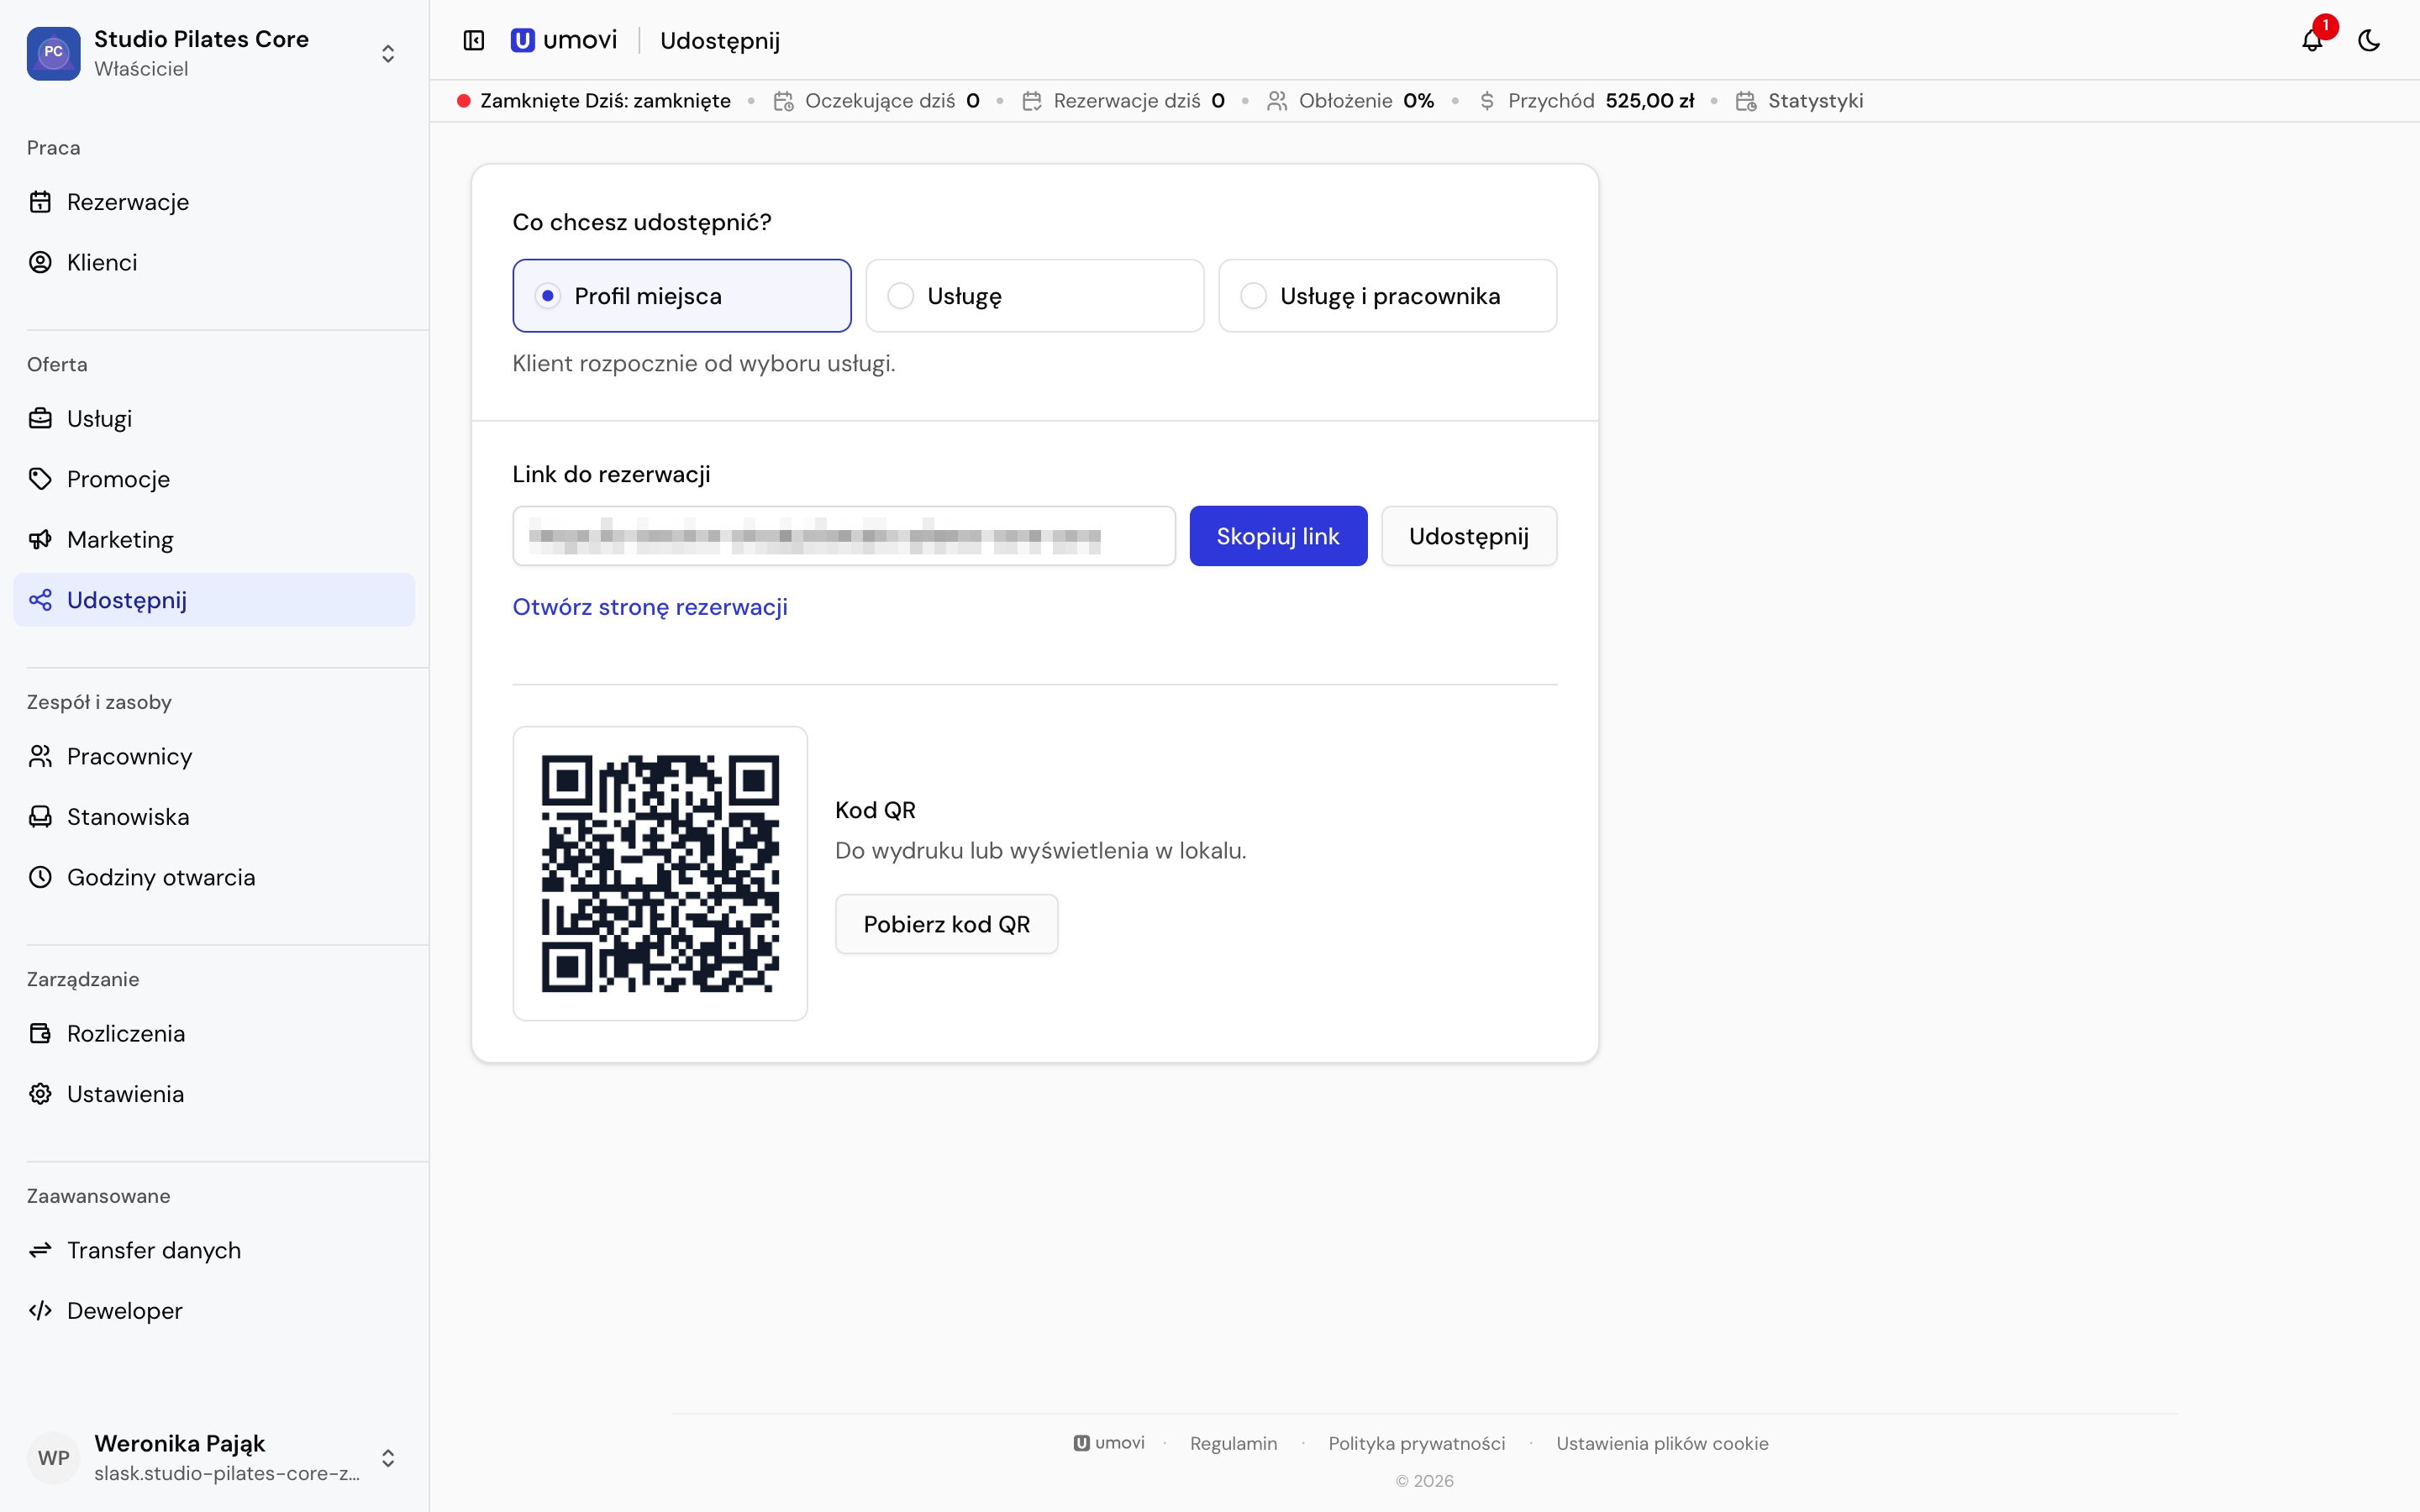
PathWeb panel → Share
Place sharing in the web panel
Generate a link and QR code for the public booking journey. Screenshots show the Polish interface. Button labels may vary with the app language and version.

Choose a destination

You can share the entire place, a specific public service, or a service with an employee. For the whole place, clients choose a service themselves.

After selecting the required details, Umovi generates a link and QR code. Copy the link, download or print the code and use it in your place's materials.

Internal services are unavailable in public links.

Mobile equivalent: Links and QR codes in the app.

4.3

Plans, payments and invoices

Review your plan, usage, invoice details, billing history and payment methods.

PathWeb panel → Billing
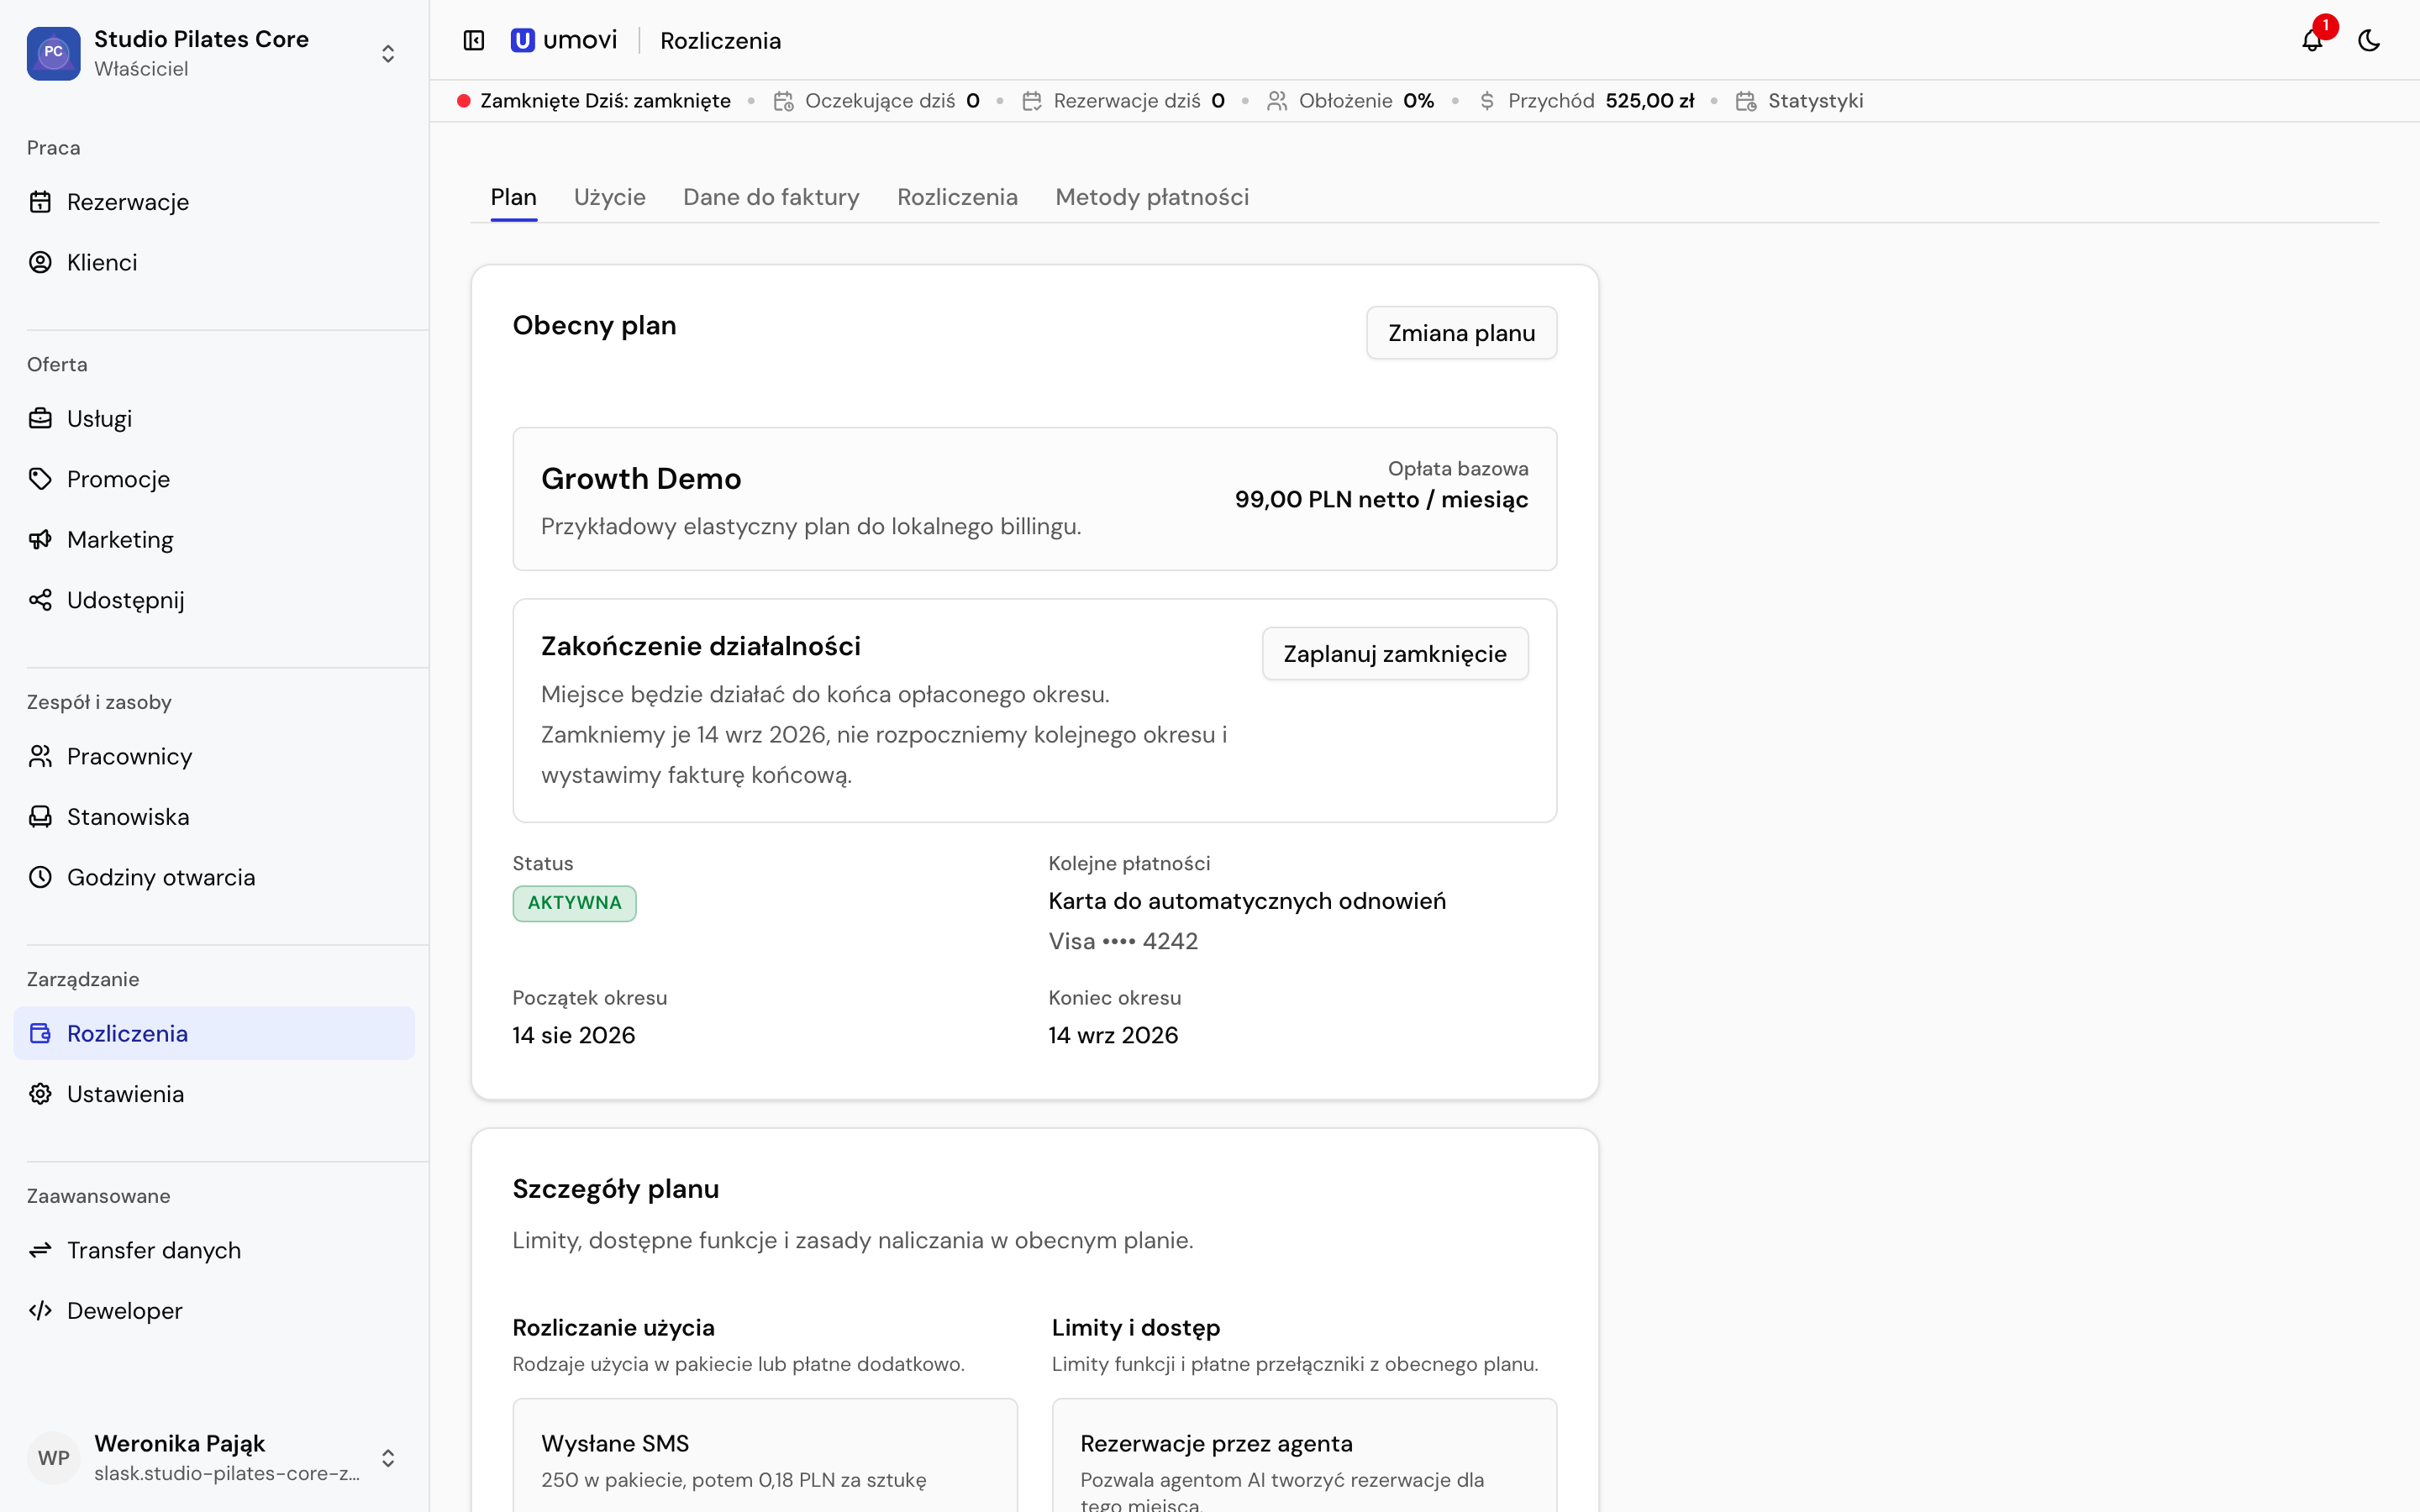
Billing in the web panel
Current plan, subscription status, period and renewal method. Screenshots show the Polish interface. Button labels may vary with the app language and version.

Plan

Plan shows the current plan, base charge, status, period and renewal method. Before changing a plan, review features, limits, effective date and the amount due.

Usage

Usage shows the current period, used quantities, included quantities, billable usage and estimated cost. Review counters for SMS, email, push, in-app notifications, new bookings and completed bookings. Charging rules and included allowances depend on the plan. Feature limits can cover employees, services, workstations, integration clients and webhooks.

Moving to lower limits may deactivate items above the new limit. Review the impact before confirming.

Invoice details

Enter the legal entity name, address, country and tax identifier. Check the details before changing plans or downloading documents.

Billing and payment methods

History includes payments, pro formas, invoices and corrections. Download ready documents, retry payment or change the method where available. In Payment methods, add a card, set the default and choose the renewal method.

Closing a place

The owner can schedule closure at the end of the paid period or cancel a scheduled closure. The panel shows the closure date and impact on future bookings.

4.4

Data transfer in the web panel

Import clients and bookings, prepare CSV exports and review task history.

PathWeb panel → Data transfer

Owners and managers can access Import, Export and History.

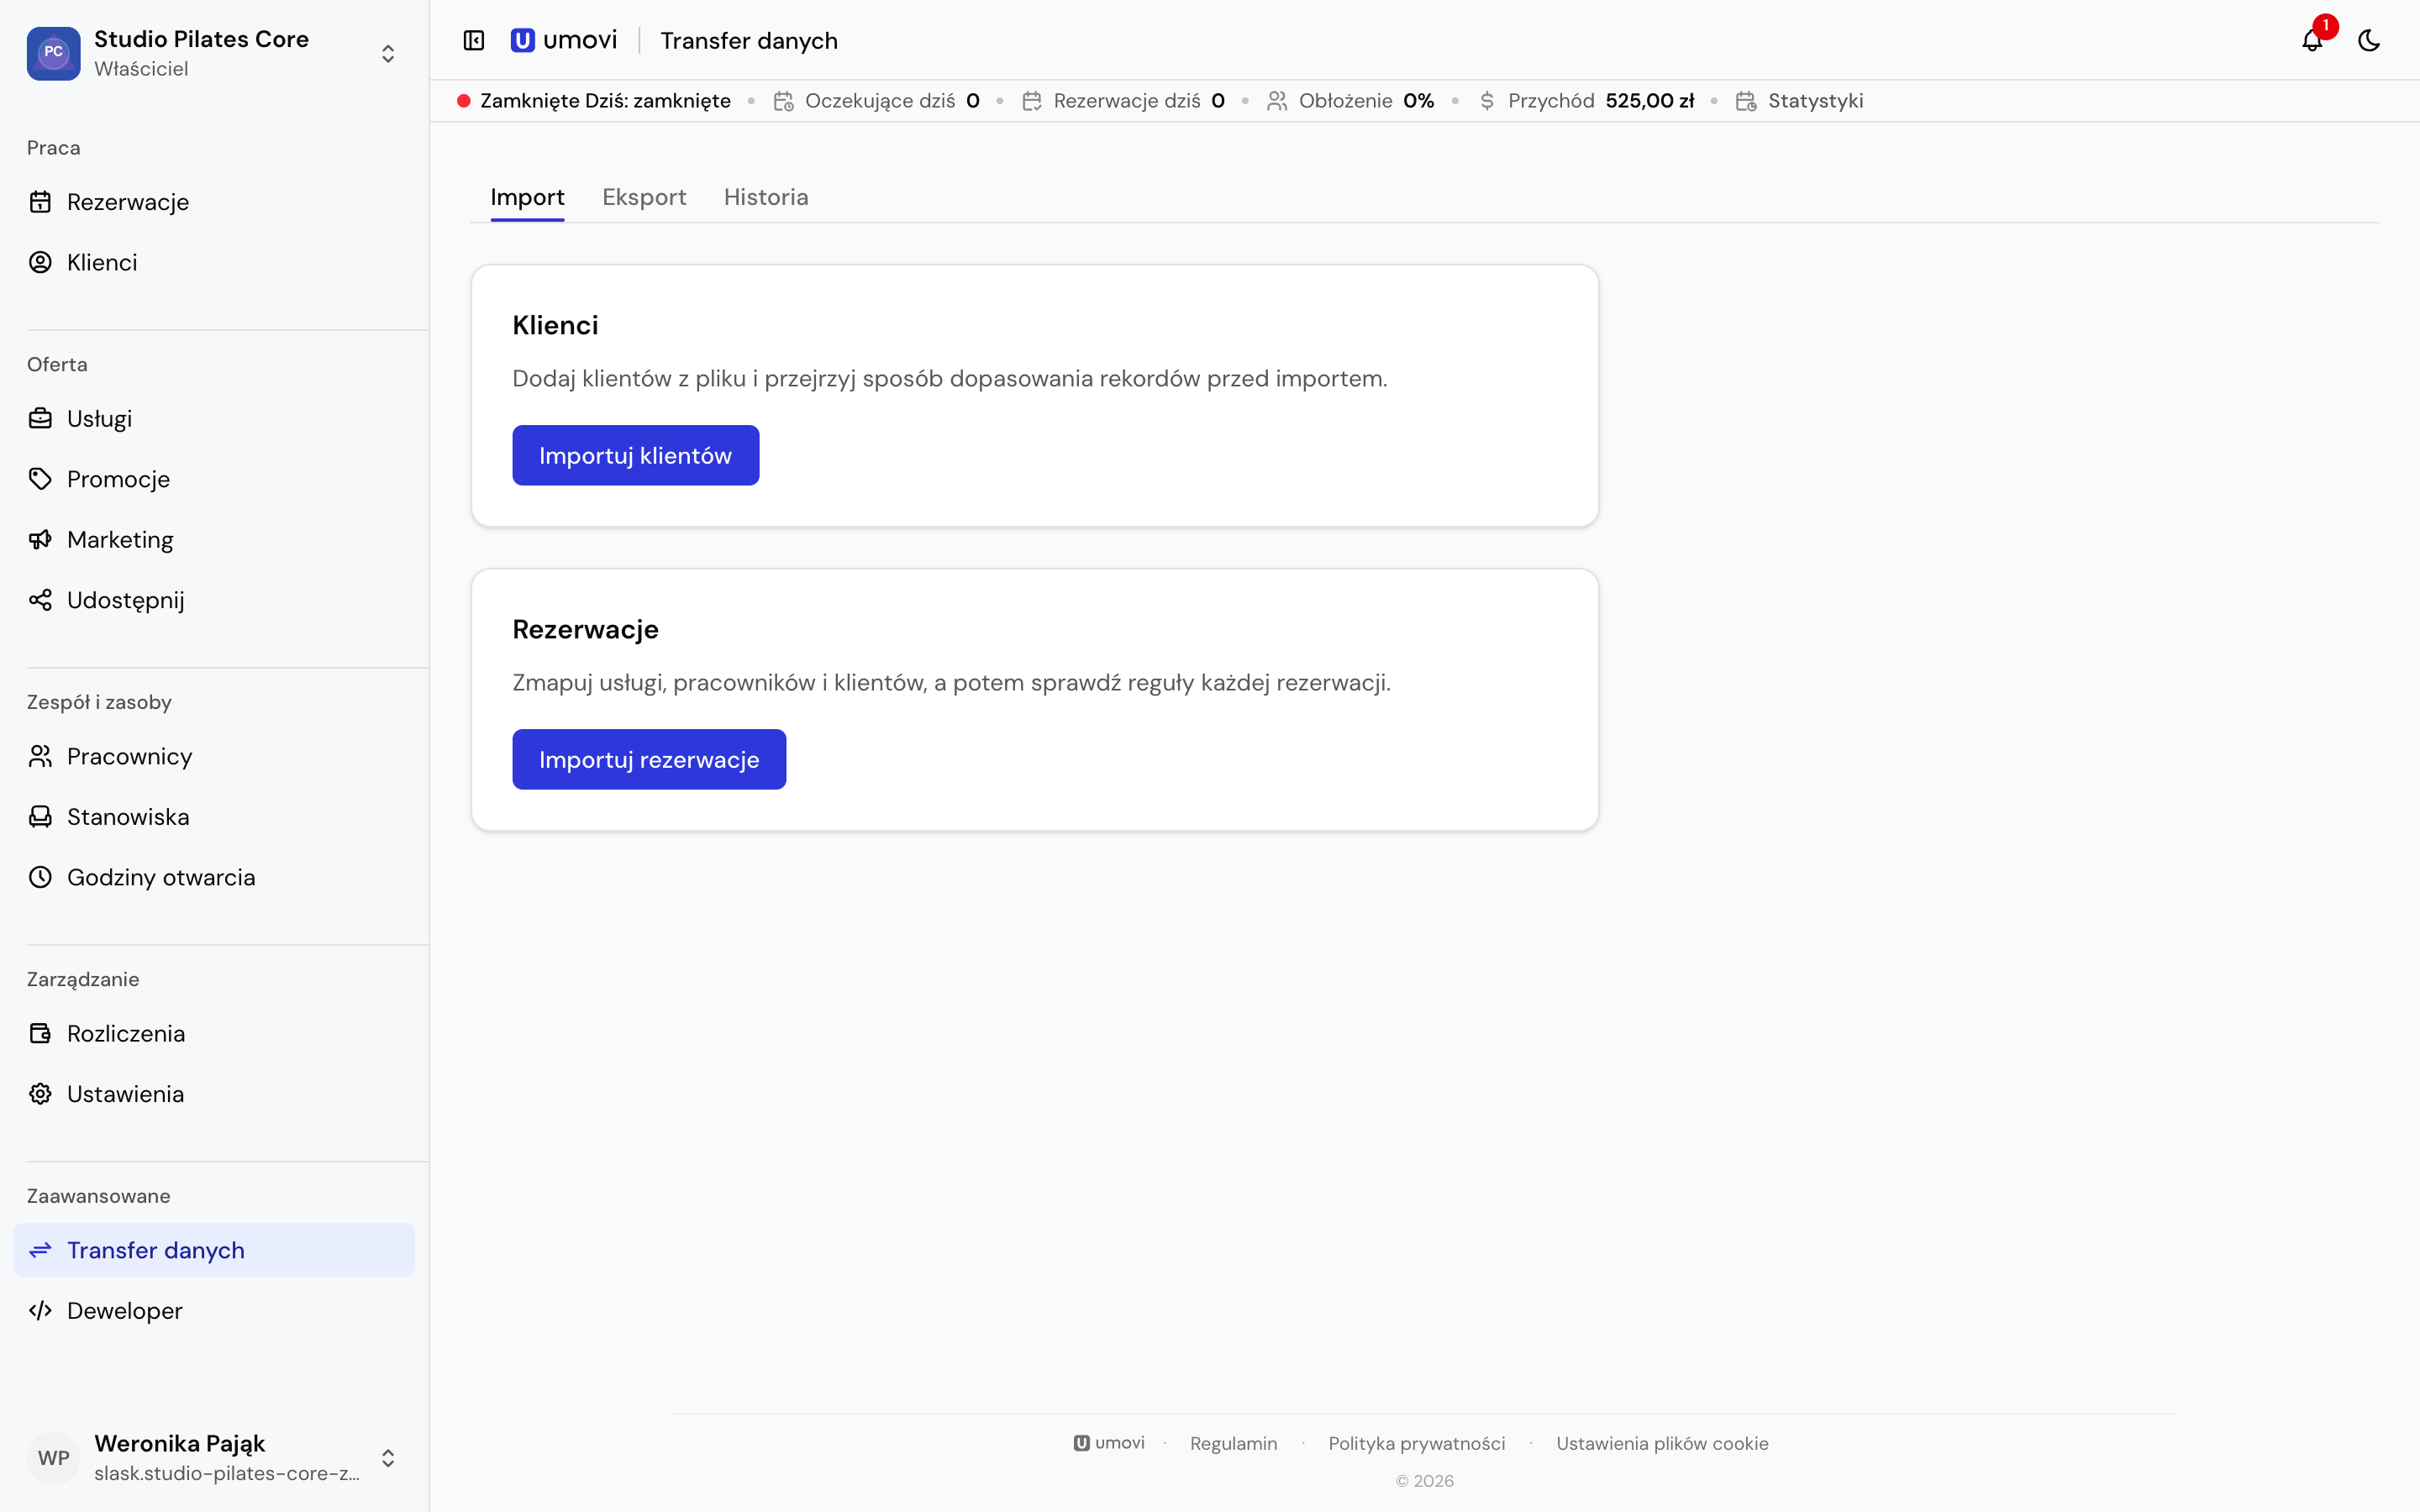
Data transfer in the web panel
Choose the data type, then follow the import or prepare an export. Screenshots show the Polish interface. Button labels may vary with the app language and version.

Import clients

  1. In Import, choose Import clients and upload the format requested by the wizard.
  2. Map file columns to client fields.
  3. Review matches to existing profiles and resolve ambiguous records.
  4. Run validation, fix errors and review the summary before saving.
  5. Check the result in History.

Import bookings

Choose Import bookings, map columns and match services, employees and clients. Services and employees must already exist; booking import does not create them. Add missing services and employees first.

Validation checks each row against the place's rules. Check dates, time zone, statuses and conflicts. Availability overrides enabled in settings are applied automatically during import. Review blocked and failed rows before retrying.

Export clients

In Export, choose clients and Prepare export. The task covers the place's client list. Processing runs in the background and large results are split into several CSV files. Download every part for a complete result.

Export bookings

Choose both dates; one export can cover up to 90 days. Use a preset if helpful and filter by status. No selected statuses means all statuses. Start the export and wait for Ready.

History and retries

History contains previous imports, exports and reports. A task can be queued, running, failed or expired. Check results before repeating an import because some records may already have been saved. If an export file expires, prepare a new one.

4.5

Developer tools and integrations

Manage integration clients and webhooks available for your place.

PathWeb panel → Developer
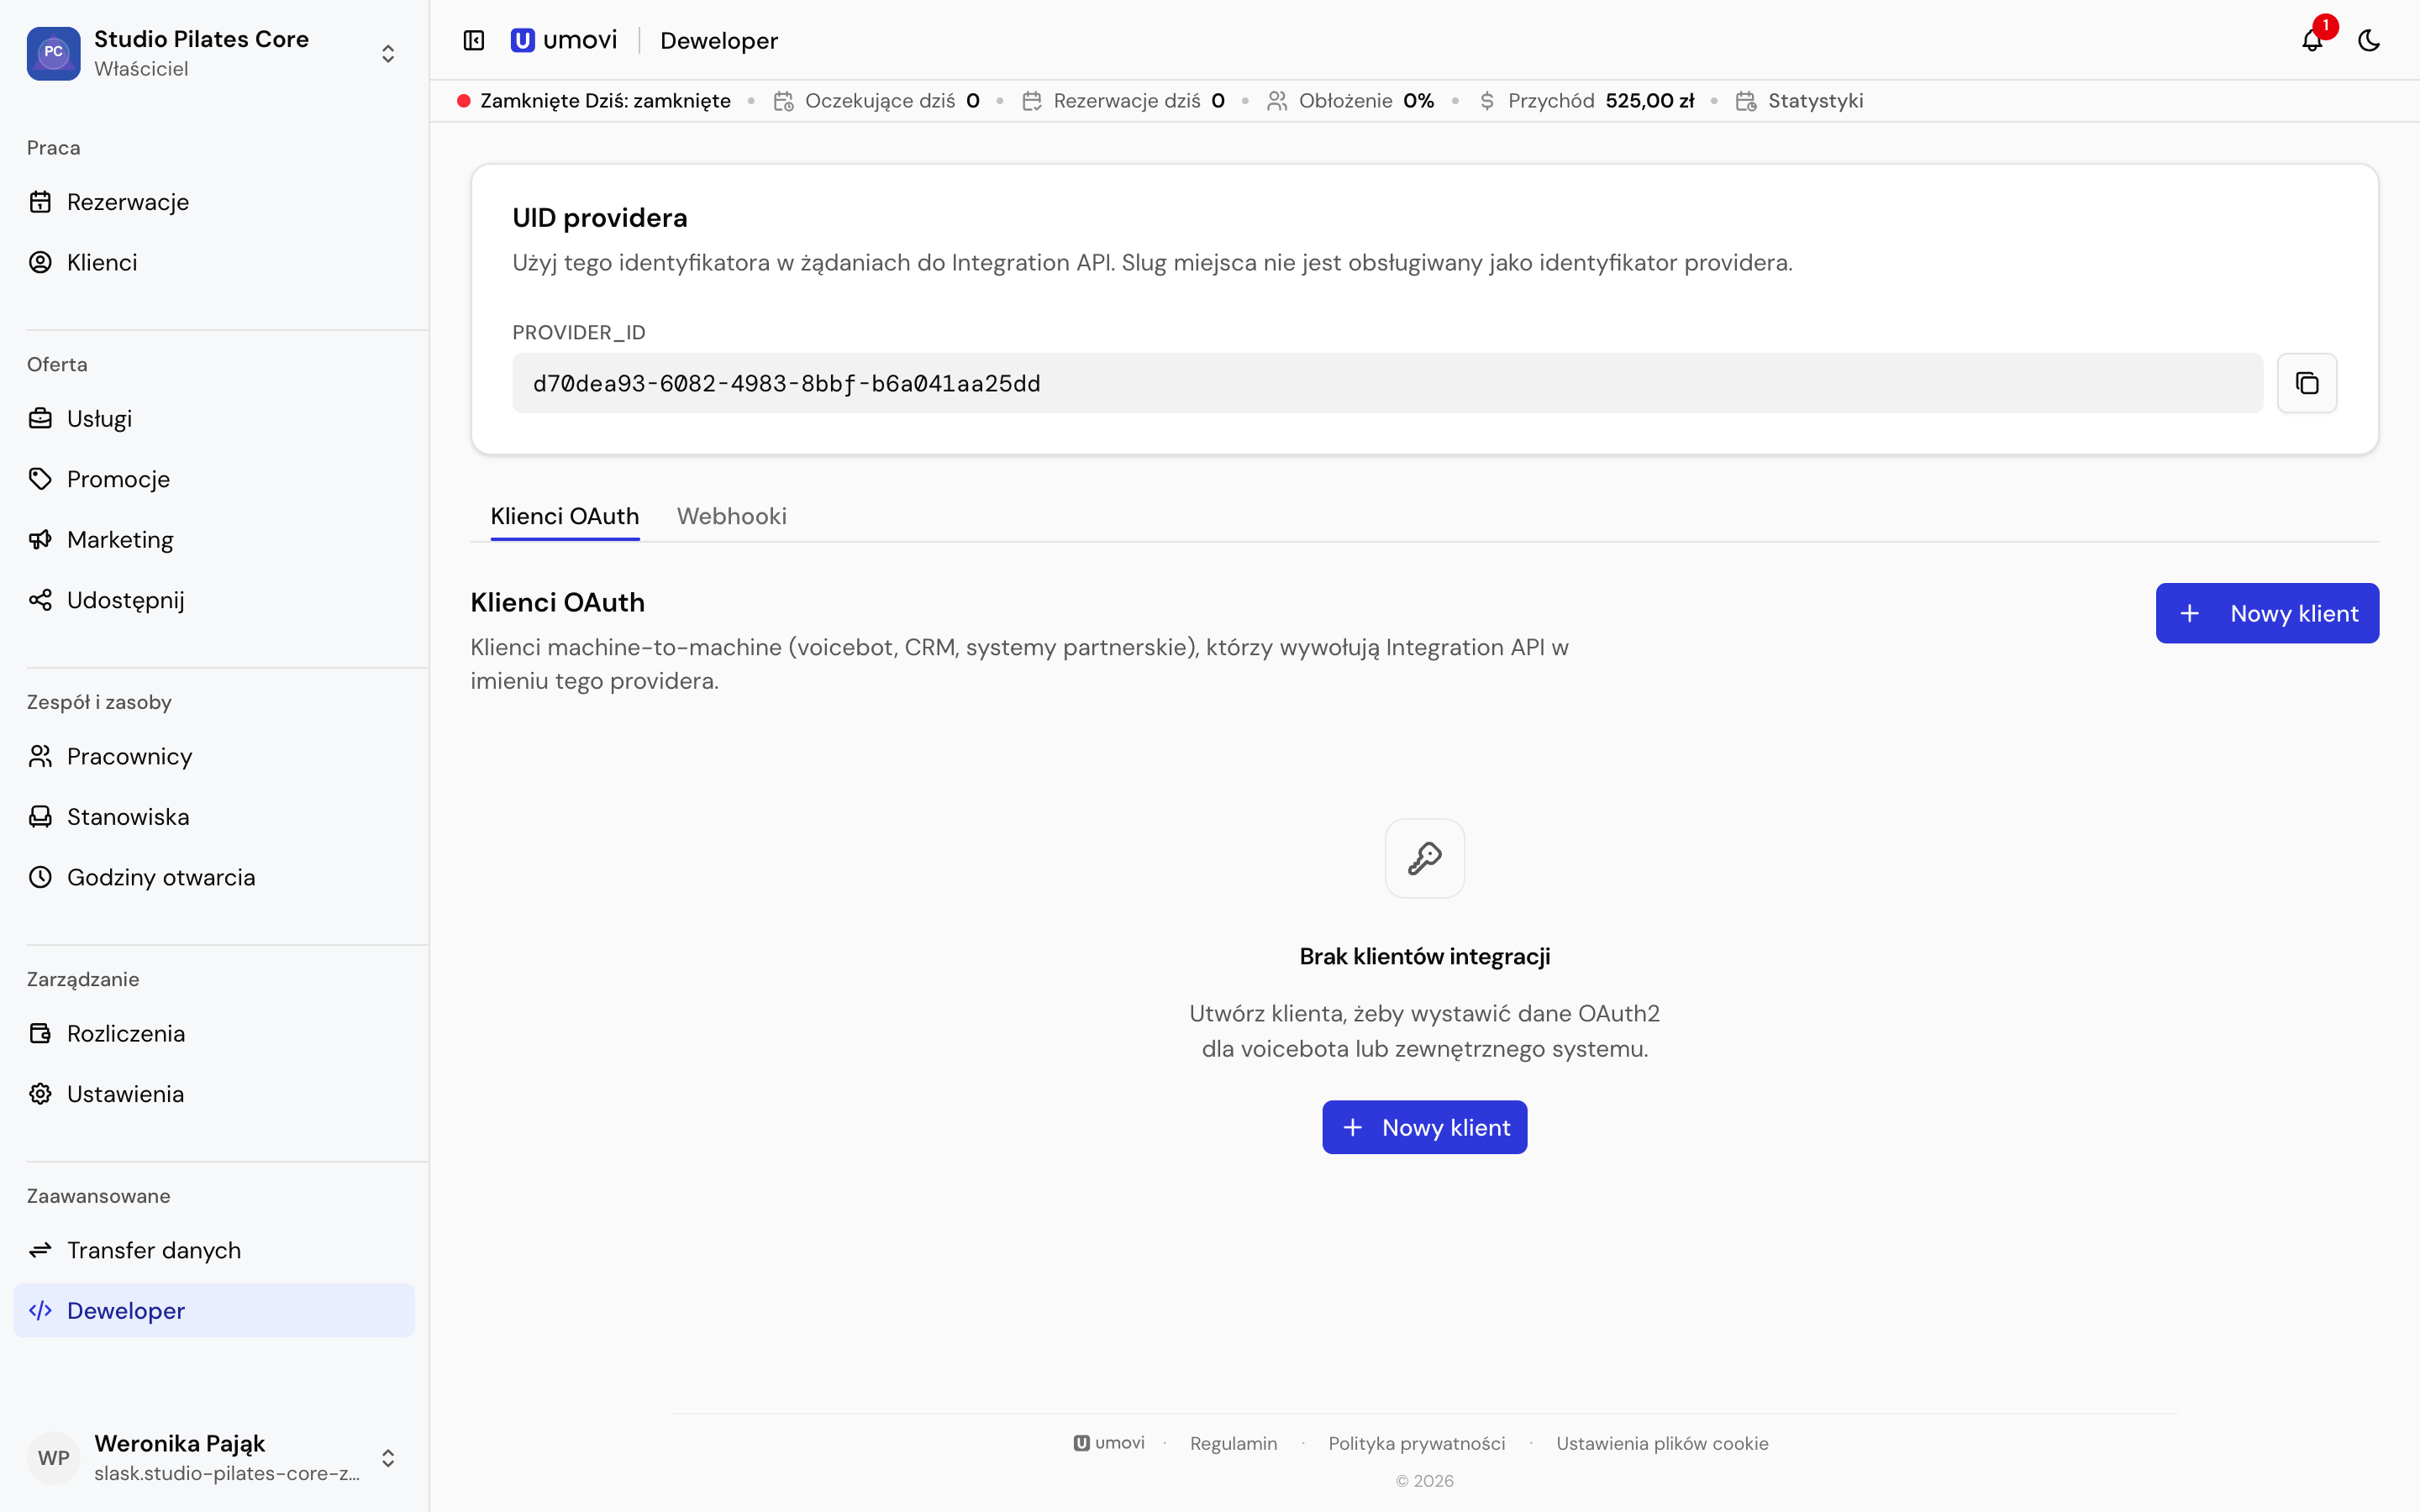
Developer section in the web panel
Integration configuration is available to the owner and depends on the plan. Screenshots show the Polish interface. Button labels may vary with the app language and version.

Integration clients

Create a client only for a trusted application. Save its identifier and secret securely. The secret may be shown only once; generate new credentials if it is lost.

Webhooks

Add the recipient's HTTPS address, choose events and save the signing secret. The recipient should verify signatures, handle retries and respond promptly. Monitor deliveries and disable unused endpoints.

Technical documentation

OAuth, REST, webhook and MCP details belong to the separate developer documentation portal. This help centre explains the place's visible settings only.

Chapter 5

Mobile app — calendar

5.1

Umovi Calendar overview

A dedicated guide to managing your place on iPhone and iPad.

Umovi Calendar supports daily operations. Complete place configuration remains in the web panel.

Main tabs

  • Calendar — day and employee calendars, bookings and availability exceptions.
  • List — pending, upcoming and historical bookings, plus search.
  • Clients — client list, profiles, bookings and records.
  • Account — place, sharing, notifications, language, security and devices.

Open notifications using the bell in the top bar.

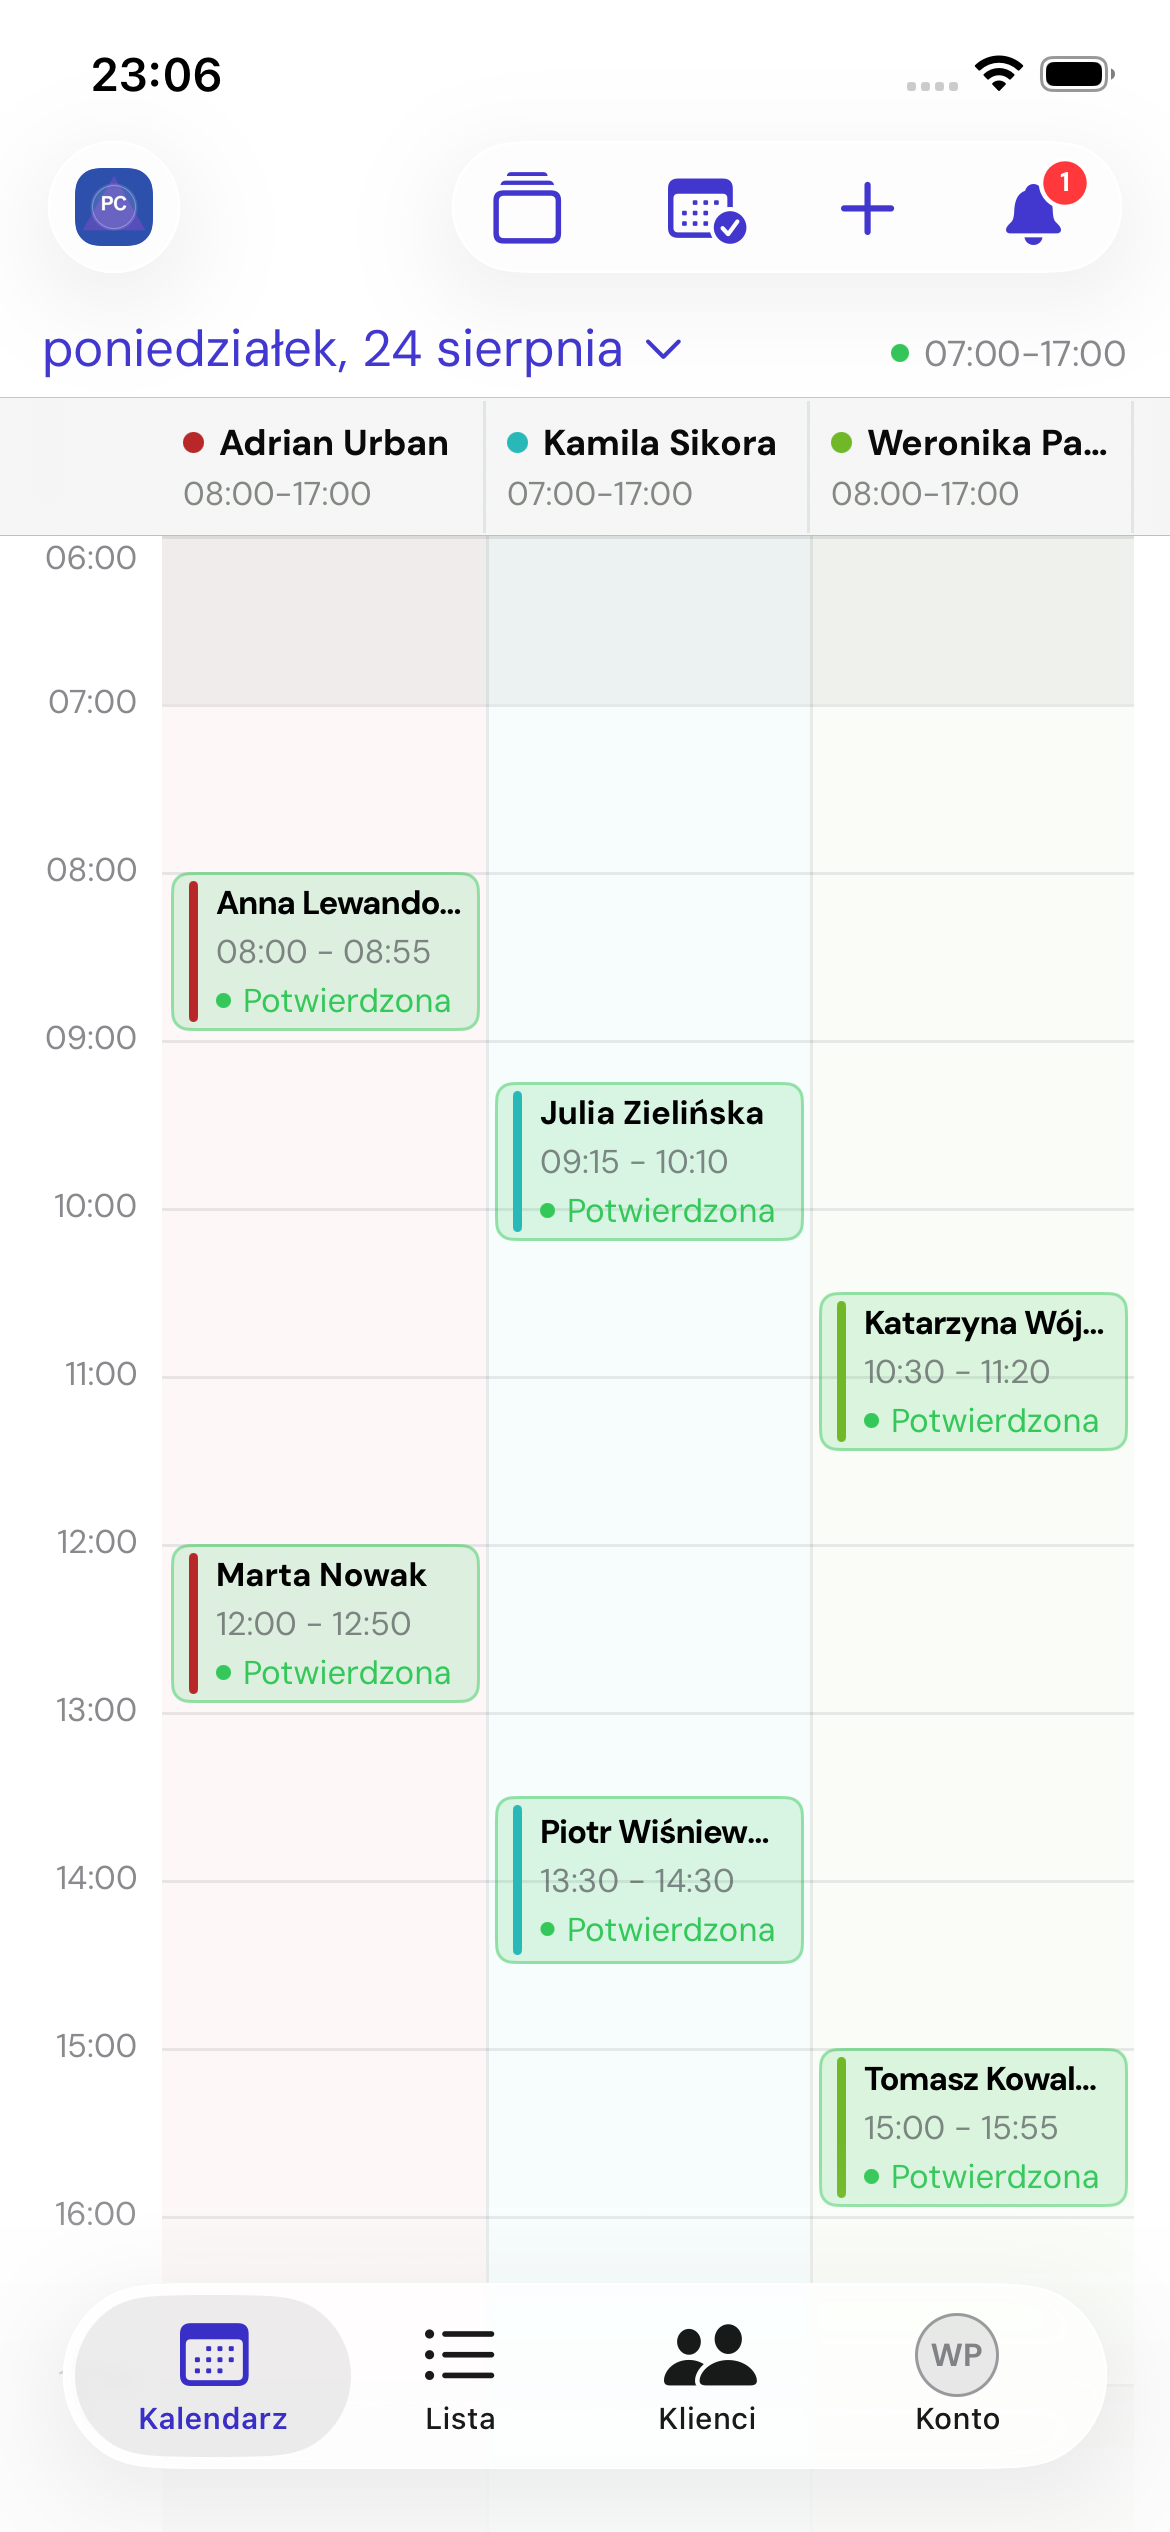
Team calendar in Umovi Calendar
Daily view with employee calendars and bottom navigation. Screenshots show the Polish interface. Button labels may vary with the app language and version.

Settings in the web panel

For services, categories, workstations, regular opening hours, promotions, marketing, billing, data transfers and integrations, use the web panel guide.

Open tabs

On iPad and in the booking workspace, you can keep up to 15 tabs open. Hiding the workspace keeps the form. Closing a tab with unsaved changes requires confirmation.

5.2

Daily and team calendars

Change dates, choose employees and open bookings from the timeline.

PathUmovi Calendar → Calendar
Daily team calendar in the app
Employee columns show working hours, bookings and exceptions. Screenshots show the Polish interface. Button labels may vary with the app language and version.

Change the day

Tap the date at the top to select a day, or use the previous and next day controls. The status beside the date shows whether the place is open.

Choose calendars

Owners and managers can select several people using Choose employee calendars, Show all or Hide all. Employees see the scope permitted by their access.

Bookings on the timeline

Tap a booking block to open details. Colour and labels indicate its status. Each column belongs to a different employee.

Edit on the calendar

In booking details, choose Edit on calendar to move the booking or adjust its start and end. Precise five-minute actions are also available. Saving checks conflicts again.

The plus button

Tap briefly to create a booking. Press and hold for a menu containing bookings and employee or place availability exceptions.

See the full list in Booking list and search.

5.3

Availability exceptions in the app

Add breaks, leave, meetings, extra shifts and place-wide exceptions.

PathCalendar → press and hold + → Manage exceptions
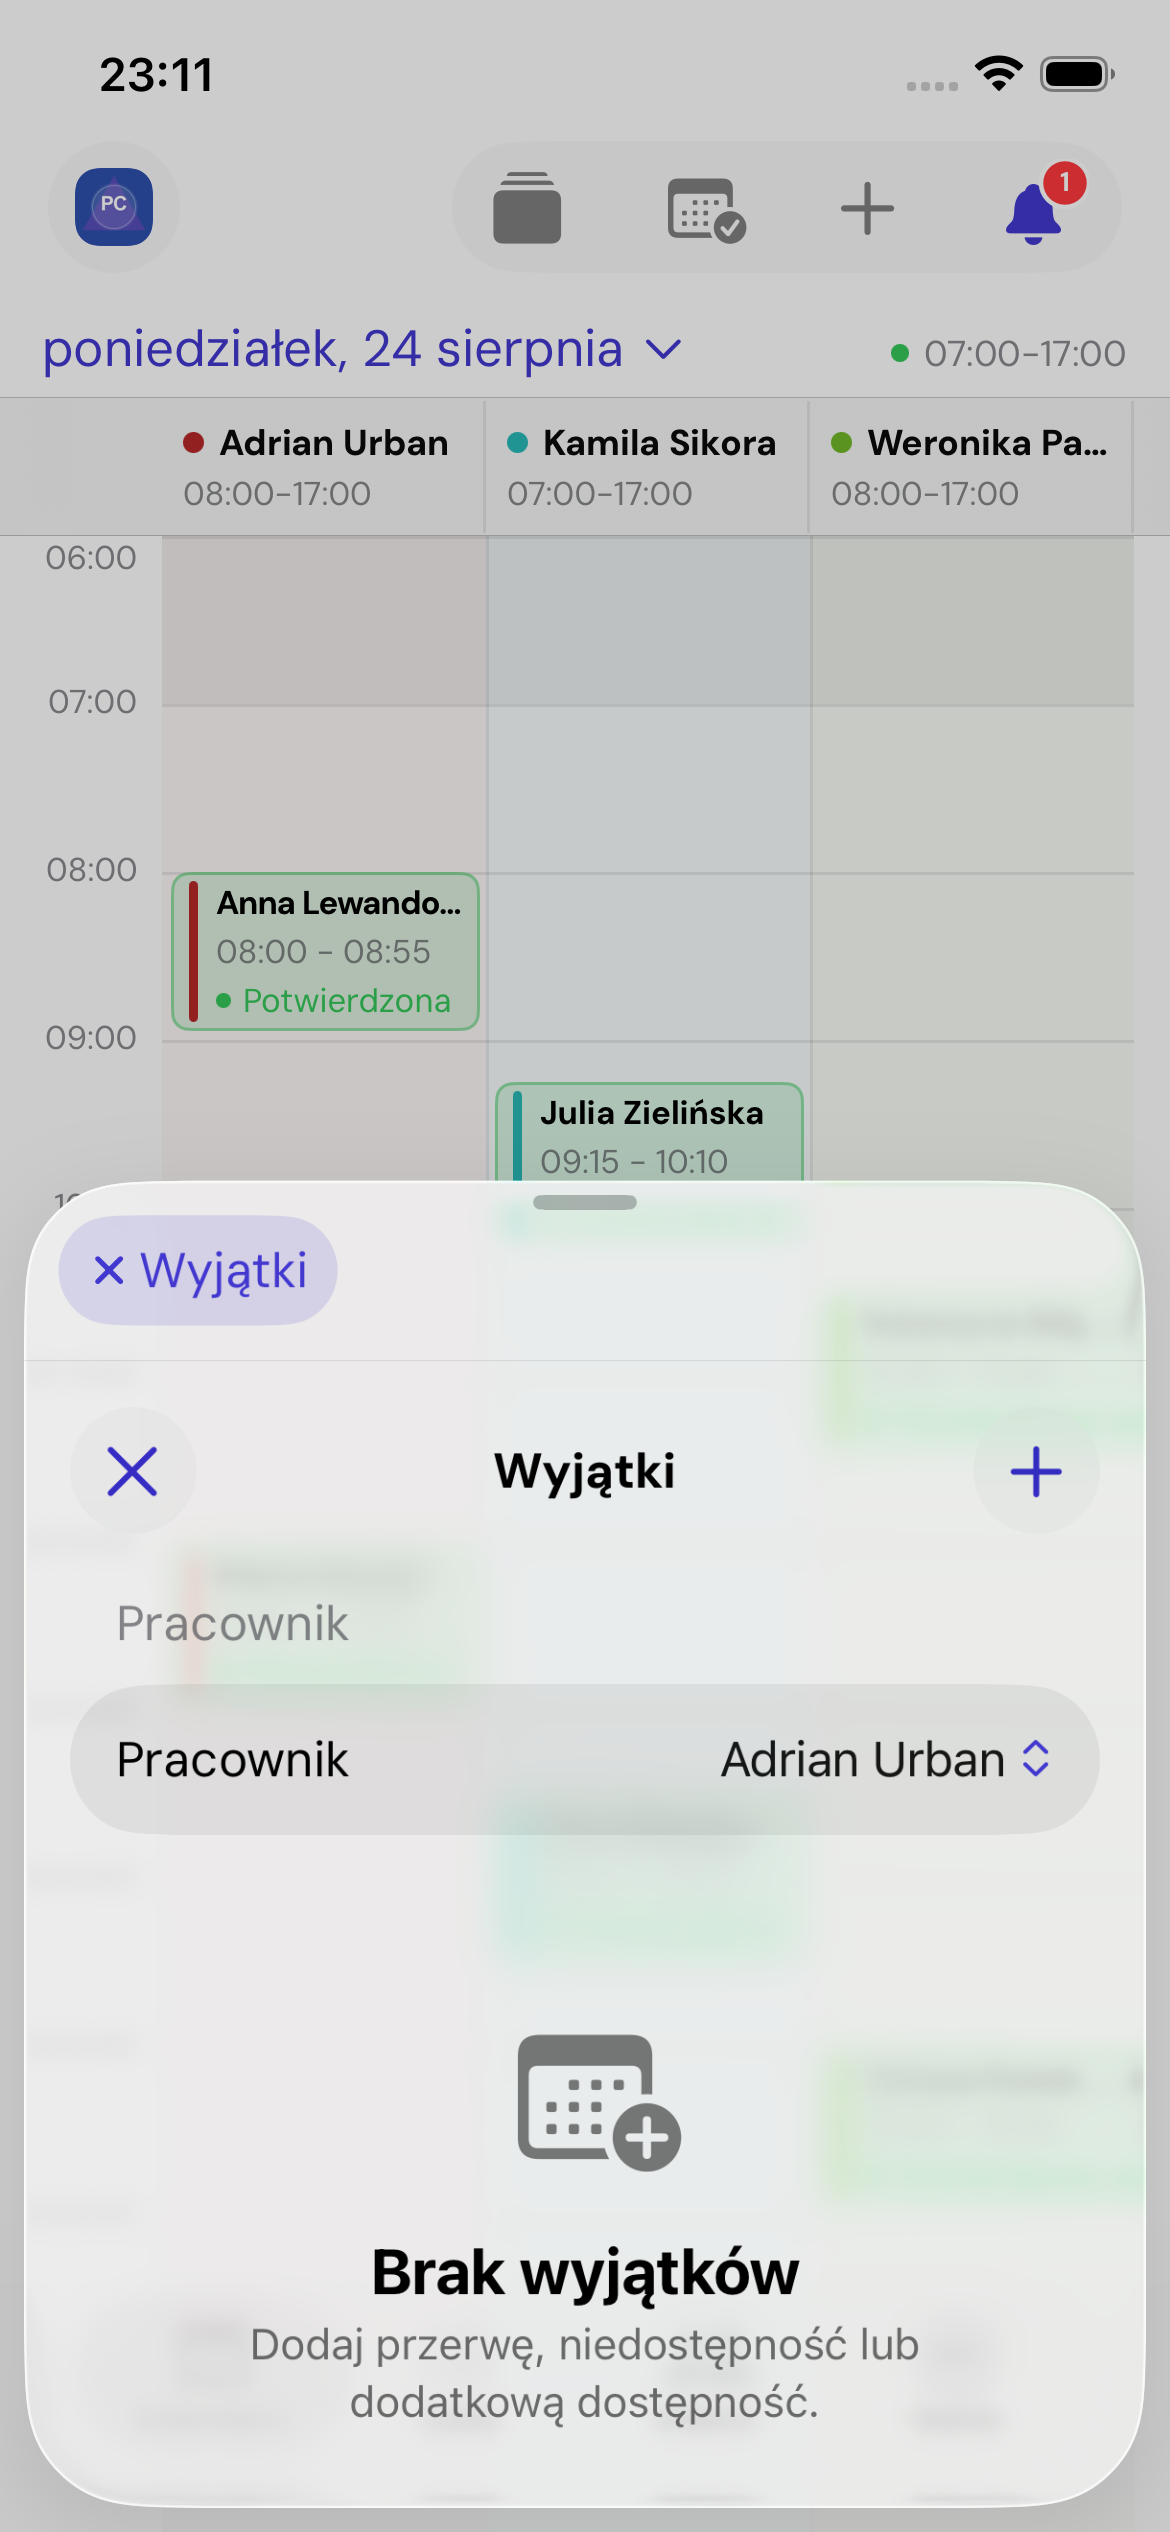
Availability exceptions workspace
Exceptions open in their own tab alongside booking forms. Screenshots show the Polish interface. Button labels may vary with the app language and version.

Types

For an employee, choose Unavailability or Additional availability. Categories describe the reason: break, leave, holiday, meeting, other or extra shift.

Place-wide options are Place unavailability and Exceptional opening hours.

Add an exception

  1. Choose Add availability exception or Add place exception.
  2. Select an employee for an employee exception.
  3. Choose its type and category.
  4. Set a one-off date range or weekly recurrence.
  5. Choose all day or start and end times.
  6. Optionally add a description, then save.
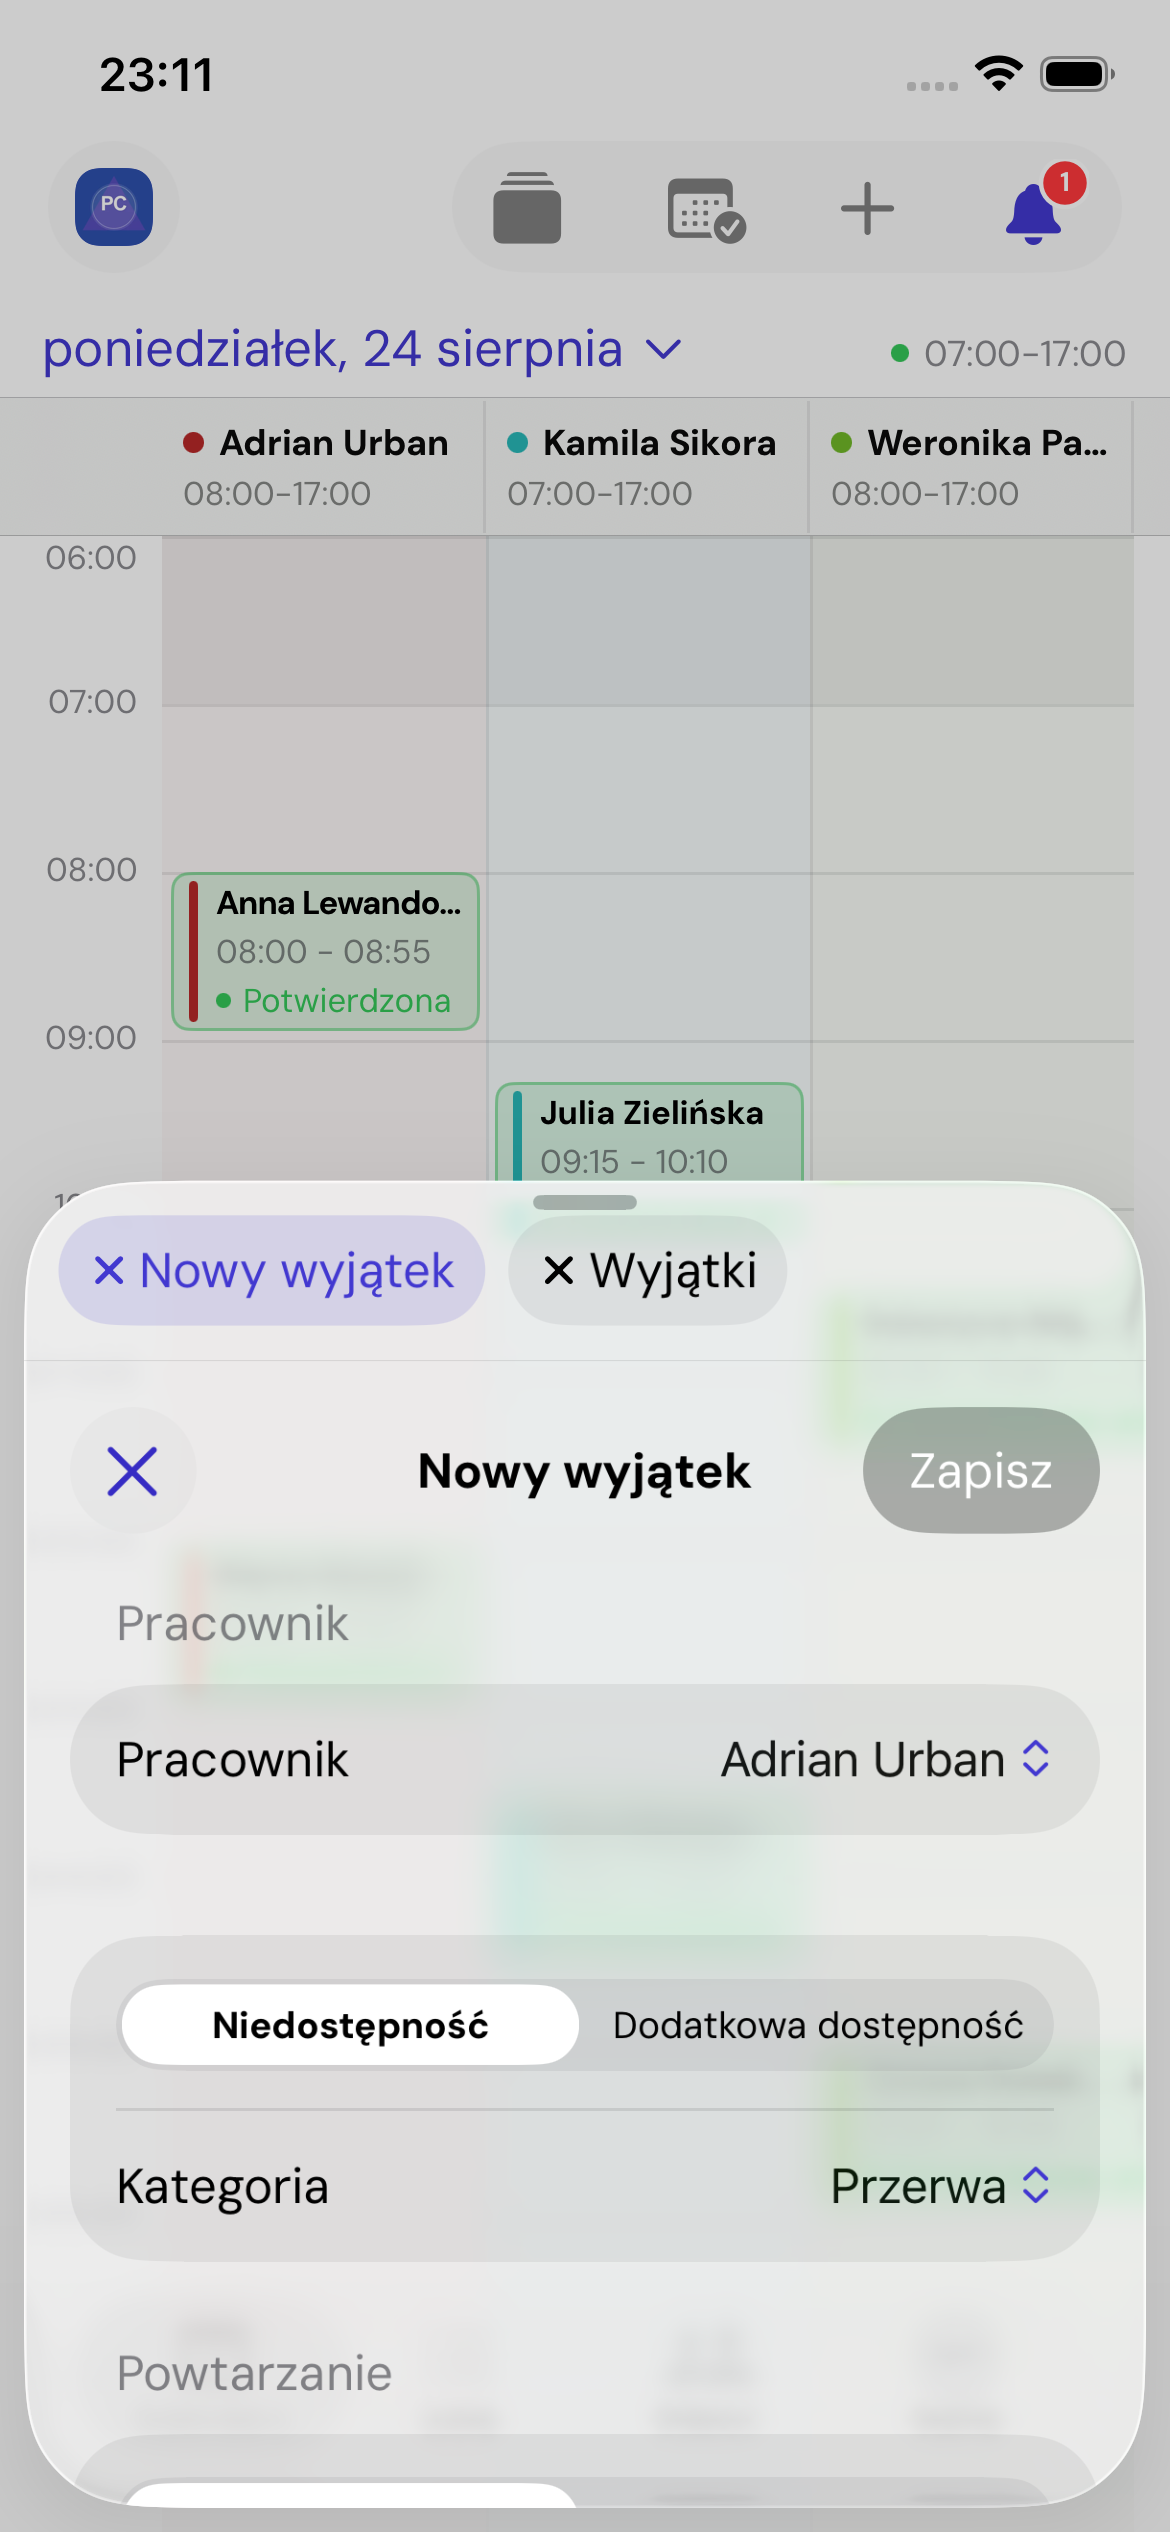
New availability exception form
Choose unavailability or additional availability, with one-off or weekly dates. Screenshots show the Polish interface. Button labels may vary with the app language and version.

Edit or delete

Open an item, update its details and save. Deletion cannot be undone. Dates and times use the place's time zone.

5.4

Booking list and search

Browse pending, upcoming and historical bookings, and narrow the results.

PathUmovi Calendar → List
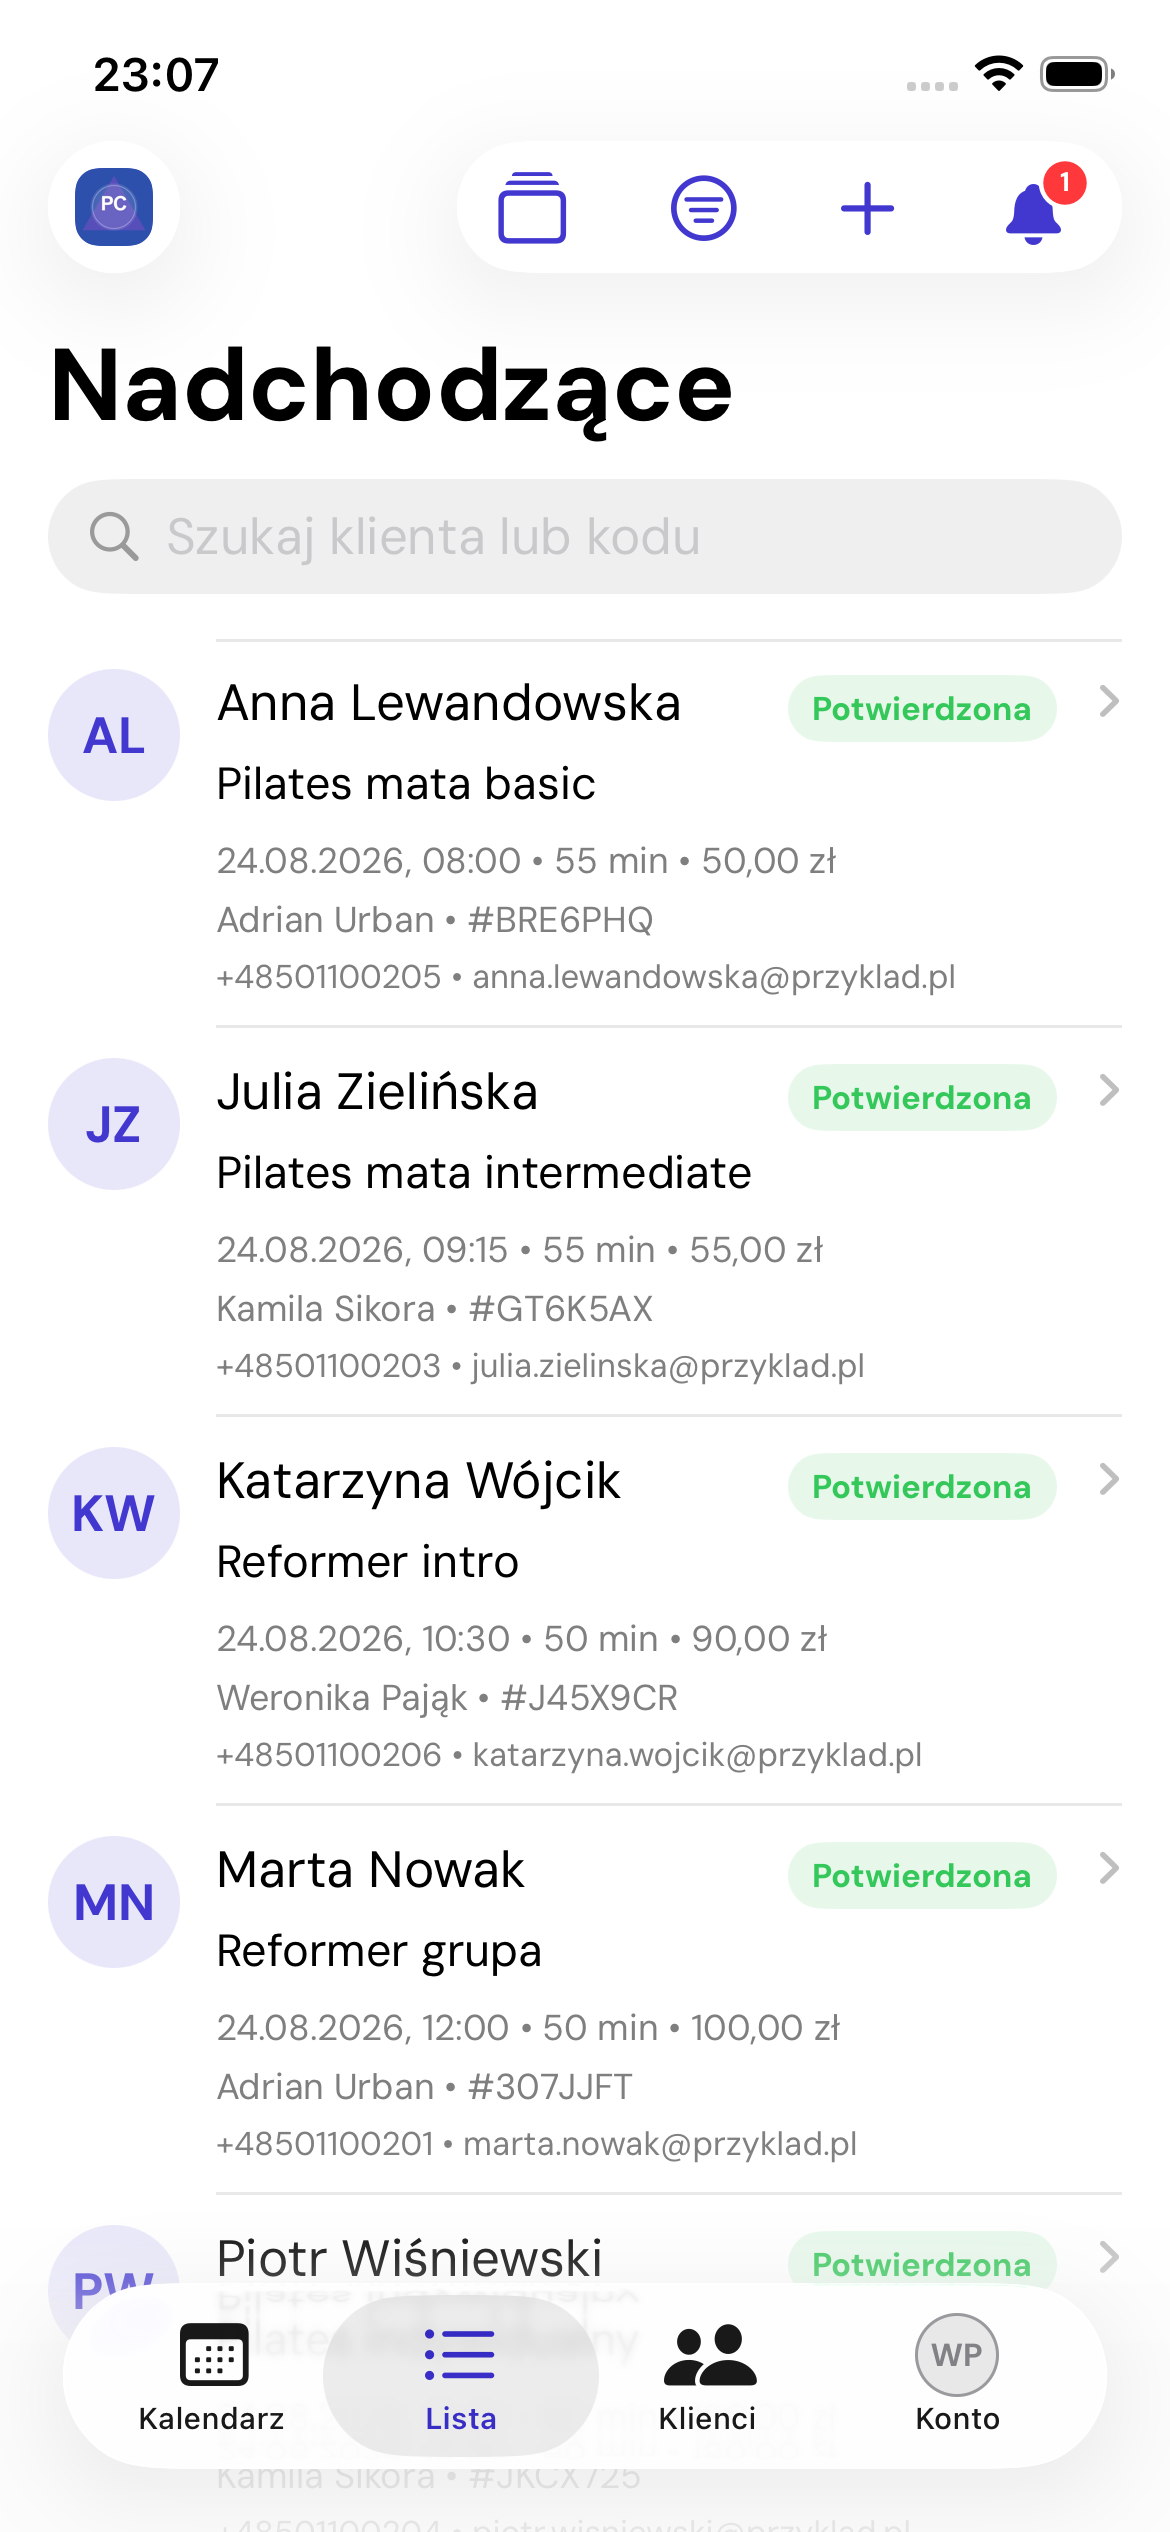
Booking list in the app
Search and filters with separate sections for current and historical bookings. Screenshots show the Polish interface. Button labels may vary with the app language and version.

Sections

  • To confirm — new requests and time changes needing a decision.
  • Upcoming — confirmed future bookings.
  • History — completed and cancelled bookings, and no-shows.

Search and filters

Enter a client name or booking code. Use the filter button to narrow by employee or state. Pull down to refresh.

Open a booking

Tap a row to open a workspace tab. You can return to the list without losing the form.

Web equivalent: Booking centre.

5.5

Create a booking in the app

Start from the calendar or list and find an available time.

PathCalendar or List → +
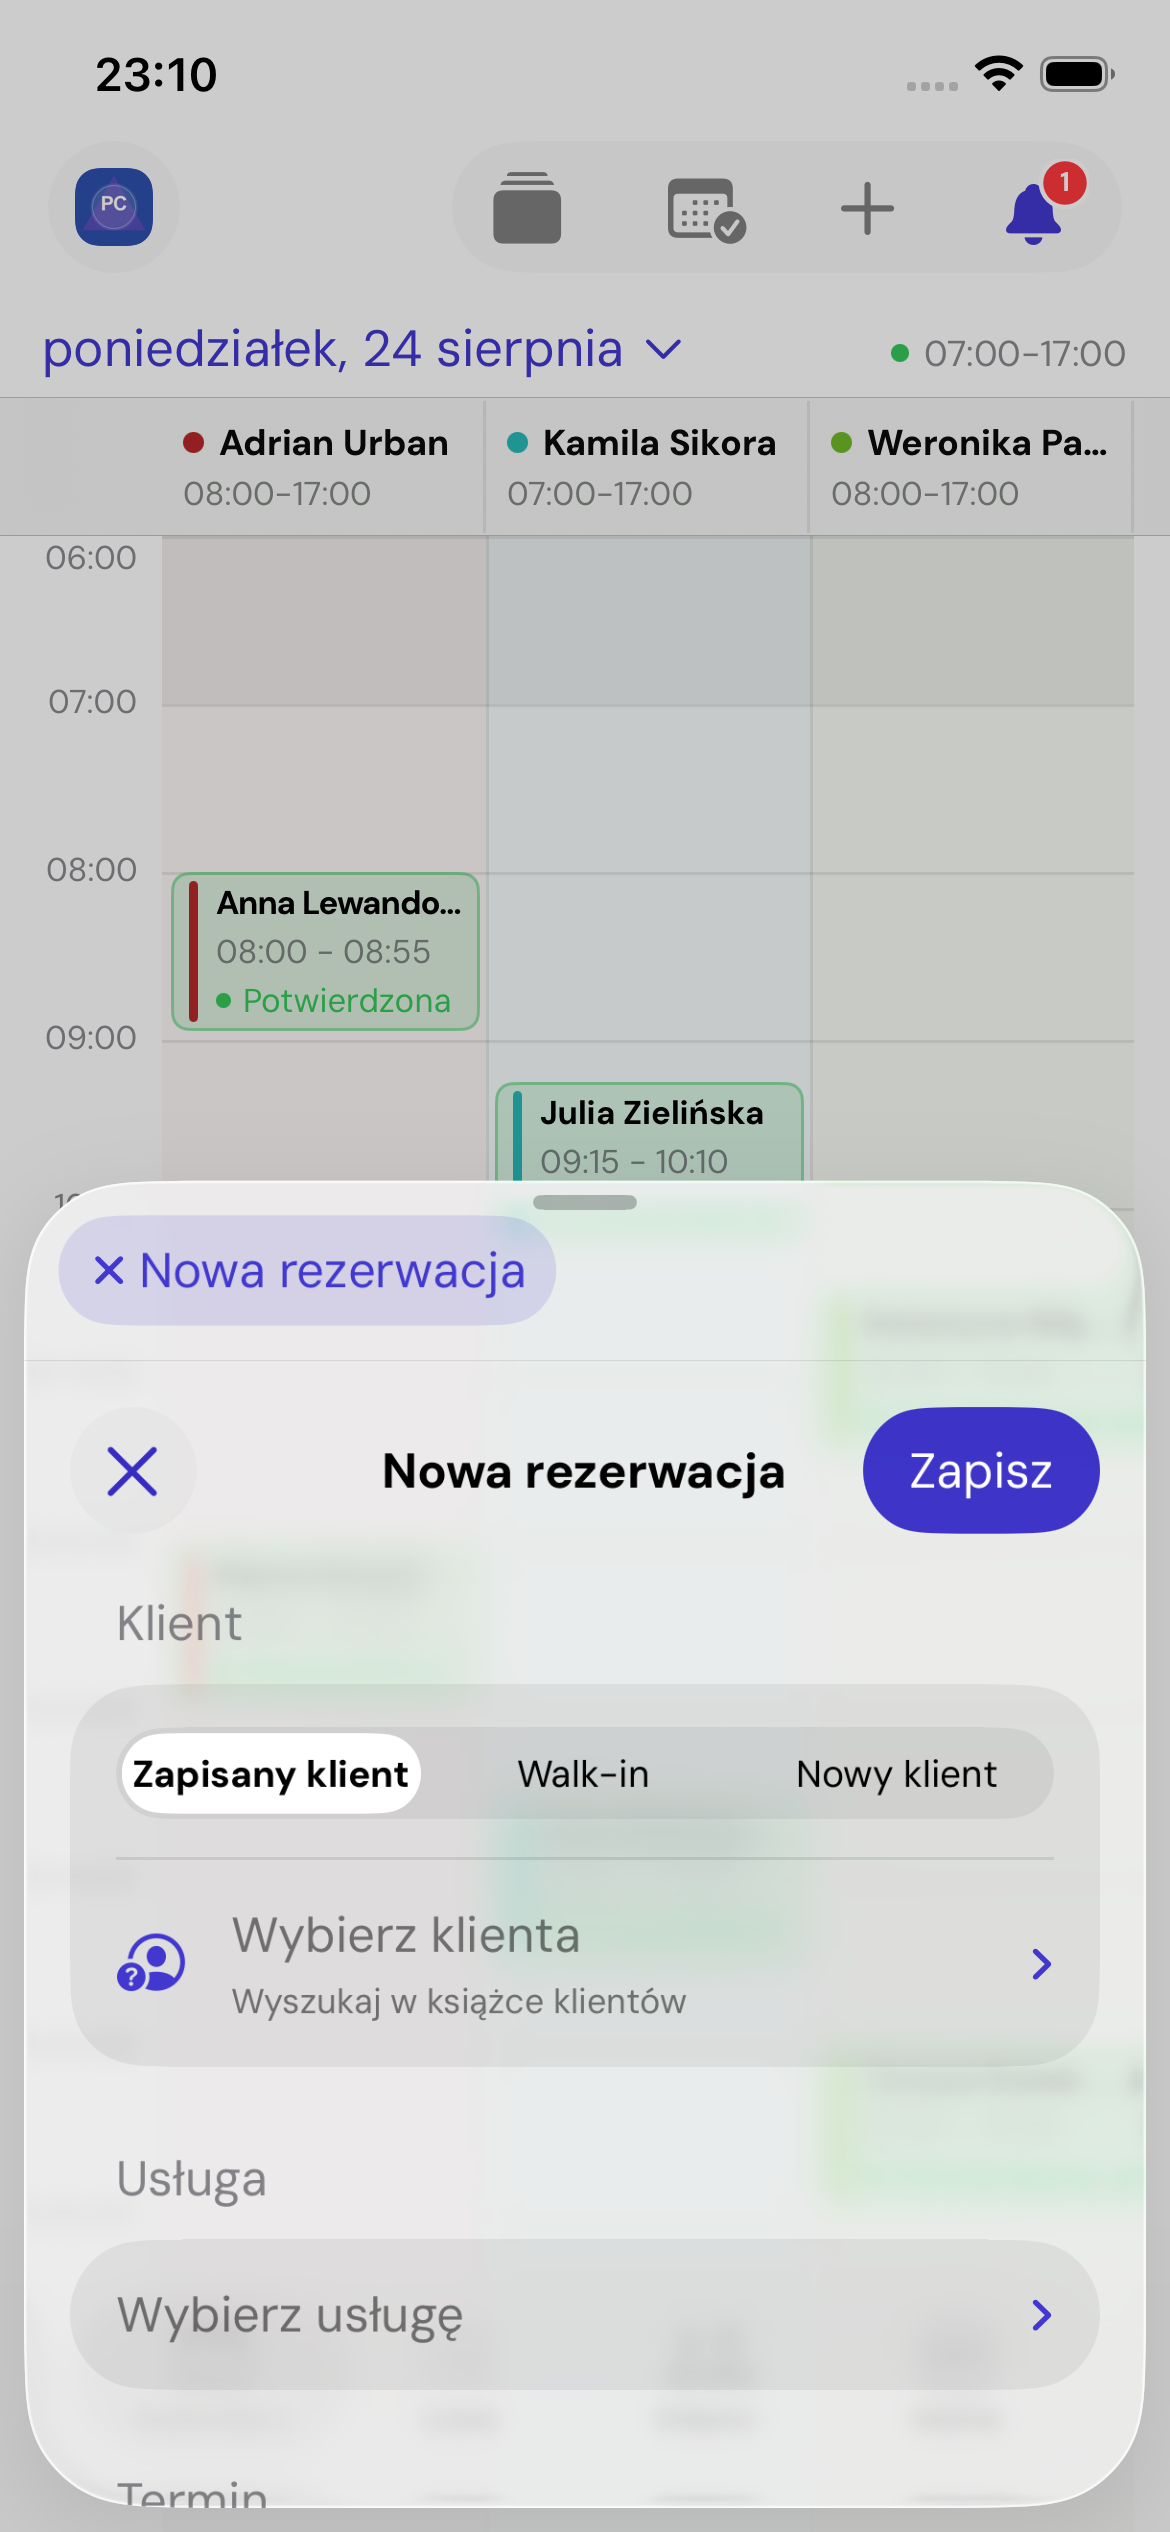
New booking in Umovi Calendar
The booking form opens in a tab above the calendar. Screenshots show the Polish interface. Button labels may vary with the app language and version.

Client

Choose Saved client, Walk-in or New client. For a new client, enter at least an email address or phone number and confirm that their details may be used to manage bookings.

Service and employee

The catalogue shows categories and services assigned to the selected employee. Internal services are available for the team's manual bookings and labelled Team only.

Select an employee or Any available. Automatic assignment chooses a free employee who performs the service when you save.

Time

Set the start and duration, or use Find the next available time. Select an available day and time from the results. Check availability again if you change the service or employee.

Additional details

Set the price and Internal note, up to 2,000 characters. Only people with access to the booking can see this note; the client cannot. If the place allows it, you can also keep the time available for online bookings.

Conflicts

Conflicts may be overridable or blocking. Causes include an occupied employee, working hours, an exception, a closed place or unavailable workstation. For an allowed conflict, the app offers Save anyway.

Web equivalent: Create a booking in the web panel.

5.6

Edit bookings and statuses in the app

Update booking details, assign a client and change the status.

PathCalendar or List → tap a booking

Booking details

Details show the client, code, service, employee, start, end, duration, price, creation source, update dates and status.

Edit

Select Edit and update the available fields. For a walk-in, use Assign client; the assignment takes effect when saved. A pinned client-record entry appears as a booking note.

You can also use Edit on calendar to move the block or change its duration on the timeline.

Internal note

Add or edit the Internal note for the team, up to 2,000 characters. The client cannot see it. It is separate from a pinned client-record entry and the client conversation. Save before closing the tab.

Status actions and reasons

  • Confirm — accept a pending booking or a new time from the client.
  • Cancel — choose a reason on the place's side.
  • Complete — record that the service was performed.
  • No-show — record that the client did not attend.

The cancellation reason may be visible to the client and team. Actions are not undone by simply toggling the button back; events remain in history.

Unsaved changes

The app asks whether to discard changes when closing a tab. Switching places also warns about unsaved forms.

Web equivalent: Booking statuses.

5.7

Booking messages and history

Discuss a booking with the client and review the sequence of changes.

PathBooking → Messages or Change history

Messages

Each thread belongs to one booking. Send messages, check read status, edit your own content, unsend messages and view revision history.

Sending may be unavailable when:

  • the booking is a walk-in;
  • the client has no linked Umovi account;
  • the place has disabled messages;
  • the booking's messaging window has ended.

Edits and unsending remain in the place's audit history even when the client can no longer see the content.

Change history

History shows creation, detail edits, rescheduling, statuses and automatic completion. Each entry includes the time and the person or source when known.

Open from a notification

A message or booking-change notification can open the relevant place and tab. If you lack access, the app shows a message without revealing the booking data.

Web equivalent: Edits, messages and history.

Chapter 6

Mobile app — clients and account

6.1

Client list and profiles in the app

Find, sort, add and edit clients on your phone or tablet.

PathUmovi Calendar → Clients
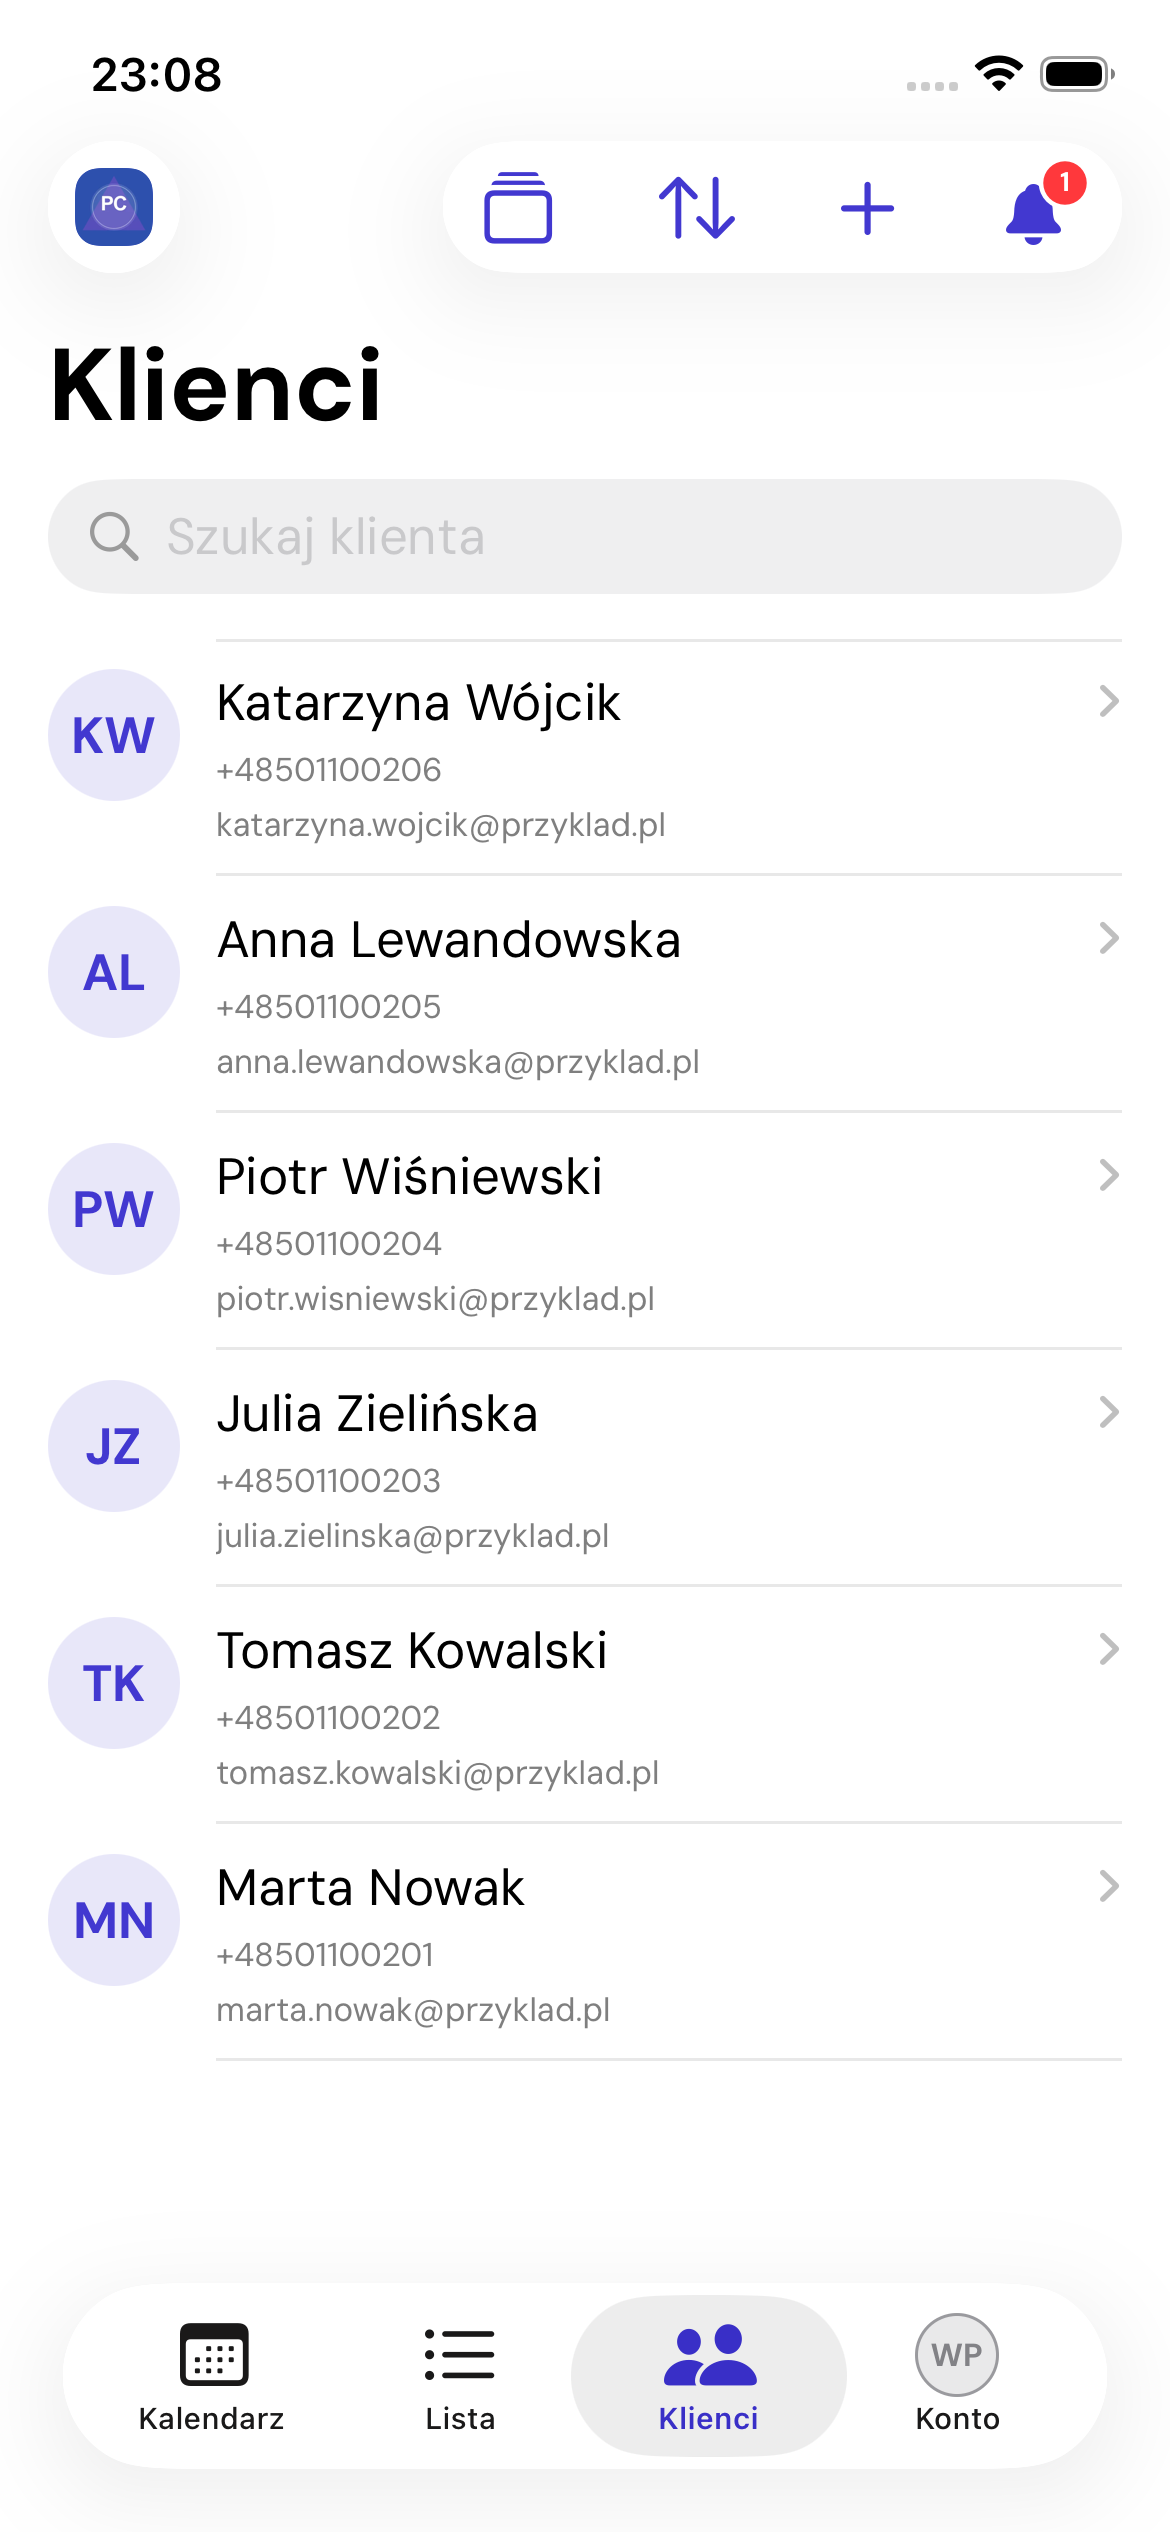
Client list in the app
Example clients and formatted contact details. Screenshots show the Polish interface. Button labels may vary with the app language and version.

List

Search by name, phone or email. Sort by newest, name, email or phone. Pull down to refresh.

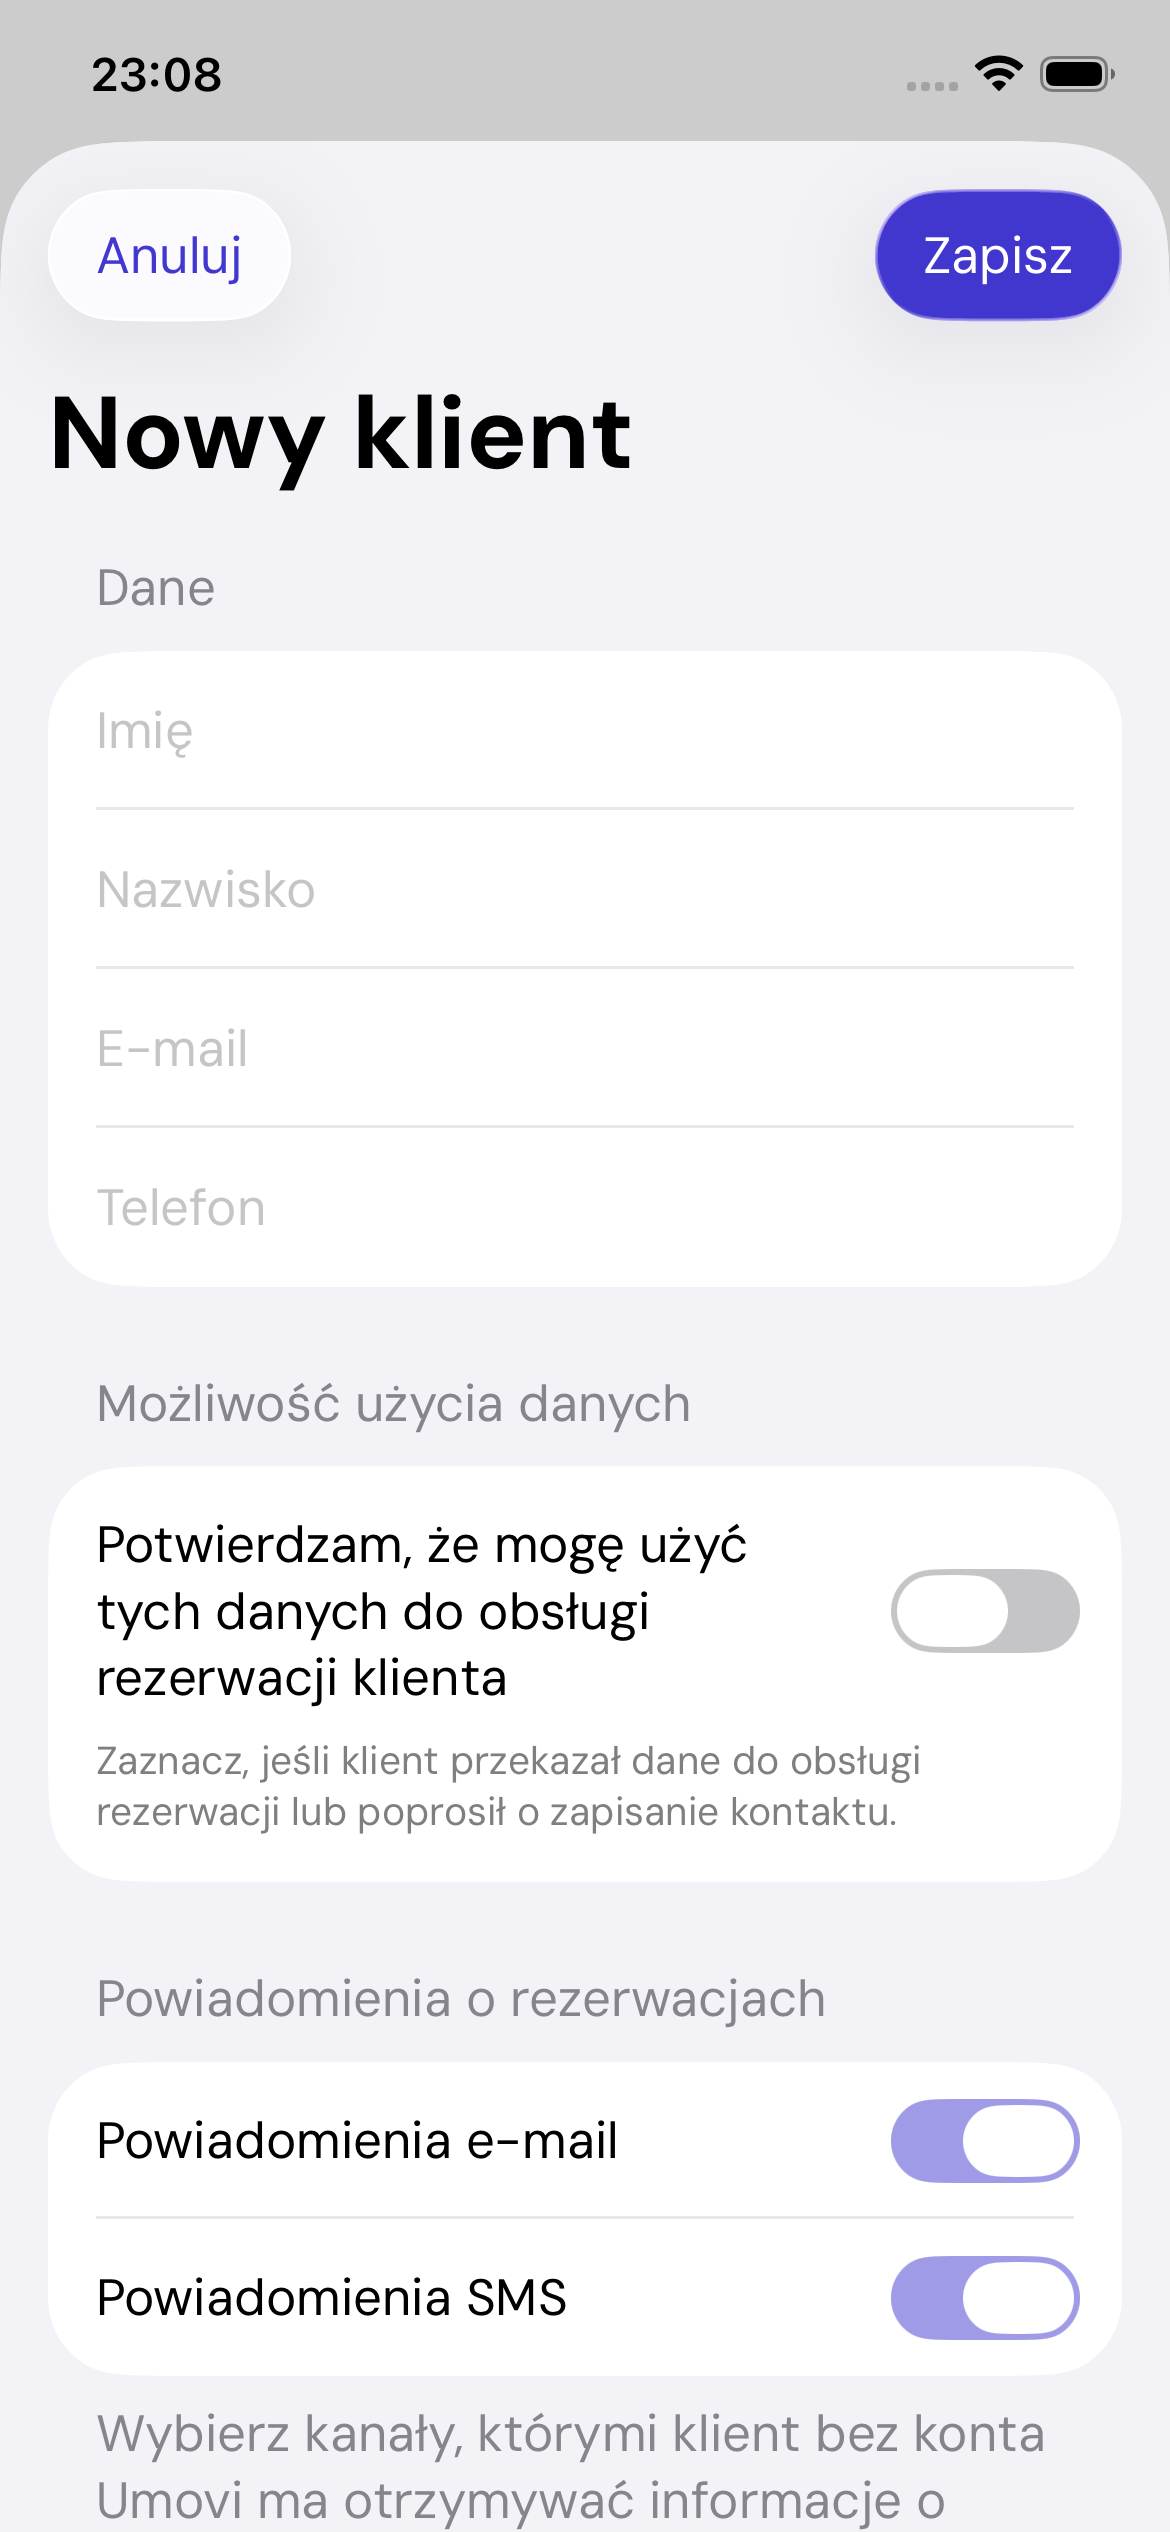
Add a client

Tap plus and enter first and last name, plus at least an email address or phone number. Set notification channels, any marketing consent and the option to invite the client to Umovi.

New client form in the app
Details, permission to use data, communication and marketing consent are separate. Screenshots show the Polish interface. Button labels may vary with the app language and version.

Profile

The profile shows contacts, details, recent bookings and a button to open the client record. Phone numbers and email addresses are actionable links when the system supports them.

Edit

Update details, consent and communication settings, then save. If a verified email or phone points to another profile, the app stops the save and asks you to check the duplicate.

Web equivalent: Clients and communication.

6.2

Client records and attachments

Add notes, preferences, photos and documents, and pin a short note to bookings.

PathClients → client profile → Open client record

Add an entry

Choose Add entry, select Information, Preference or Important, and enter the text. An entry can contain text or an attachment.

Attachments

Attach JPG/PNG images or PDF documents. Each entry can have up to five files; the app also shows the maximum size per file.

Open an attachment, save it to Files, share it or remove it without deleting the whole entry.

Pin to bookings

For an entry containing text, select Pin to bookings. The first 300 characters appear alongside bookings to give the team a brief reminder.

Order and deletion

Reorder, edit, select or delete entries in bulk. Deleting an entry also removes its attachments.

6.3

Links and QR codes in the app

Share your place or a service without opening the web panel.

PathAccount → Share place
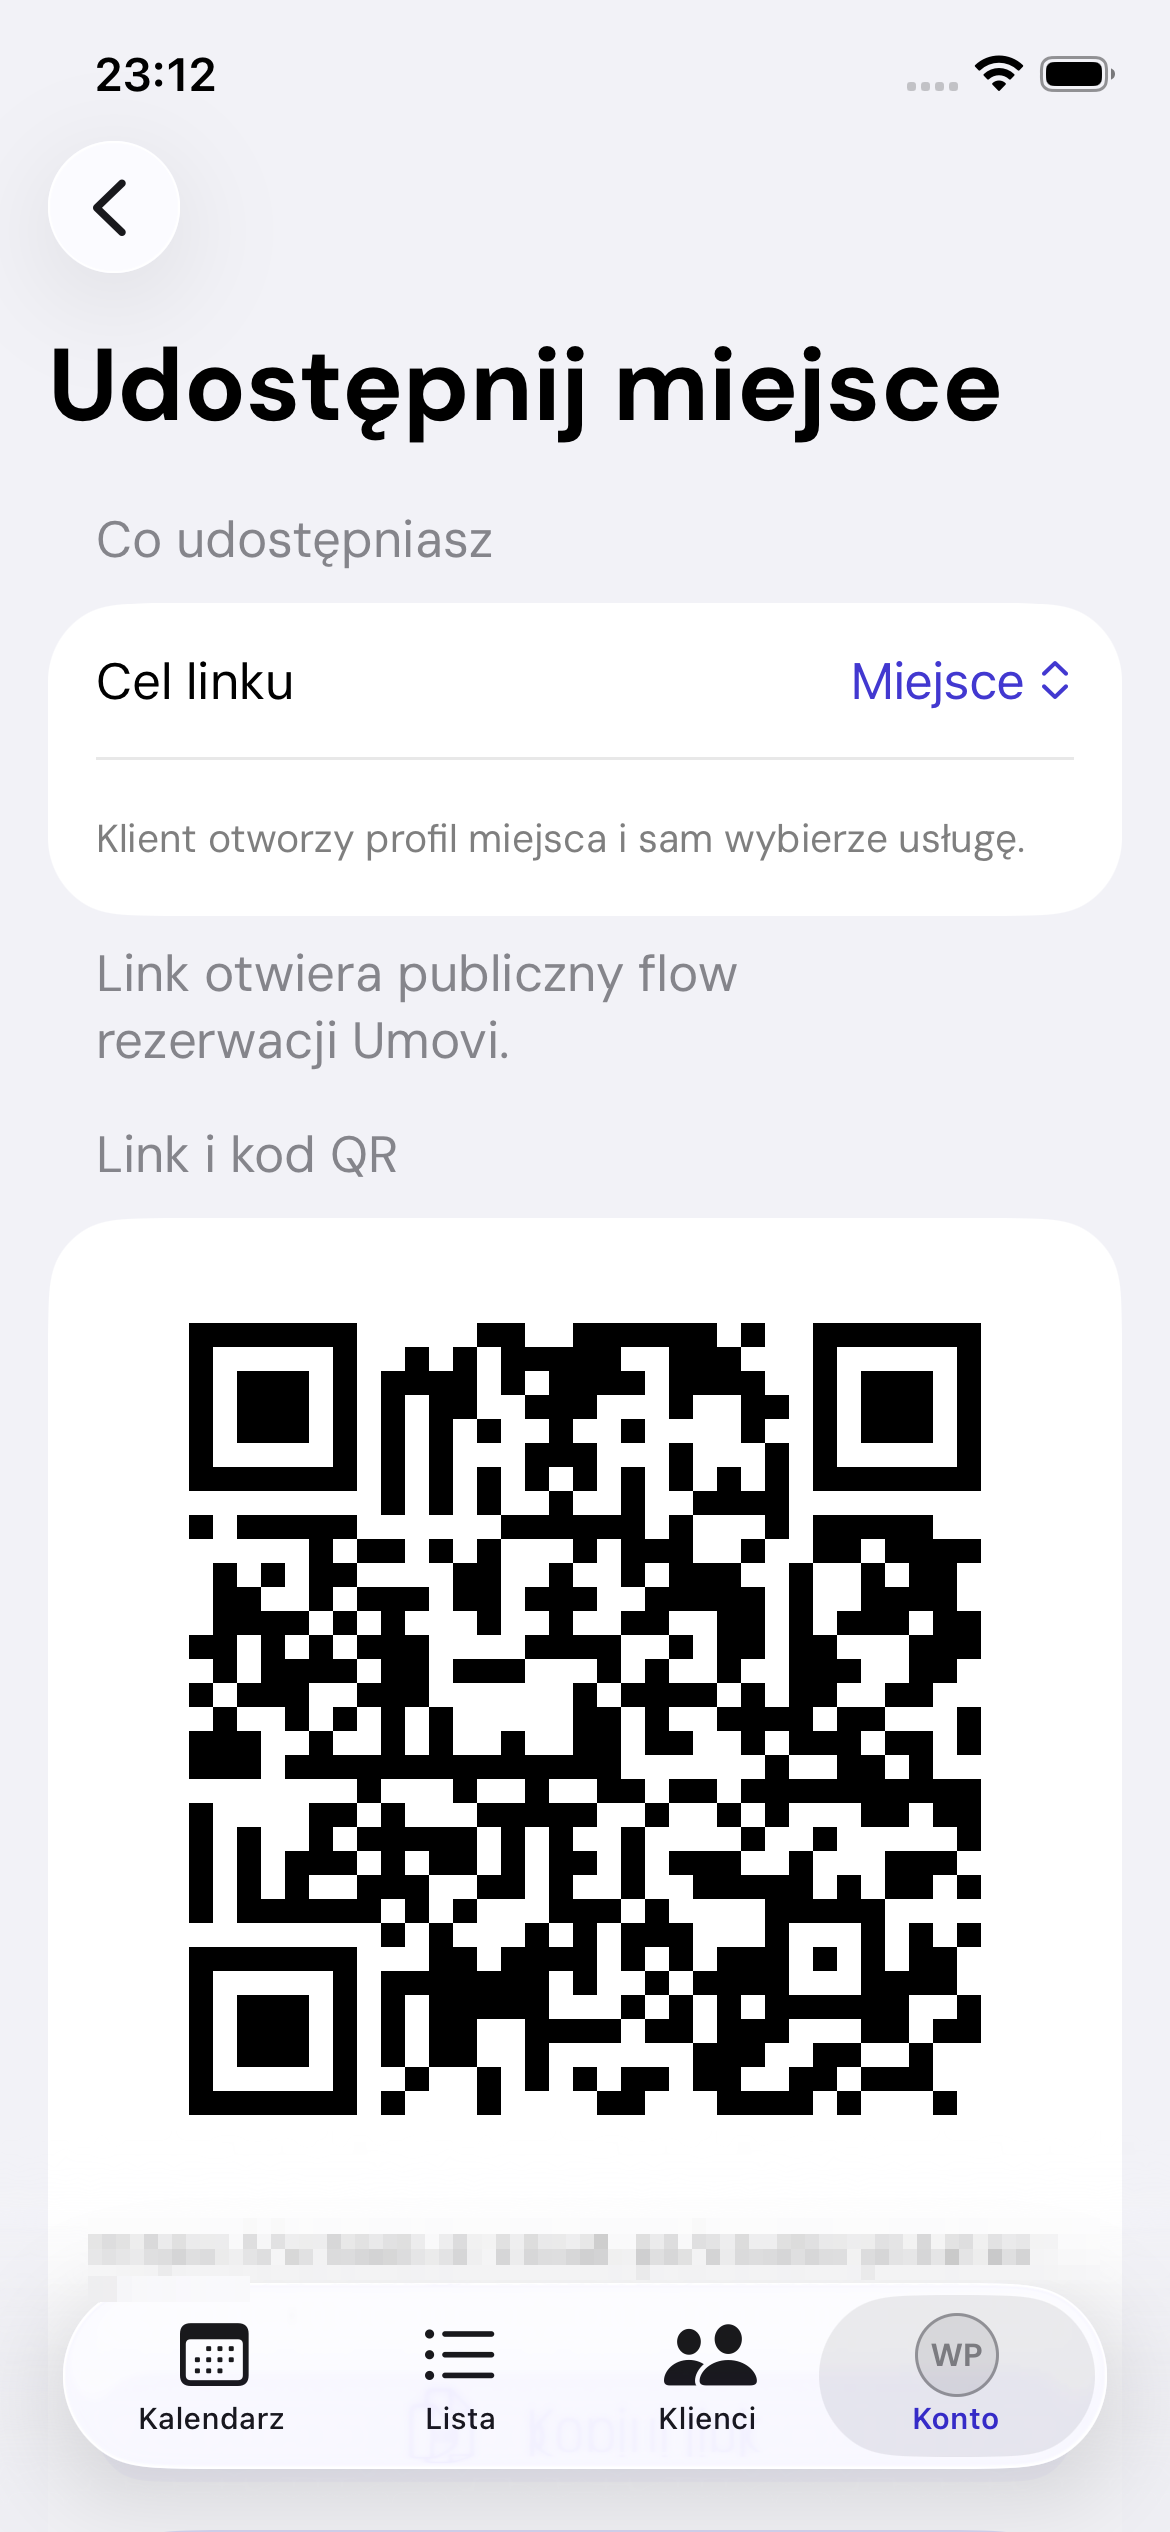
Place sharing in the app
The app generates a link and QR code for your chosen destination. Screenshots show the Polish interface. Button labels may vary with the app language and version.

Choose Place, Specific service or Service with an employee. For the latter two, choose an active public service and, where needed, an employee who performs it.

Copy and share

Once generated, use Copy link or Share to open the iOS share sheet. The QR code opens the same public booking journey.

Web equivalent: Share your place.

6.4

Notifications in the app

Read, filter and delete notifications, and manage your device channels.

PathAny tab → bell
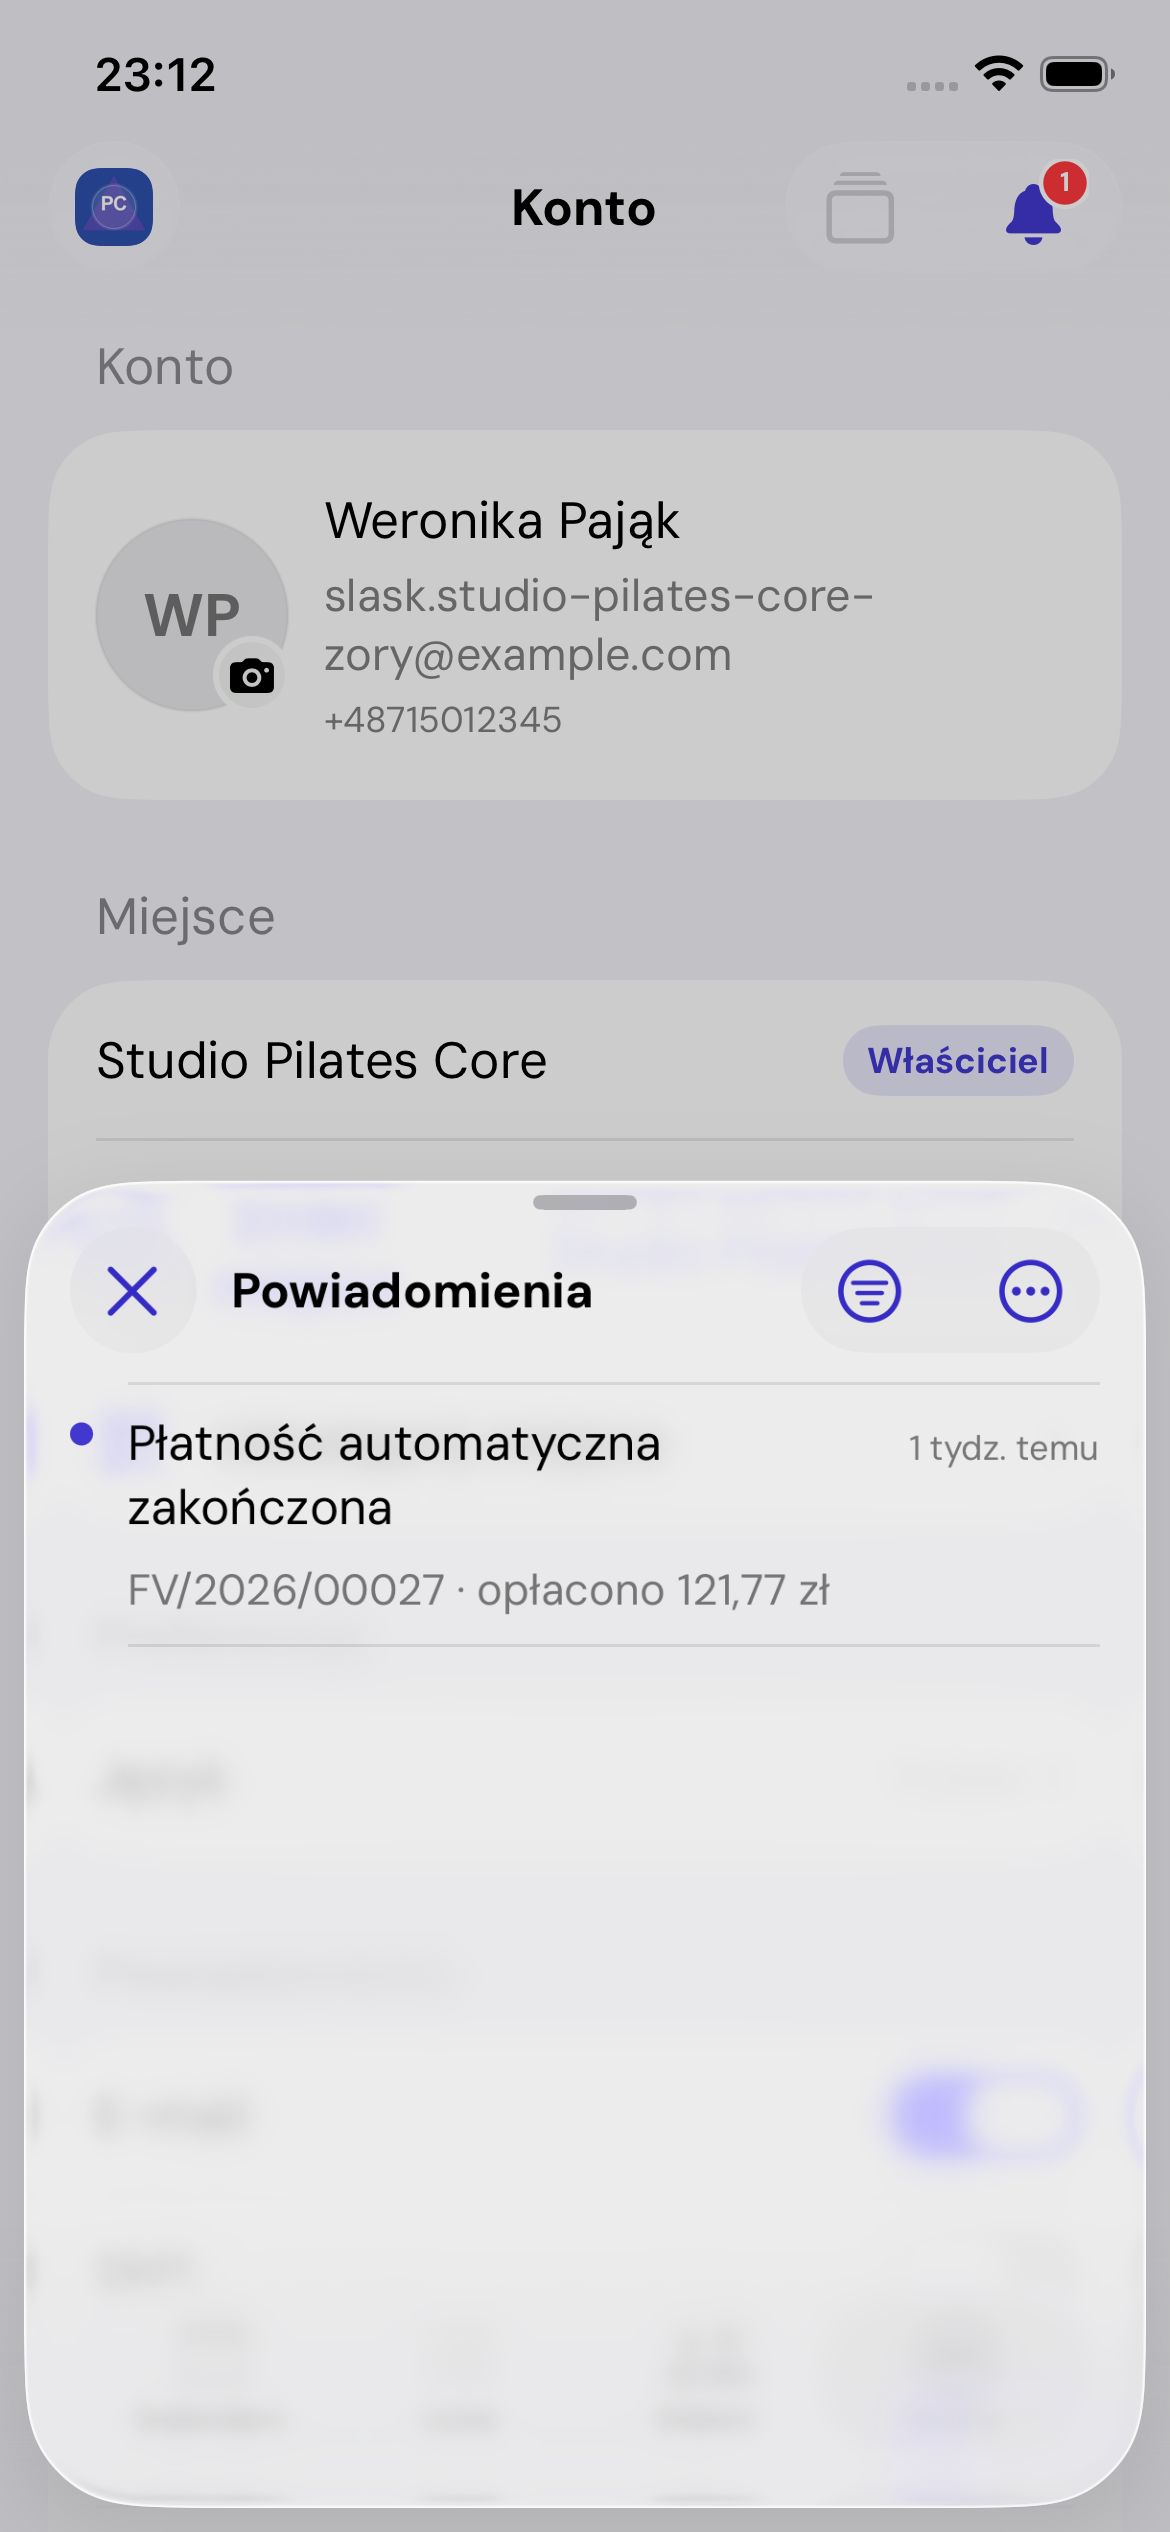
Notifications panel in the app
Notifications open in a sheet and can lead to the relevant booking. Screenshots show the Polish interface. Button labels may vary with the app language and version.

List and filter

Switch between All and Unread. Use the actions menu to mark all as read or delete all notifications. An individual item's menu lets you mark it as read or delete it.

Open an event

Tapping a notification can switch places and open a booking, message or billing item. If the place cannot be opened or your account lacks access, the app explains the problem.

System notifications

The initial iOS permission enables push notifications. If access is blocked, change it in phone settings. Account shows whether permission is enabled, provisional, not yet set or blocked.

Email and SMS

Account channels depend on verified email and phone details. SMS requires a verified number. Place settings determine eligible events; user settings determine whether the channel is active.

6.5

Account, language and 2FA

Manage your profile, sign-in methods, language, devices and two-factor authentication.

PathUmovi Calendar → Account
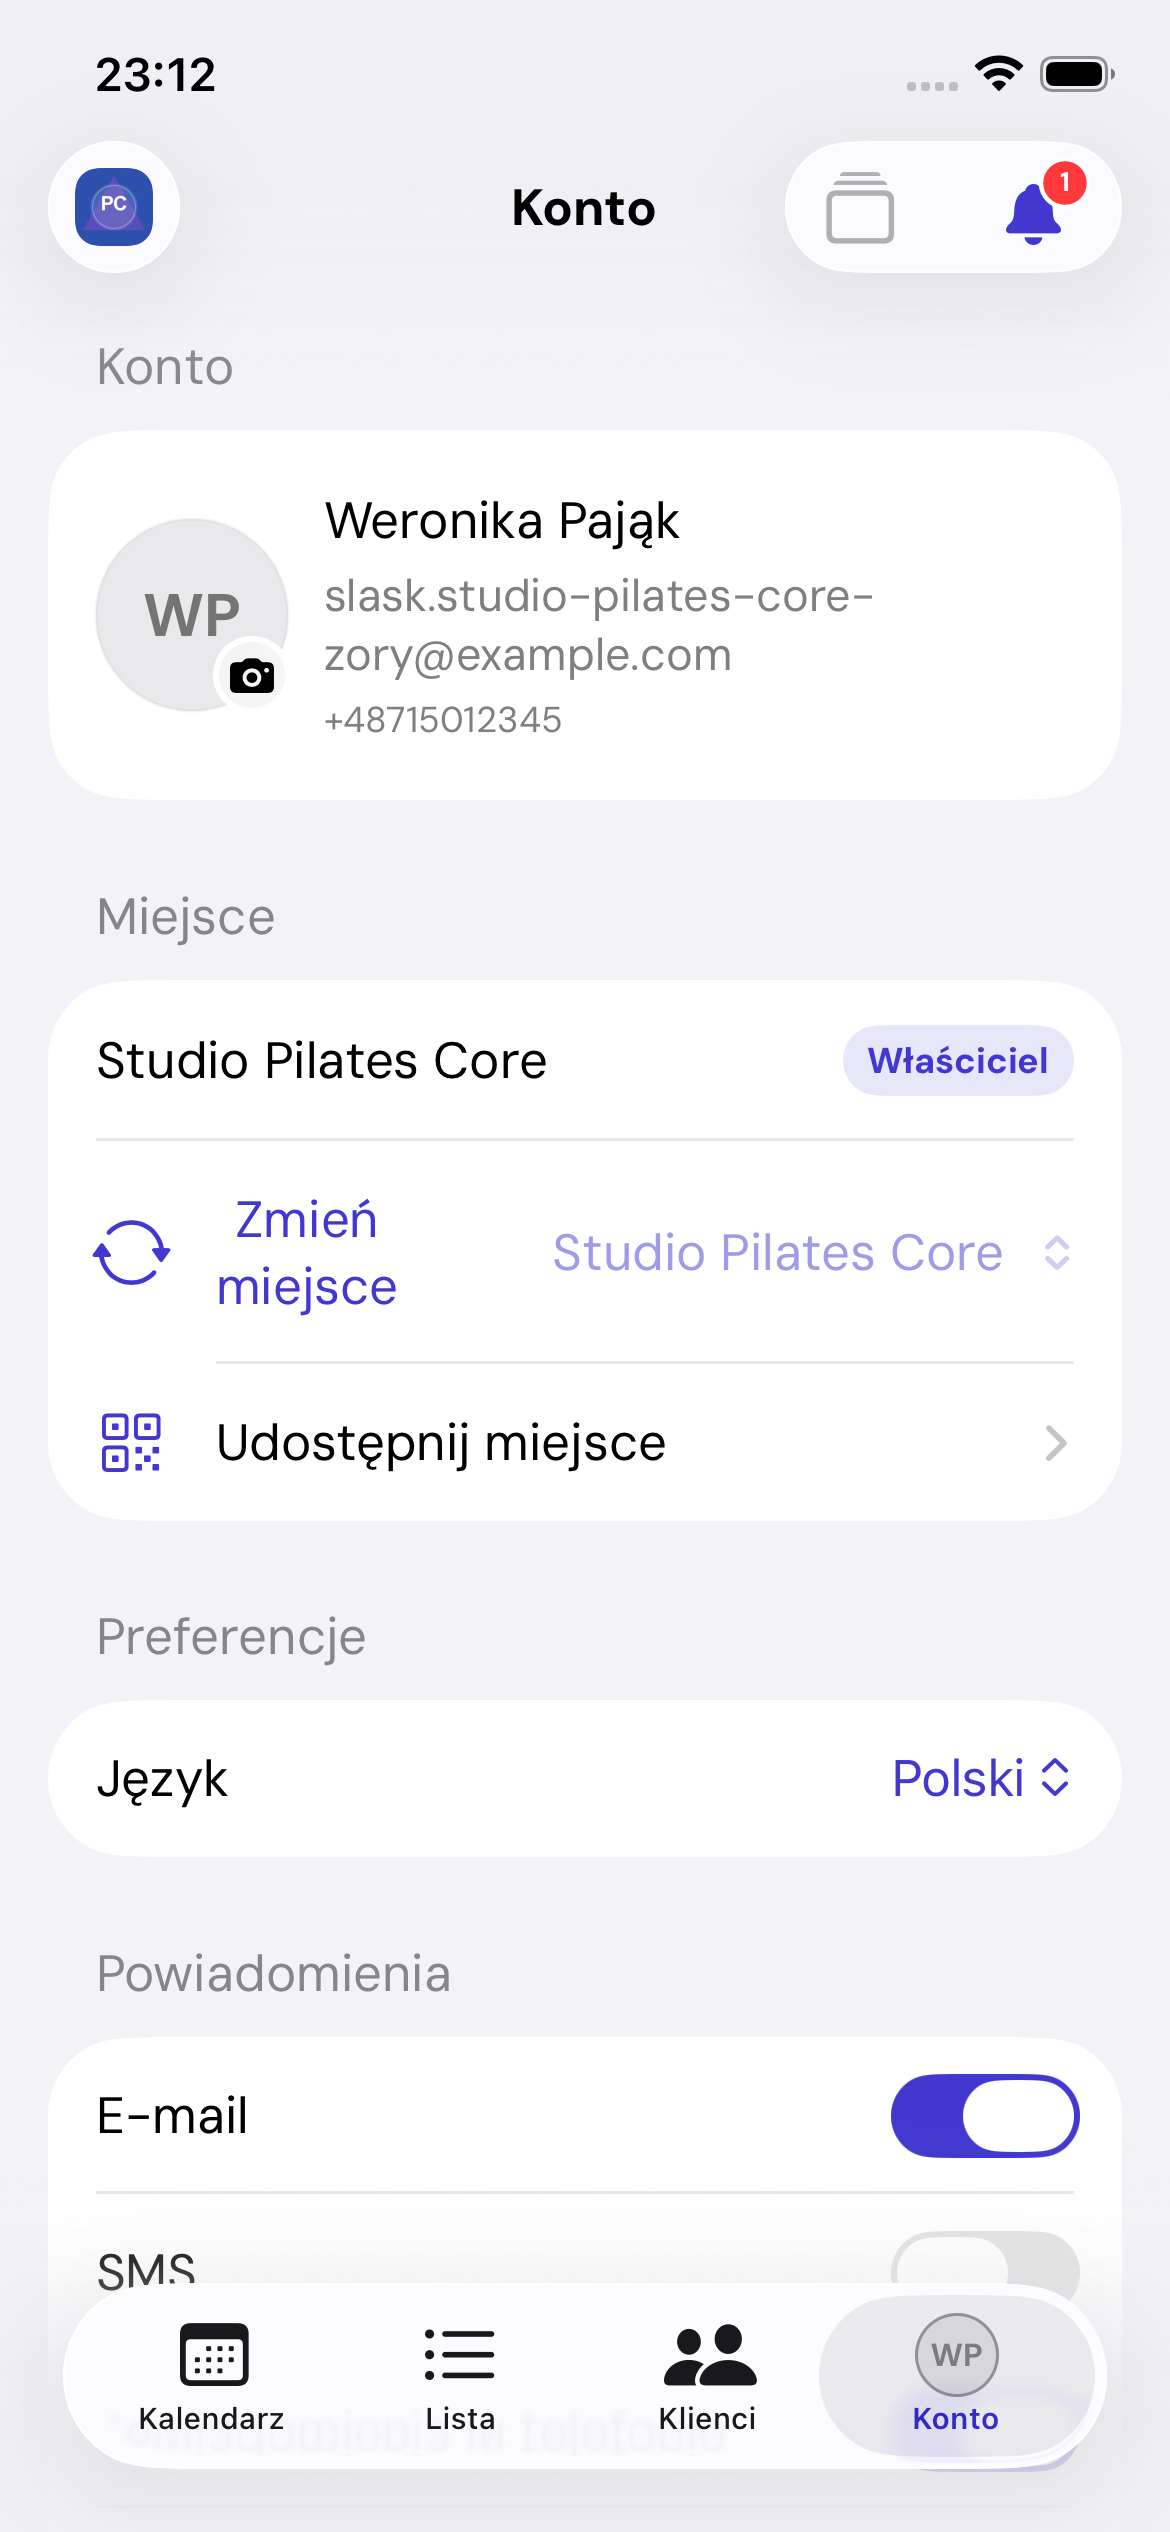
Account in Umovi Calendar
Place, sharing, preferences, notifications and security settings. Screenshots show the Polish interface. Button labels may vary with the app language and version.

Profile photo

Tap Edit photo to use the camera, choose a photo or remove the avatar. The app checks the file type and size.

Language

Choose Language, then Polish, English, German, Spanish or Czech. The change applies immediately and is saved to your account.

Apple and Google

Link or unlink a sign-in method. You cannot remove your last access method; set a password or link another method first.

Two-factor authentication

To enable 2FA:

  1. Open setup.
  2. Copy the key, open your authenticator app or show the QR code on another device.
  3. Enter a code from the authenticator.
  4. Save the single-use recovery codes.

Disabling 2FA requires your password.

Signed-in devices

The list shows current and other sessions, recent activity and approximate location where available. Sign out a selected device. Signing out the current device returns immediately to sign-in.

Sign out

Signing out does not change calendars or bookings. Unsaved forms may be lost.

Chapter 7

Troubleshooting

7.1

Contact and support

Get help from the Umovi support team.

Email us

Need help using or configuring your place? You can currently contact the Umovi team by email:

help@umovi.app

What to include

Give the place name, describe the problem and explain what you were doing when it happened. State whether you use the web panel or Umovi Calendar. Include the wording of any error message.

Do not send passwords or sign-in codes. Hide client details and other confidential information in screenshots.

7.2

Sign-in and session problems

Resolve password, 2FA, Apple or Google sign-in, session and place-selection issues.

Incorrect email or password

Check the Umovi account address, password case and autofill. Use Forgot password? in the web panel. The reset email contains a link to set a new password.

2FA code

Use the latest authenticator code and check automatic time on your phone. If the challenge expires, start sign-in again. Recovery codes work only once.

Apple or Google does not work

The method must be linked to the same account. If the email belongs to an existing account, sign in with your password and link the method in settings. Apple or Google must supply an email address.

Session expired

Sign in again. In the web panel, Keep me signed in maintains the active session; you can still refresh it manually or sign out. In the app, check Signed-in devices if you think the session was revoked.

No place available

Your account may be signed in correctly but have no active assignment. Ask the owner to check the employee-account link, role and place status.

7.3

Missing features or data

Check your role, plan, selected place, filters, statuses and employee profile.

A feature is hidden

Check that:

  1. You selected the correct place.
  2. The place is active.
  3. Your owner, manager or employee role permits this screen.
  4. The current plan includes the feature.
  5. Your employee profile is active and linked to your account.

Managers need assigned billing or marketing access. Billing access can be view-only or allow management. Marketing may retain read-only history when the plan disallows new campaigns. Settings and Developer are owner-only; some team settings require an owner or manager.

A booking is missing

Clear search, choose all statuses and employees, and check dates. Cancelled, completed and no-show bookings may be in history.

A service is missing from booking creation

Check active status and category assignments or direct employee assignments. Public booking also requires public visibility. Internal services are for the team only.

A client is missing

Search by email and phone too. The record may belong to another place, have been deleted after withdrawal of permission to use the data, or be a duplicate linked to a different account.

The app shows only your calendar

This is normal for an employee role. Owners and managers can choose several calendars. If your scope is wrong, check membership and roles in the web panel.

7.4

Booking time conflicts

Identify conflicts involving employees, working hours, exceptions or workstations.

Common causes

  • The employee already has a booking at that time.
  • The time is outside their working hours.
  • An employee unavailability exception applies.
  • The place is closed or unavailable.
  • Every workstation assigned to the service is occupied.
  • The start is in the past or violates the minimum lead time.
  • The time does not match the allowed start-time interval.
  • The employee does not perform the selected service.

Blocking conflict

Change the time, employee or service. For configuration problems, update the schedule, exception or assignments in the web panel.

Allowed conflict

Some places let the team save despite a warning. Use Save anyway only when you intentionally accept the extra booking and the resources are sufficient.

A time was taken just before saving

Umovi checks availability again when saving. If someone else took the time, choose another slot and try again.

7.5

Connection and notification problems

Resolve connection errors, temporary service issues, request limits and missing notifications.

No connection

Check Wi-Fi or mobile data and refresh. The app distinguishes no internet, temporary Umovi unavailability, server errors and request limits.

For a request limit, wait briefly; the app may retry automatically. Do not tap save repeatedly.

Outdated data

Pull down a list in the app. In the web panel, use refresh or reopen the section. Before saving again, check whether the earlier action succeeded.

No push notifications

  1. Open iOS Settings → Notifications → Umovi Calendar.
  2. Allow notifications.
  3. Check the channel status under Account in the app.
  4. Check the event and push settings for the place in the web panel.

No email or SMS

The channel needs valid, verified contact details. SMS requires a verified number. User preferences take precedence over place settings.